


When I made my ottoman slipcover I followed the basics of a tutorial I found over at Tatertots and Jello. Essentially, you sew a box from fabric and slip it down over your ottoman. It had been a while since I had sewn a fabric box so it took me some trial and error before the technique came back to me.
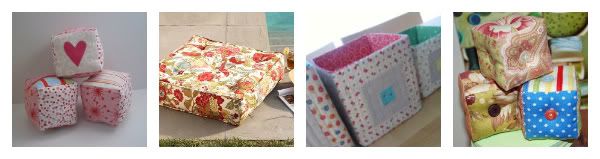
Besides an ottoman slipcover, you could sew fabric baby blocks, a squared floor pillow, a fabric storage bin, or a boxy pin cushion- just to name a few.
So, if you want to try this, here are a few tips for those corners:
- When sewing the sides to the top: Leave a space; start and stop 1/2" (or whatever your seam allowance is) from edges. (Or unpick them later.)
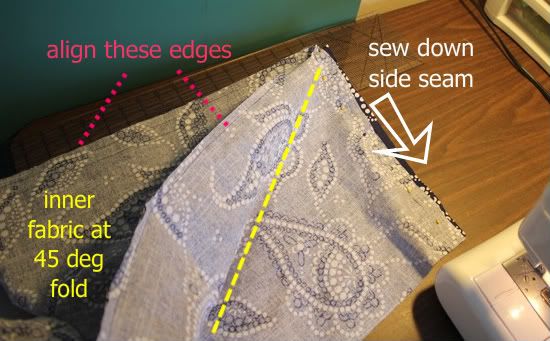
- When sewing side pieces together: Lay fabric nice and flat by aligning sewn edges across "top" and folding the inner fabric (which is your top piece) at a 45 degree angle. Now sew down sides, keeping same seam allowance.

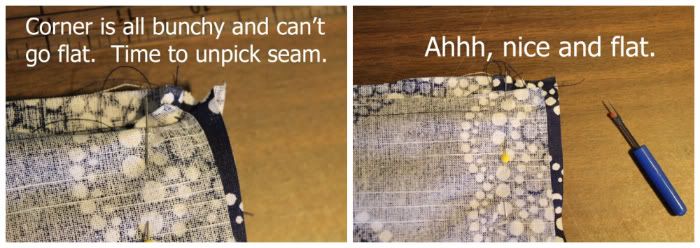
And even after all that...
You might still need to seam rip your stitches, sew any gaps, and sew again. I became good friends with my seam ripper today!
These are just tips. Like I said, it had been a while since I had done this technique and I was rusty. This is now my reference! Just be patient with yourself. Mark this post for future reference and when you do get around to sewing a 3D or cube corner, you will have these tips handy! Hope it helps.
This is so helpful and the timing is perfect! I have a project for some pet cushions I wanted to do and this is exactly what I needed to do.
ReplyDelete