Showing posts with label hair accessories. Show all posts

Thursday, August 25, 2011

{Tutorial} Hair Clip Holder ... and hole-in-the-bathroom-wall-coverer!

Even though I made a headband holder for my daughter, I also needed a hair clip holder! OR Maybe I needed a convenient excuse to make something.

My Stella has so.many.hairclips that it is hard to sort through them. Several of them have been worn a hundred times so they are getting ratty. But. She loves them and I can't talk her out of keeping them. All of them. She even wants to keep the teeny baby ones.

So I needed a system to speed up our morning school routine for her hair-doing. I can't bear to sift through the crappy bows in order to find the few that are clean and new. Not to mention she can only wear clips that coordinate with her school uniform.
What's a mom to do?

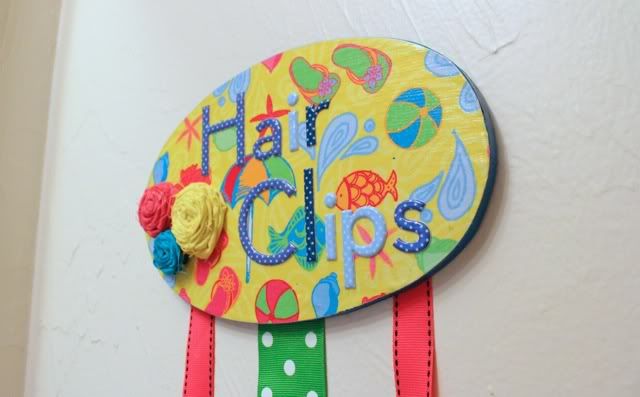
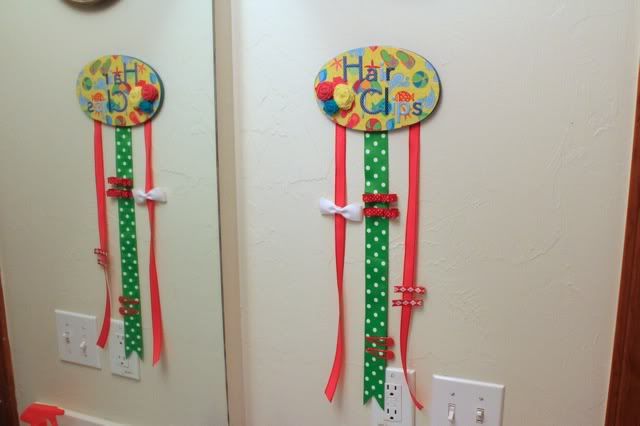
Enter, the Hair Clip Holder!

Here is a mini-tutorial on how I made it:

{Tutorial} Hair Clip Holder

You need: 
  • Wood plaque or something similar (found this at the $1 Store) 
  • Paint (I used spray) 
  • Paper 
  • Mod Podge 
  • File or sand paper 
  • Ribbon 
  • Glue 
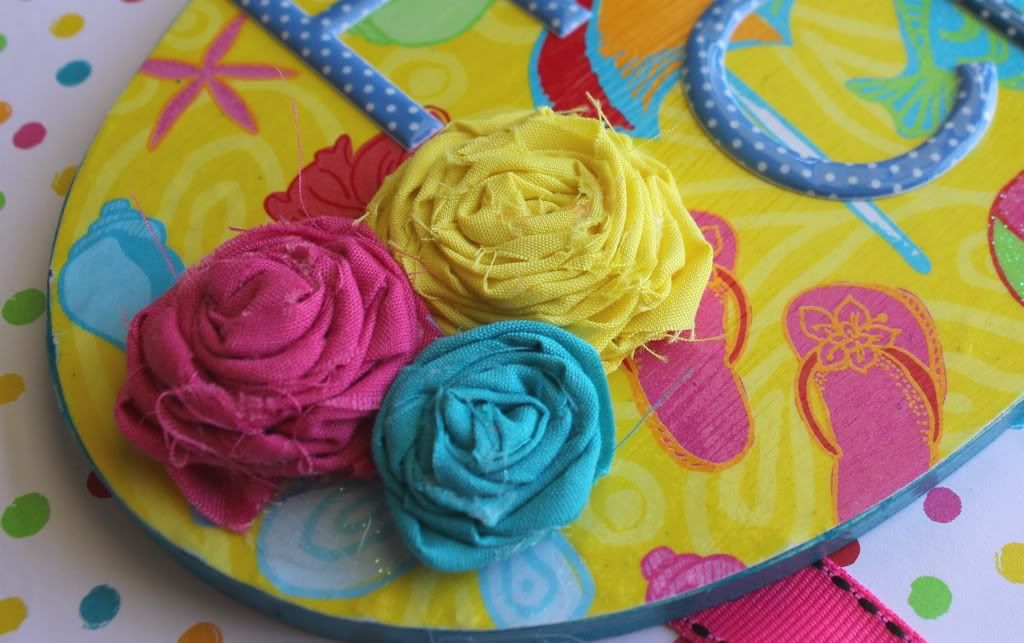
  • Letters and rolled flowers (optional) 
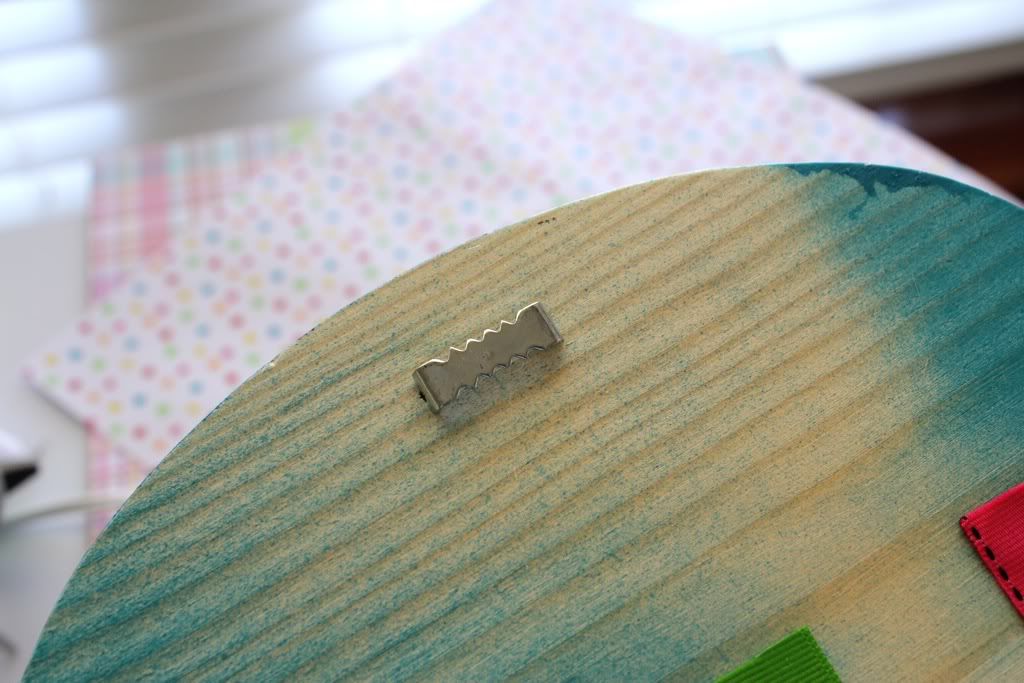
  • Picture hanger hardware
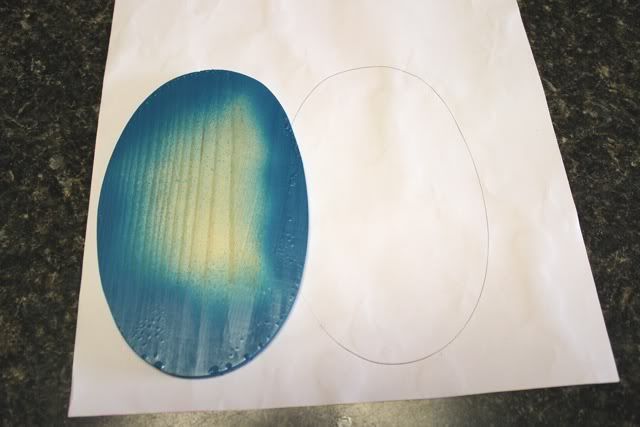
1. Paint the edge of the plaque. Recognize this Lagoon color?? Let dry.
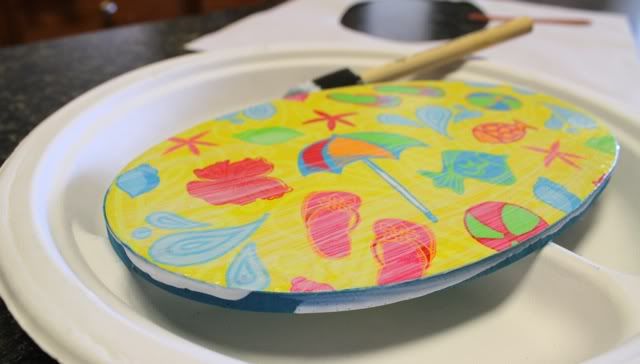
2. Trace the plaque on your paper. This paper was in the 99cent section at Target. Cut out and Mod Podge to your plaque. Dry.

3. Use the file to get the edge of the paper even with the wood. Don't do too much filing or you'll file off your paint.

4. Then follow with two more coats of Mod Podge on the top.

5. While that is drying, make some rolled flowers....or not.  Totally optional.

6. Glue on your ribbon. Cut it evenly and heat seal the ends (I used a lighter). Put your letters on. Mine were stickers. Whatever words or initials you like.

{I have seen lots of hair clip holders online and they are personalized- which I decided not to do.  I was more concerned with coordinating it with the kids' bathroom.  Plus, only having one girl, I didn't feel the need to personalize it.}

Glue on your flowers. Add the picture hanger on the back.

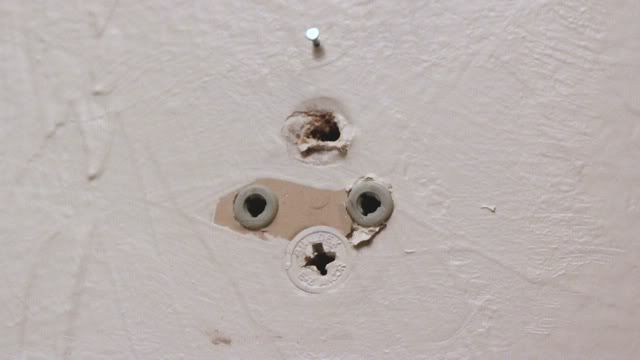
7. Cover up that hole in your bathroom wall from the towel holder that always wiggled and is in the dumbest place ever anyways.

8. Be organized!

This little hair clip holder has been great!  Now I don't even have to open the drawer full of messy clips and old bows in the morning- when we are rushed anyway- to get the ones that are nice and new and school-worthy.  This is not just helpful for uniform wearing gals either...You might find this hair clip holder useful if you set out your daughter's school clothes the night before, you can set out her bow, too. Just pick a ribbon or spot for the day's or week's bows.  Or at least put the newest or nicest ones on the holder.

I am trying, trying, trying to streamline our processes (wow that sounded like part of my old job description) here in the mornings and to get a better routine in the evenings, too.  This craft idea might seem trivial, but it has eliminated several minutes of wasted time from digging through the yuck bows, the not-allowed bows, and then getting distracted by all the other hair things in the drawer.  There is never a question of where her school clips are.  They're right there!

Linking here:
 Somewhat SimplePhotobucketA Crafty SoireeTransformation ThursdayThriftyThurs Thrifty Thursday Week 34 Catch a Glimpse Button36th AvenueNightOwlCrafting

Monday, August 15, 2011

Craft Bucket List Completed: #26 Hair Bows

Remember when I said I was going to make this bow from my Craft Bucket List?

Well, I did.

Well, I tried.

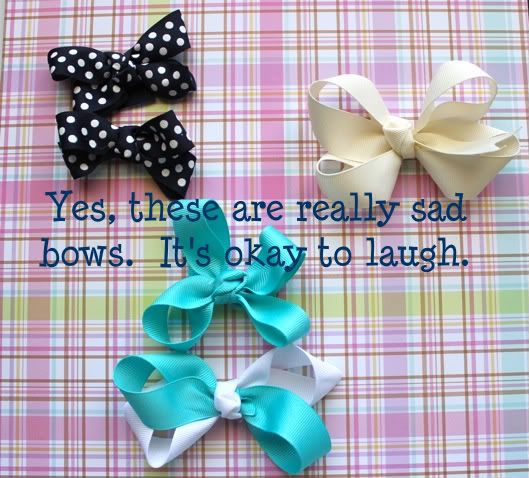
Not sure, but this may border on a craft fail.

 Ok.  Fine.  I admit it, I really struggled to make a hair bow!  Ouch.

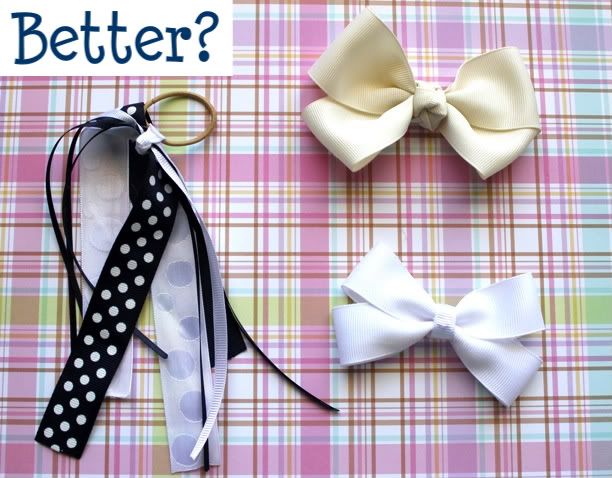
I spent, oh, probably an hour or more cutting ribbon, looping and wrapping, and still they turned out pretty sad. How pathetic am I really?  But, they did they did get slightly better each try. And after several attempts (that I won't show you) I finally made a presentable bow. And a few more that sucked but I could still show you without being too embarrassed. I'm afraid I may be asked to turn in my craft crown if I can't master the bow.

What is my problem?
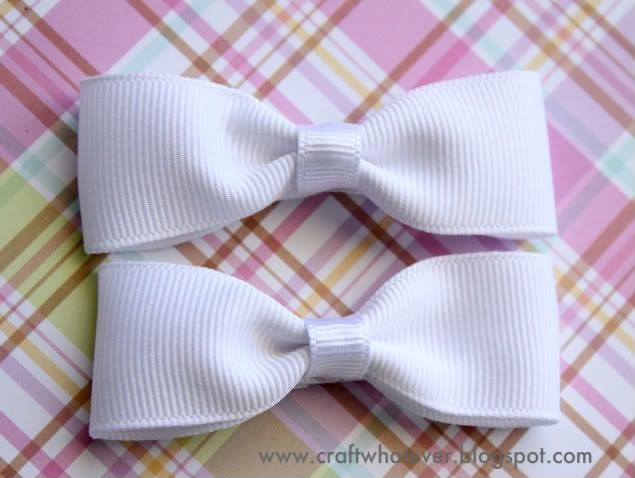
And then after making ONE bow that looked nice enough to put on my daughter, I was feeling very smarty pants and made a few more hair bows for my daughter, Stella, to wear to school.

Not completely embarrassing...


These are for pigtails if she ever lets me...

Why the hair bows all of a sudden?  I am making all of these bows and such because my older two kids are going to a new school this year- one that requires uniforms and therefore my daughter cannot wear her 27 pink headbands, bows, and clippies to school. (Last year, she got away with wearing tiaras and even headbands with antennae on them!)  These need to be school colors- red, white, blue. Sure, yes. Common colors that I can buy at any store. BUT, ever since she started wearing bows as a baby I wanted to try to make one or two.  And I just haven't.  So, maybe this is "harder" --to make a bow than to buy one...?? But I don't care. These won't be the last headbands and bows she ever wears. If I (ever) master the techniques I can make all her bows for ever and ever and ever.  Oh lucky Stella.

Wednesday, August 10, 2011

A Headband Holder for ME!

Oh, I just HAD to!


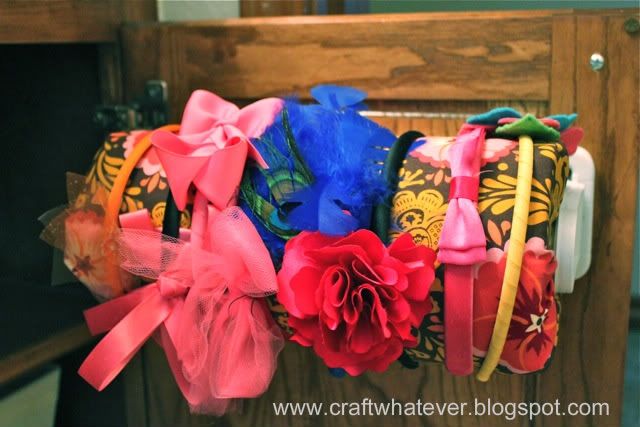
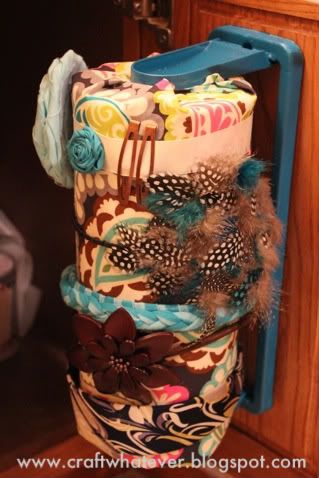
I made one of these for my daughter last week.  Here for the tutorial.  Hers cost $1. Mine was about ten. Oopsy. It was the spray paint!  If only I had some leftover from another spray-painting craft- then it would have only been $2. (Because I broke the first paper towel holder by bending it the wrong way. awesome.)  This is hers:

My cabinet door was not as wide as the one in my kids' bathroom. So I just mounted the paper towel holder vertically! Voila!

So I learned something about spray paint through this project. Wanna know?


Apparently, maybe you already know, they make a Primer Spray Paint for Plastics. Yes. So you spray this primer on your plastic item. Let it dry. Then you can paint it with WHATEVER spray paint color you want. The regular stuff, too. I figured this out because I was very disappointed after not being able to find "cool colors" of the spray paint made for plastic. I was this close to just leaving mine white, but then I found everything at Home Depot (when shopping for a ceiling fan).

Do you love this color?   I love it!  It's called lagoon.  And for a couple of days now, I have had a lagoon colored thumb, too.

I also added a band for clips around the top of the holder. I have only a couple of clips so this will be perfect for me.  I grabbed some ribbon I already had and hot glued it onto the holder in two spots. I marked the glued spot in front with a small flower so I know where I can't fit a clip. The clips slide under the band between the flowers.   Here it is fully loaded.


It is possible that I will redo this one day with a fatter paper towel roll.  A couple of my head bands didn't grip as well on this one.  Or I will get a smaller head.

Hope you are inspired! Linking here: PhotobucketTodays Creative Blog Tip Junkie handmade projects NightOwlCrafting Somewhat SimplePhotobucketA Crafty Soiree ThriftyThurs Thrifty Thursday Week 34 36th Avenue

Monday, August 8, 2011

Bucket List #24 Completed- Braided Headband

Here's another Bucket List Craft that I made!  Recognize the fabric??
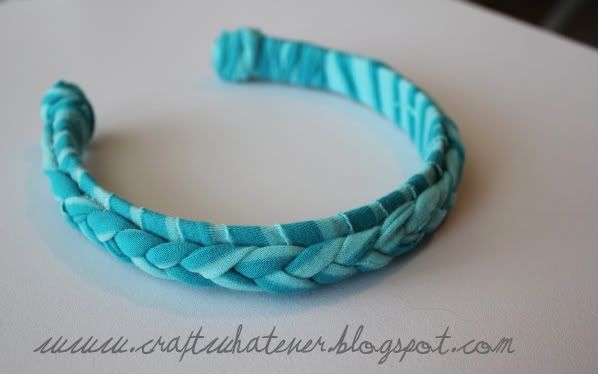
#24 Braided Headband = DONE.

Ohmygoodness...another super easy craft.  Tutorial: Braided Headbands {@ Alisa Burke}

I picked up a couple headbands at the dollar store that had the teeth in them (2/$1). Since I wrapped the knit around the band, I don't even notice the teeth when I am wearing this! I decided to try Fabri-Tac glue for this craft and it worked perfectly. I added a knot to the ends and slipped the headband into the knots. I didn't know how to finish the ends so I just came up with something before the glue dried.  I think the ends are bulky, but fine.

This was a super cute and easy craft. Highly recommend to the novice of novices to try!  And wouldn't you know it- my daughter asked me to buy a headband just.like.this one at Target this weekend- for $3.99.  Actually, she asked me for two.  I said ok for one and I would make the other.  Four bucks, geesh.  Mine= $0.50 

The headband was so easy, that I worked on it while...


I was helping my daughter sew a little creation of her own! She is working on a stuffed owl.  These are the eyes.  She did the stitching all.by.herself!  I was so proud.  sniff.

My daughter, Stella, is 4 and she just discovered sewing...{sigh}.

She received this book for her birthday and we have made several projects from it.  Here is her finished owl.


Share this

LinkWithin

Related Posts Plugin for WordPress, Blogger...