Showing posts with label gifts. Show all posts

Friday, January 27, 2012

{5} Little Crafty Things to make in bulk!

(...gifties that will improve my craft-credibility! Which I need after last weekend.) Did you see my un-crafty gift tags on Monday? ugh.

Which led me to the idea that I need to just make some crafts in bulk. I mean like sitting down on a Friday night, catching up with the week's TV shows, and making about a dozen or two of these things. I can store these items in a small box and have them ready to deploy at a moment's notice!  Because when I try to be crafty and make a last-minute gift, at the last minute, it looks less like cute and mostly like crap. Then I don't look crafty, I look crappy.

{Friday 5} Gifty Things to Make in Bulk
1. Gift Tags.  Here are some free printable polka dot printable tags from hello, Good Gravy. There are a zillion out there. My #1 and #2 go-to sites are Tip Junkie and Living Locurto.  Others I like are:  Solid Tags from Pugly Pixel, Cupcake Tags from Pink Owl Designs, adorable hand drawn tags from Little Paper Dog,

2. Recycled Gift Bows.  This one is from Hope Studios.  More tutorials can be found at New Green Mama, Hope Studios,  and How About Orange


3. Thank you cards and birthday cards.  A couple cute ones here are (3top) Kids thank you note from Positively Splendid, via Somewhat Simple and (3bottom) Thank you card from Sweet Metel Moments.  More you might like:   Aqua or Purple dotted thank yous from Living Locurto, Pink flowered card kit at My Grafico.


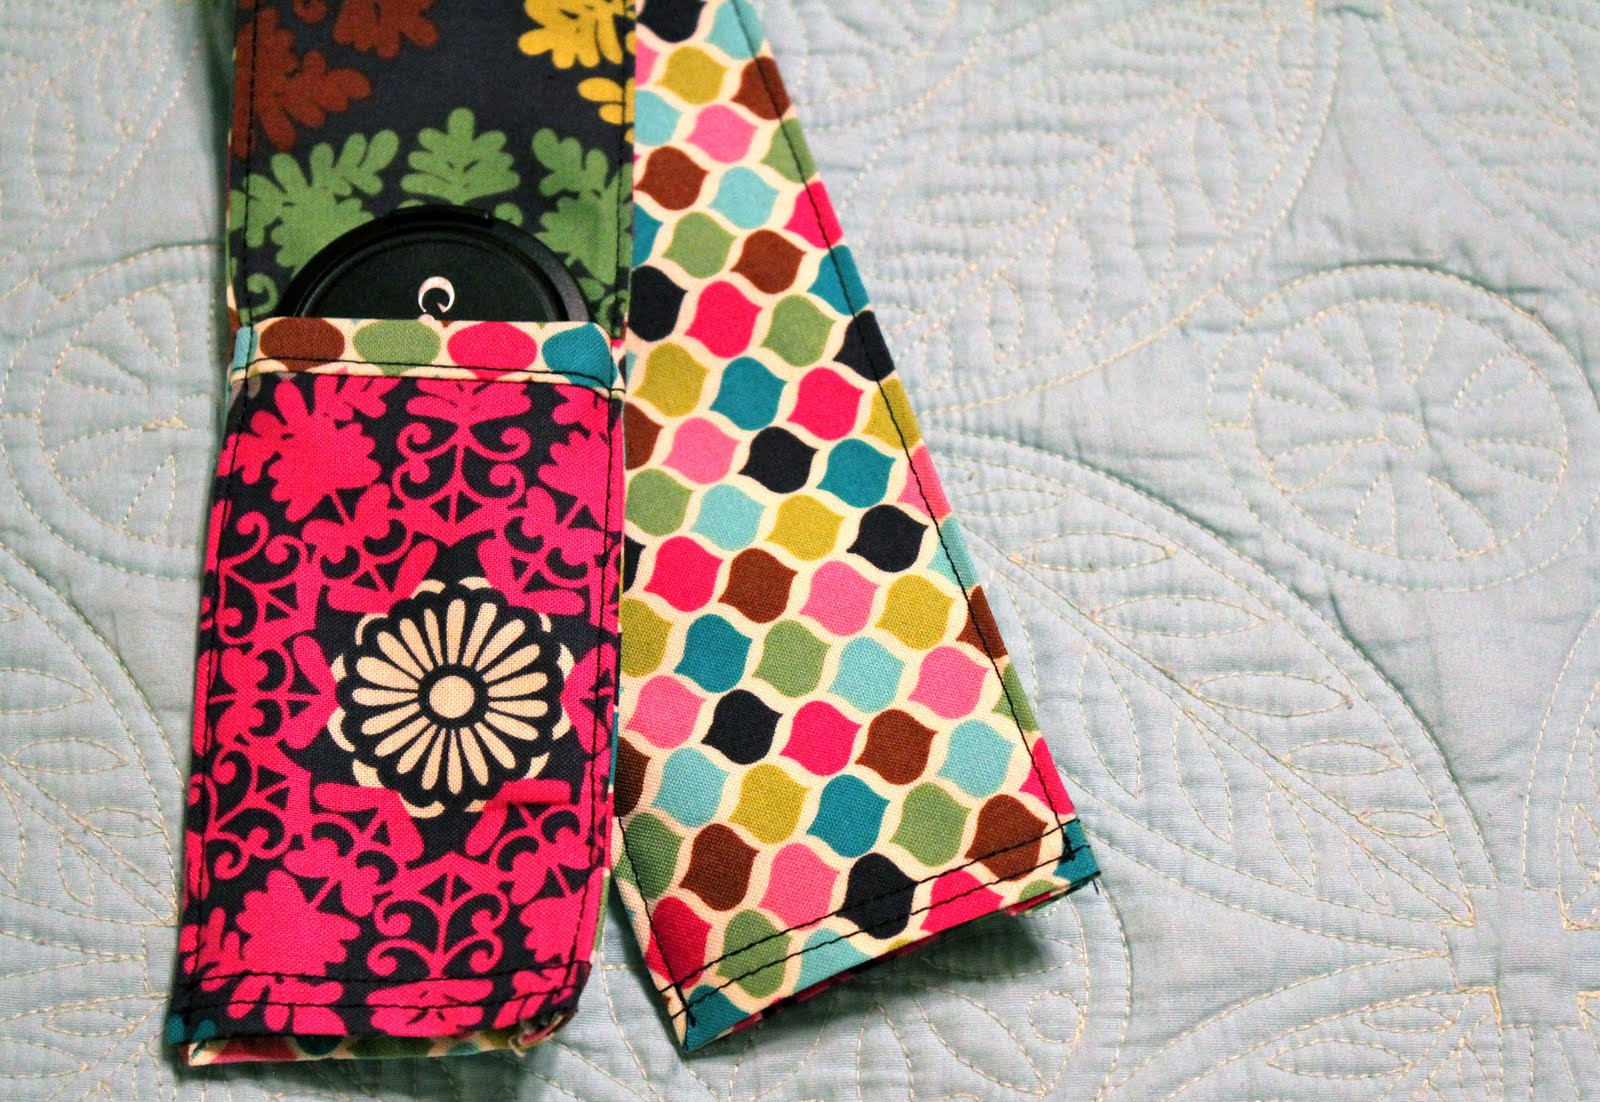
4. Gift Add-ons or Favors.  Things like, felt hair bows, trinket keepers, scrabble tile necklaceBottle Cap Magnets...basically anything you can add to a kid's (or adult's for that matter) birthday present or bring as a hostess gift.  And you can see this idea goes on and on....

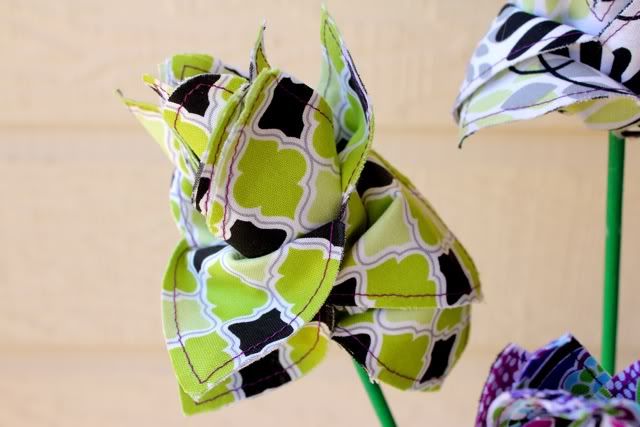
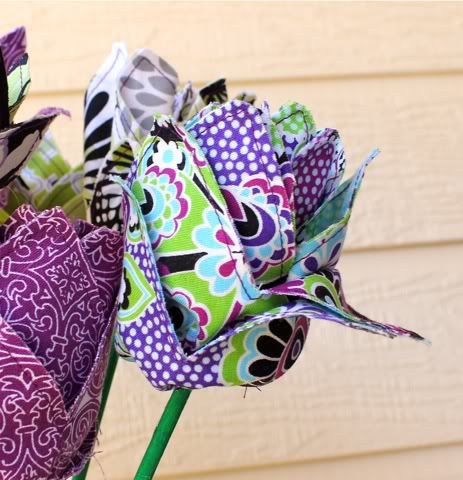
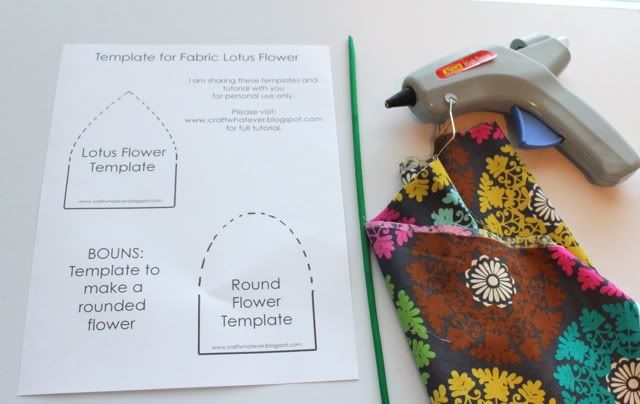
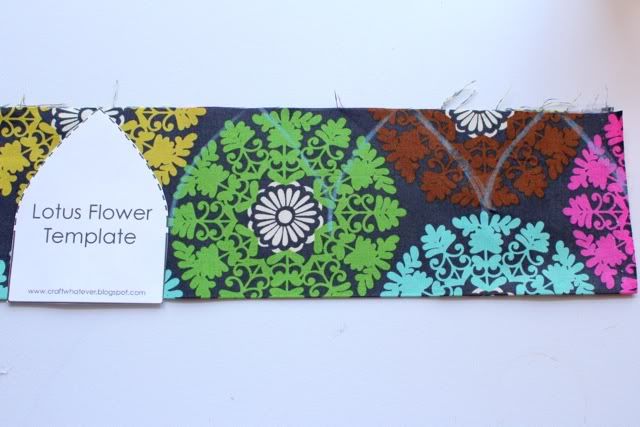
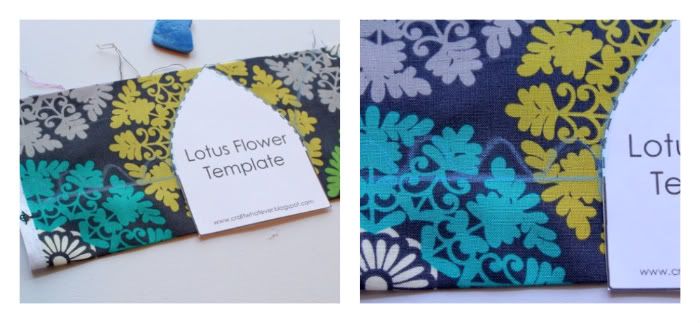
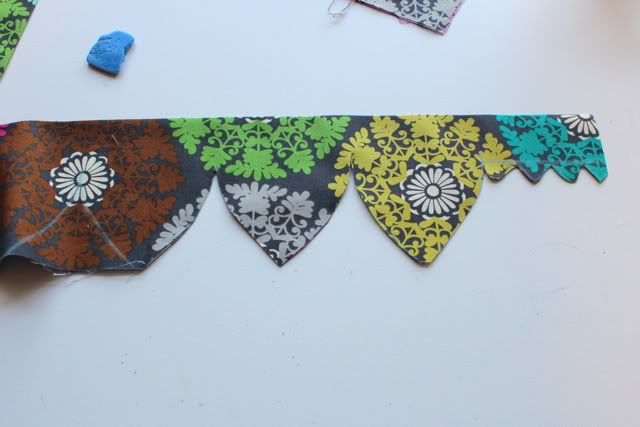
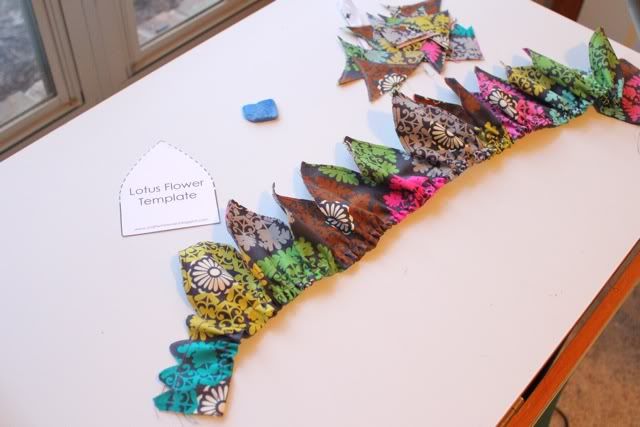
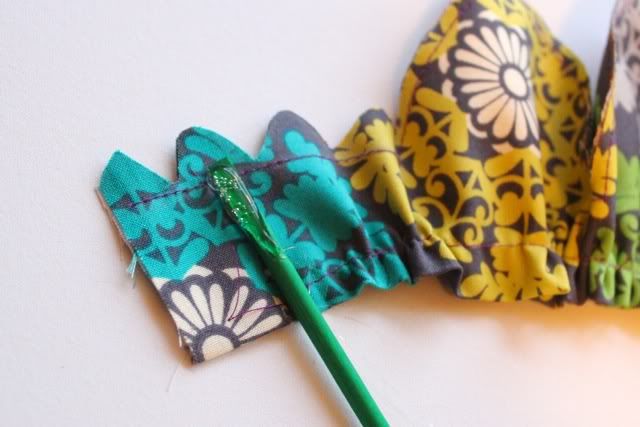
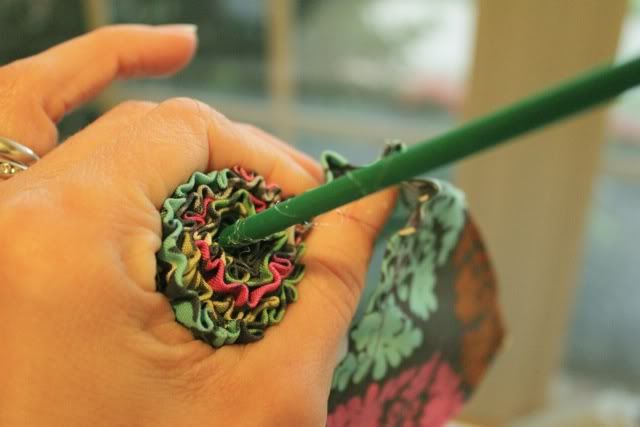
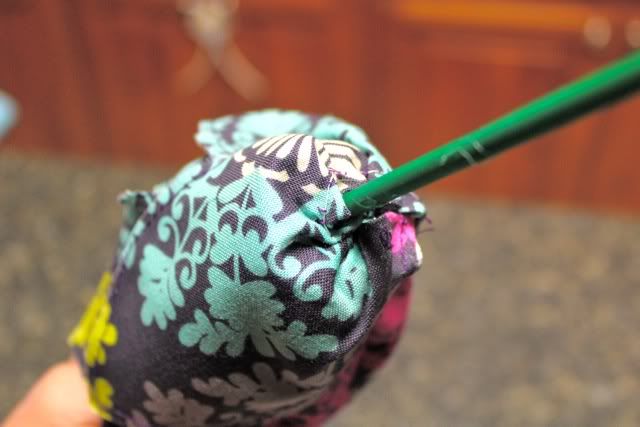
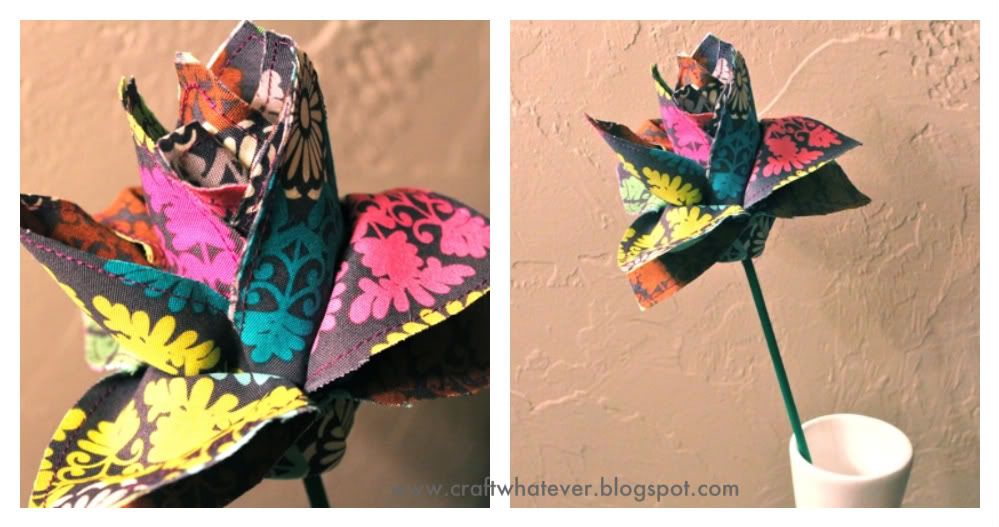
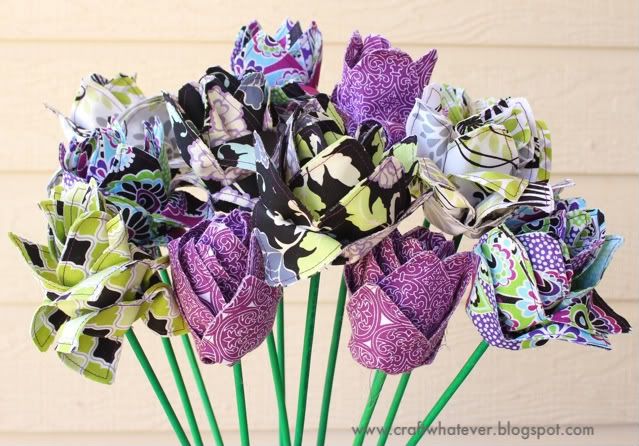
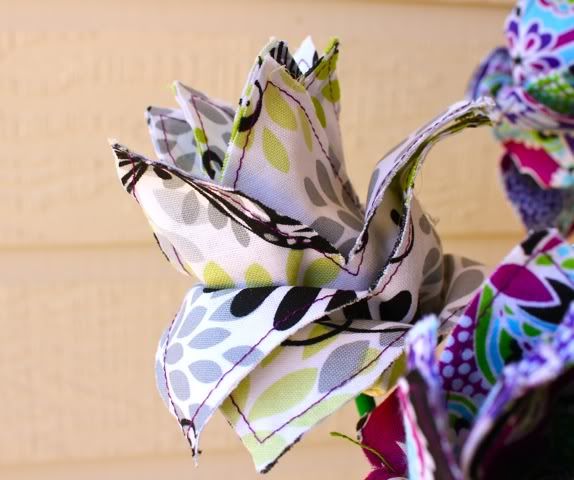
5. Fabric flowers and rosettes.  Tons of tutorials (These blogs have some great tutorials:  My Sparkle, Skip to My Lou, Craftaholics Anonymous, My Blonde Ambition, and Mad Mim...to name a few.
Here are my tips to make a rolled flower.

Because the possibilities are endless for what they can be used for!
screen shot:  "fabric flower" Yahoo! Image search
...or even put a flower on the gift itself!

Pin It

Tuesday, December 6, 2011

Simple Ornament to Keep Forever (and I used a Squicker Sticker)

I don' t know about you, but I have 5 pages of "Squickers" stickers laying around.  Some stickers are from three years ago!  I thought they were cute but I just didn't know what to do with them.  Until now...

Does your child's school do the Squickers fundraiser?  Ours does.  But here is my confession:  I just keep the free sheets of stickers and don't order their products.  I know.  I shouldn't have said that out loud.  But it's true.  

And honestly (another confession), I have never been too impressed with my kids' artwork to order anything with their picture on it either.  

BUT this year...my kids were super-duper creative and artsy and made some funny creative artwork!

I had the light bulb idea this year:  Stick the squicker sticker on an ornament to cherish (and laugh at when they are older, of course) forever.  

I mean, who doesn't want a GI Joe ornament on their Christmas Tree?!?!

I found these unfinished ornaments at Hobby Lobby for $1 (which I scored at 50% off, so 50cents), painted them and then mod podged the squicker on the ornament. Added a little ribbon and viola!  Memories that last.

It does appear that Stella tried to write some sort of word, but she couldn't remember what it was.  Very colorful nonetheless.  

Oooh, these would be cute gifts!  Yes?

Linking here:

Wednesday, November 2, 2011

Camera Strap Cover with a Pocket for my (lost) Lens Cap

Sometime in the last 14 days, I lost the lens cap to my camera.  You are probably wondering what that is right there in the picture!  That is the lens cap to my 50mm lens.  I have that one and the kit lens, which I use mostly.
Isn't this a great gift idea, too?

It is not surprising that I lost it.  Typically, I pop the cap off and stick it in my pocket.  Or purse.  Or bag.  Or lay it somewhere the kids can't reach.  Sometimes I *misplace* it temporarily.  But this time.  This time is for reals.  I really can't find it.  A.n.y.w.h.e.r.e.

I really hesitate to explain how I made this for two reasons.  
~~ First, there are a hundred tutorials out there to make a camera strap cover.  For instance:  Cluck Cluck Sew, w/pockets at Simply Modern Mom and Little Big Girl Studio, w/ruffles at MaryJanes and Gaolshes, and 15 more at Tipnut!
~~ Second, the dimensions will depend on your strap and lens cap sizes.

But I think the way I made the pocket is worth mentioning.  And yes, the lens cap tucks down inside the pocket.  It is jsut peeking out right now.  So, it's not a tutorial per se, but roughly...here is how I made it.

The Dimensions:  I used the width of the cap to determine the width of the strap.  Then I was careful to cut the interfacing so that it would be the finished size.

The outer fabric was about 6-7" longer than inner pocket to make the pocket.  Other than that, the fabric needs long enough to cover the strap and then add seam allowance to widths and lengths.

Here I have:  1.  Outer fabric (mine is ~33" x 4")       2.  Inner fabric (~26" x 4") 
3.  Interfacing (24" x 2.5")- two piceces 4. A small piece for pocket edge.

The Pocket:
I folded up one side of the outer fabric to make the pocket.  Now the outer fabric is the same length as the inner fabric.  Ironed the fold/pocket.  At this point, you can leave the pocket like that, edge stitch, or add a trim (what I did).  I sewed the small piece of trim on the top edge of the pocket- like you would sew on bias tape.  My piece was wider than the strap, then I cut off the excess.

The rest:
Sewed long sides.
Ironed on interfacing pieces- line up with middle seam.
(should have done this step at this point, to make it neater:) Fold in short raw edges and topstitch.
Fold long edges along interfacing.
Fold whole thing in half lengthwise.
Topstitch along long edge to close tube.  Topstitch other side to match.


So pretty much like all the other ways of making them!  And with a simple pocket!

So if I ever, find my poor lens cap again, it will have a home.

I bet I am not the only one to permanently misplace my lens cap.  
Anyone know if they sell replacements?  


I do think this would make a GREAT GIFT (maybe for my sister Emily?)...so if I have glossed over too many details and you want me to explain, let me know and I will do a proper tutorial.
Linking Here:
Somewhat SimpleA Crafty Soiree Transformation Thursday36th Avenue

Monday, September 26, 2011

{Tutorial} Stemmed Fabric Lotus Flowers


On Friday, I showcased my bouquet of handmade fabric lotus flowers. I explained why I made them- for my dear friend. She just opened up her own yoga studio and when I saw a picture of the sign that is hanging outside of her new digs I was inspired (to say the least)!!

I was inspired to create these.  Because I didn't know how to send real lotus flowers!

Of course, I combed the internet looking for a lotus flower tutorial...and maybe I don't know how to work the internet, but I couldn't find what I was looking for. I found lots of origami ideas, but I didn't want to use paper. I am a fabric girl. So, after making a few iterations of my idea, I opted for the version that was fast-enough that I would actually finish the project but pretty enough that it still takes some time to create a whole dozen.


I wanted them to look like lotus flowers.


They also sort of look like tulips.


Either way, I think they are just beautiful!


This is a SUPER gift to make for someone- a handmade bouquet of flowers!


How to make a stemmed flower to give or keep:

Supplies Needed for One Flower:
Strip of fabric, 8" x width(44")
Template (link at bottom of post)
Stem or stick (I found these green sticks in floral dept of craft store)
Hot Glue
Contrasting thread, scissors, chalk or fabric pen

1. Press 8" strip in half, wrong sides together. Lay out the fabric so the fold is the "bottom" and the raw edges are the "top".  And PRINT out this template:

2. Trace template on fabric. Place template at one end and start tracing the petals. The base of the petal is along the fold and the point of the petal is at the raw edges.  Trace along the dotted line of the template.

Keep tracing the petals until you reach the other end. There are no spaces between the petals.

When you only have room for one more petal and then some inches left, chalk a rectangle "tail" from the last petal to the edge of the fabric.  I drew a line then some wavies.
3. Cut out.  And please, cut off the white selvage. I think it is easier to cut from this side.


This reminded me that I need my scissors sharpened.  Last month I ran/cut over a pin!
TIP:  If you are making more than one flower, you can place a blank strip of fabric under the one you marked and cut them both out at the same time.

4. Sew together along the raw edge of the petals. I used a contrasting thread color.

5. Sew a gathering stitch along the bottom (folded side).

6. Start gluing the fabric to the stick. Start with the short tail part. Roll and glue about every half inch or so.  I use a lot of glue.

When it is almost finished, I pinched the base in a tiny bit as the glue cooled off.

When there is a short tail remaining, use this tail to cover the messy flower bottom.


Just roll/glue until it is neat.  After this dried, I went back and did a second round of gluing to fix anything that was sticking out. It might feel wobbly now, but it will stiffen up after it is completely dry.
TIP: I do a practice roll first, before gluing, to make sure the fabric is gathered enough/not too much and my flower will look the way I want it.

And this is what I get when I wait until Sunday night to make these...dark pictures.  Sorry.

Just look at the nice sunny ones I made a couple weeks ago instead!


Linking Here:
NightOwlCraftingSomewhat SimplePhotobucketA Crafty Soiree Transformation ThursdayThriftyThurs Thrifty Thursday Week 3436th AvenueCatch a Glimpse Button Chic on a Shoestring Decorating Lovely Crafty HomeThe Shabby NestFantabulous Friday!

Share this

LinkWithin

Related Posts Plugin for WordPress, Blogger...