Friday, July 29, 2011

{Bucket List} Want to make these very soon!

I have a little running list of all the crafts I want to make. One day. Or one day soon. These I found and I want to make pronto!

# 23. Simple Bow Tie Top at Sweet Verbena.
A.d.o.r.a.b.l.e. and easy! I really don't have an excuse not to make this one:

#24. Braided Headbands at Alisa Burke.
I might be able to use any scraps from the previous project to make this headband. I am slightly afraid that it will stand up too much on my head. But it can't hurt to try it. I could make this in front of the TV.

#25. Hair Bow Holder at Johnny In A Dress
With school starting soon, I figure I need to get organized. My daughter's hair accessories would be one (of many) areas in need of attention.

#26. Hair Bow at My Creative Way
My girl is going to need some new school bows too... I will try it and if I fail then I will suck it up and find a craftier mom to make her one. And pay her for her crafty-superiority.

Hope you have a great weekend!  I hope to show you one of these completed next week.  And maybe even some more progress on my living room!


Wednesday, July 27, 2011

Homemade Cake Mix Ice Cream {Recipe}...my new addiction


OH holy cow! This ice cream is awesome. I always wonder why in the world my son gets "birthday cake" ice cream when we go out for ice cream. I used to think it was because it was blue. NOW, I think he might just love the taste...because I DO!

Do you have one of those electric ice cream makers? Like this:

Well, we have been making a lot of ice cream since the temps started heating up in the spring. But I have only been making vanilla- striving to find the best mix of cream and milk and sugar so that I could eat a ton and not gain a ton. For whatever reason, I decided to try a new flavor, one the whole family could agree on. And one that was not blue.  Oh did I hit the jackpot on this one!!!!

I do the easy kind of ice cream. Basic Vanilla is 2 cups cream, 1 cup milk, sugar, and vanilla.

I have two versions:  The "fatty but yummy" and the "I can eat this every night" (scroll down).  And you must try this with lemon cake mix too!


...fatty but yummy version...
{Recipe} Cake Mix Ice Cream
2 Cups Heavy Cream
1 Cup Whole Milk
1/2 Cup Sugar
3/4 Cup Cake Mix (powder)- Yellow or Lemon are perfect!


Did you cringe at all the fat? Yep. Me too.

But THIS version is the one that will let you have your cake mix ice cream and eat it too!!!!!

...I can eat this every night version...
{Better for You Recipe} Cake Mix Ice Cream
2 Cups Half and Half
1 Cup Whole Milk
1/4 Cup Sugar
3/4 Cup Cake Mix (yellow, lemon, etc.)


Even though it is lower fat, the cake mix helps to hold up a good consistency.

Check this:
I did a quick comparison of the creams and milks. *Now these numbers are for the whole batch of ice cream. So don't panic.

**************** Original Recipe
Even Better Recipe
caloriesfat grams calories fat grams
Heavy Whipping Cream (2cups) 1600 160

Half and Half (2cups)

640 48
Whole Milk (1cup) 150 8 150 8
Total per batch 1750 168 790 56

  • Table does not include sugar or cake mix info
  • There are roughly 12 scoops of ice cream in the batch.  I prefer 2 scoops.
  • The even better version is a teensy bit icy but I don't care since I don't want all that fat on my butt.  You won't care- it tastes so awesome.
  • The original is still the recipe when you want to impress.
  • Using 2% vs whole milk will save you about 2.5 cal and 0.25g per scoop.  Not worth it for a slushier ice cream in my opinion.  


...thank me later...

Linking here:


Tuesday, July 26, 2011

Part 2 Living Room Redo- Ottoman Slipcover


I wanted to show you the progress I am making on my Lightning Fast Living Room Redo.  Ok, yes, I hear what you are saying about "lightning fast" and how I am dragging this project on for weeks.  I guess it is all relative.

I suppose my overall project is not lightning fast.  Not even plain fast.  BUT the individual projects, within my big project, are really, REALLY fast.  Like lightning.  Almost.

The curtains...30 min per panel.  FAST.

The ottoman slipcover...maybe a couple of hours or more due to my terribly misshapen ottoman.  The easy part was the hard part and the hard part was a cinch.

The hard part, I am referring to is the box pleated skirt I added to the bottom.  A pleat on each corner.  The easy part was sewing the "box" to slip over the top.  But my ottoman is more like a blob than a box.

And though I REALLY (really, really, really) wanted to convert my ottoman into a storage ottoman, using this tutorial at Running with Scissors.  I reminded myself that I am going for a QUICK Living Room Redo here.  Besides, if I did make this one, I would find one or more of my children inside and the fabric on the bottom ripped off.  But Oh, how I wanted to make this.  I even had my husband on board to help before I came to my senses.


Maybe next redo.


But now I am going to make some new throw pillow covers.  I have some ideas.  


No ideas for the mantle though.  Suggestions?  I should take down the wedding photo, huh?  It has been 8 yrs since that day.  Seriously...I am not good about knicknacks.  I don't really like them, but I realize I might need some.  Tell me...I can take it. : )

Monday, July 25, 2011

Ottoman Slipcover with Box Pleat Skirt {sewing technique}


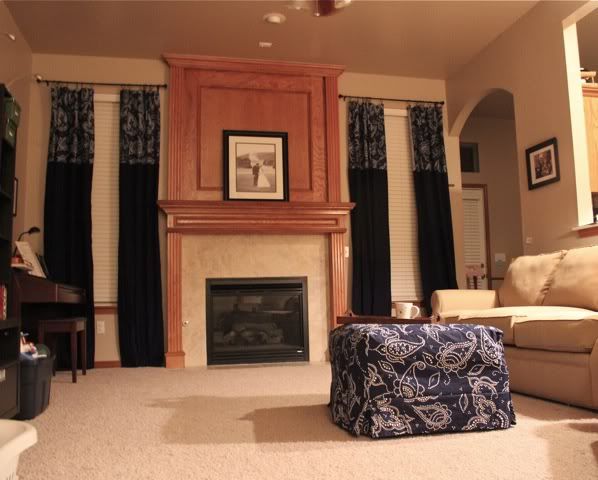
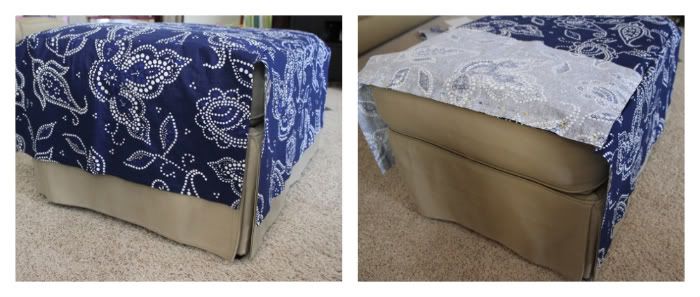
You like??  I made this ottoman cover out of a shower curtain!  
(Read below to see how I did this.)  
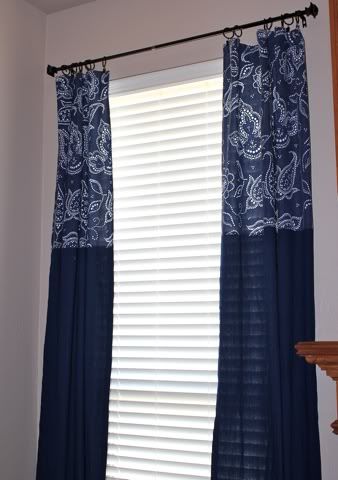
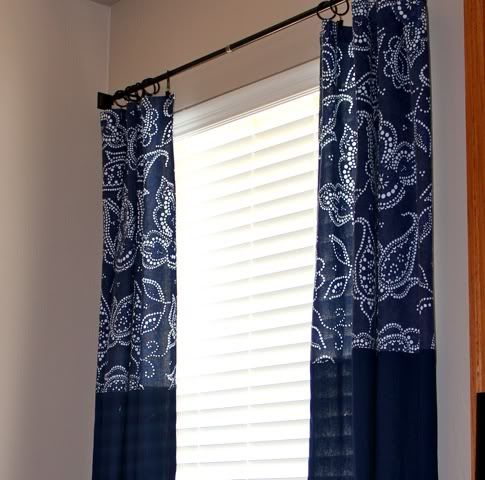
In addition to the 
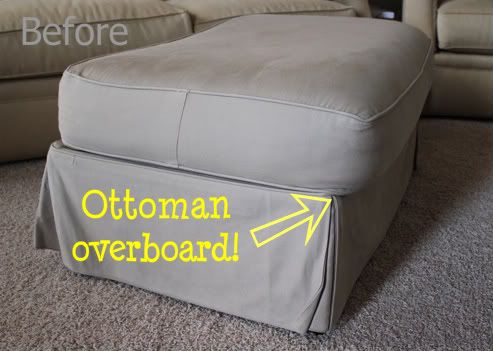
curtains, I made a new slipcover for our ottoman. I'd say it desperately needed it!  I made this green slipcover 6 yrs ago. I'd say it had a good run. But now it is worn out and an eyesore.

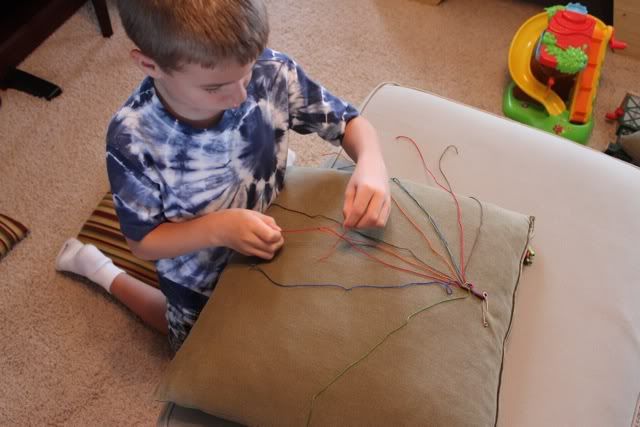
The cover is not the only problem. See what I mean:

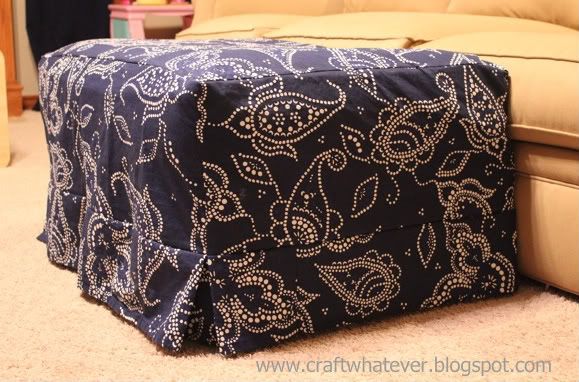
And now...my shower curtain-turned ottoman slipcover:


Going for QUICK here, on my Living Room Redo...I followed this tutorial at Tatertots and Jello as a basis.  Then, I added a box pleat skirt on the bottom vs. the pleated ruffle from her tutorial. (I knew my husband would oppose anything remotely girlie for the living room.) I followed her tutorial but when it came to sewing the corner seams I had some trouble getting nice corners.  (Will tell you about that next time.)


***My best advice for making this slipcover, is to try-on the cover at every step of the project.  In theory, you sew a box and slip it over your ottoman.  Easy, right?  Except when your ottoman is melting over the side!  Like mine.  I had to constantly tweak my pins and seams.  My goal was to disguise it's out-of-shape-ness.

{Sewing Technique} for adding the box pleat skirt:
TIP: I used the hemmed edges (bottom and sides) of the shower curtain for my pleated skirt. That way I didn't have to hem it!
1. My skirt was 6" so I cut 6.5" strips off each side and bottom hem. Sewed them together to make one long strip.
2. Add up your side lengths and add 12" for each corner. Ex: (2 x long side) + (2 x short side) + 4(12") + seam allow = total length of the skirt

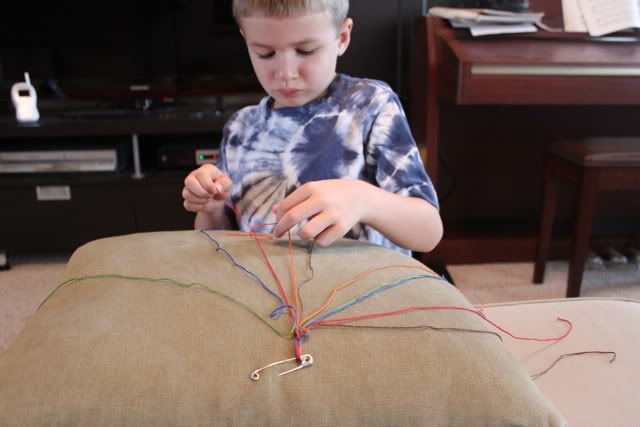
3. Start pinning skirt to cover at a side, then pin along to the corner.


4.

5. Create the pleat at the corner by bringing outer pins #1 and #3 (under) to meet the center pin #2. Smooth and pin, pin, pin.

6. Pin skirt to cover and continue pinning to next corner. Repeat steps 4, 5, 6 until you have three corners pleated and pinned.

7. On the 4 pleat, working towards this last corner seam, pin skirt to cover on both sides of the corner until you get a big "loop" in the skirt.


8. Flatten this ruffle loop evenly to make the last pleat. It may or may not be exactly 3" pleats like the others. That is fine. Pin pleat in place. Pin to cover.

9. Sew the skirt to the cover.

I don't know if this was very helpful to anyone else (unless you are making a slipcover like this one), but at least now I have this technique documented because I am sure this won't be my last time doing this.  Thanks for bearing with me!

Are you loving this blue as much as I am?  (in case you wondered, got the shower curtain at Target)

Linking here:
BWS tips buttoncraftMakingThe Girl Creative Keeping It Simple


Wednesday, July 20, 2011

My kids were actually begging me for crafts this week. They caught me off guard and I had nothin.

Usually, I am begging them do do a craft. Seriously. And at that point, I am just talking about cutting up some scraps of paper or fabric or whatever and glueing it to something- more paper, more fabric, or whatever. So simple. Just something that they can do to channel their tired energy into their eyes and hands and brains. But of course when they said, "Can we do a craft?" I immediately said "Suuuure". I was trying to come up with something before I finished the word!

I said who wants to make friendship bracelets?! I got one taker. Nicholas, my oldest. He is 6.

I have been seeing these bracelets on blogs, so I suppose they are making a comeback, but I haven't seen any one wearing them around here. (Maybe I don't mingle with the right people.) But still, I grabbed what few colors of embroidery floss I had and started hyping up this friendship bracelet craft to my son.
He really was excited. I even did the first row to get him started. (I remember that was the trickiest part.) It all came back to me. knotting. keeping the colors organized. we used to pin them to our jeans to make them...I opted for a pillow.
Good thing. Because he got this far.
It will probably stay like this for the rest of the summer...unless I pick it up and get addicted to the mindless knotting...quite therapeutic, too.

I found this tutorial for making them...which I don't need, because I already know/remember how to make them from a zillion years ago! OK. Except that fancy one with the pink diamonds I have no clue how to make that one.

Source:  Cut Out and Keep


***OH, and I did finish the curtains.  Can't wait to show you.  I started measuring for the new slipcover for the ottoman, too.  It is a lot of fabric to spread out and cut so I am waiting for a non t-ball night or weekend...

Monday, July 18, 2011

DIY Curtains- Part 1 Living Room Lightning Fast Redo

Lookie what I made this weekend...New curtains!

These curtains are not only new, they are the only curtains these windows have ever seen! (I can hear you gasping from here. So, I am a bit noncommittal about some things, ok?) We lived here for three years (already!) and I never even considered putting up a single curtain, until now. And all I can say is: "What was I waiting for?!" I think it dramatically improved the look of the room.

This is just the start of my living room color redo. Basically before yesterday, our living room was just plain. Beige-ish. Unless you count the dark "wood" (from Ikea) furniture or the colorful toys that scatter the room. Which I don't. The room was really, um, yuk to be honest.

But this BLUE...OH how I LOVE this BLUE!!! What was I so afraid of?! A little color is really fresh and grown up.
I still have to make the set of curtains for the other window. I hope to do those tonight. Then I will share how I made them. Basically, I added some length to a store-bought panel. I needed a curtain that was approx 105" and I couldn't find any (reasonably priced and immediately available, that is). I searched for fabric and never really found any that I was in love with. I was just about to settle on a green print when I saw this blue and white paisley shower curtain at Target. That's when my ideas took off. And when I scoured my favorite craft blogs to get ideas that were already tried and true. This will take several nights and maybe even weekends to finish, as that is the only time I can manage to squeeze out of this summer to make anything. But I am going for QUICK not cheap on this redo. I need a fast turnaround! And judging from my progress on Saturday afternoon...my goal looks promising. Stitched up two panels and hung them in probably the same amount of time it took to hang the curtain rods!

I also plan to make a new slipcover for my ottoman...some new throw pillow covers...and a wall hanging. I can't wait!

Friday, July 15, 2011

{Recipe}: Turkey Caesar Pitas

...Here is my go-to QUICK-don't-have-time-for-dinner dinner!...
I know summer is busy. I know having the kids home (all day, every day) it is difficult to accomplish anything. I know when it is 100 degrees outside a hot dinner is not appealing. So I give you you, my all-time favorite go-to recipe for times like this.

Reasons I love this recipe:  I don't have to use my brain to make it.  I dirty up one bowl.  No cooking involved.  No side dishes needed.  No measuring.  Seems healthy-ish.  And very adaptable to your likes.

Turkey Caesar Pitas

- Romaine lettuce, cut smallish
- tomatoes, diced
- deli shaved turkey, chopped
- Caesar salad dressing
- Parmesan cheese or shredded cheese, optional
- pita pocket bread


In a bowl, add lettuce, tomato, and turkey. Toss with salad dressing until well coated. I like the dressing a bit heavier than a normal salad. I just think it goes better with the bread. Sprinkle in some cheese if you like. Then put mixture into a pita pocket. I mean really stuff it in there, too. This is dinner, remember.

That's it! Salad you can eat with your hands, basically.

Or maybe it is a way to trick my kids into eating salad.  Hmmm.

Some ways I vary it up: add more meat to my husband's pita, left over grilled chicken chopped up, shredded carrots, warm the pitas first, and I like slices of sharp white cheddar cheese for a treat. My kids have learned to like this recipe. For them, I throw some extra shreds of cheese in theirs and I don't fill them up as much.


It is practically a given that we will have this for dinner if it is a t-ball or soccer night.
This recipe is perfect for busy nights all year long- soccer practices, swimming lessons, school activities...or maybe you just want to get in and out of the kitchen and enjoy family time together.

Hey, did you just put this on your menu for next week?   We will have it again on Tuesday...double t-ball night!

Linking here:
BWS tips buttoncraftThe Girl Creative Keeping It Simple


Tuesday, July 12, 2011

Trying to regain momentum

Remember when kids napped? Ahhh. Those were the days. An hour or two to do something that I want to do or just recharge my batteries for the rest of the day. I miss naps. {sigh} I mean I REALLY miss naps.

I want to (finally) share some pics from when we tie dyed a couple weeks ago. They just turned out so great!

This was a spiral design
I don't know how you other craft bloggers are doing it! Crafting, Taking Picutres of Crafting, and Blogging about it all. I can barely stay afloat in my daily routine. Let alone make something *adorable* and share it with the world. (Ok, not really the "world" per se...just my handful of readers! Ha!)

I used a Tulip brand kit for this one!  Dyed the top and skirt!

This shirt is a bullseye and some stripes on the little sleeves.

At the moment, I don't know where my 6 and 4 yr old are...not good. Oh wait, at least I hear them. My 2 yr old has a fever and is napping (the only one who still humors me with a nap of some sort most days). It is storming. Which is fantastic because for the last, I don't know, 13 days it has been over 100 degrees. I think it was 106 on Saturday and Sunday. But the dishes are piled up. My coffee is cold and still in the pot. I still need to eat lunch. I need to start some laundry- all my kitchen towels are dirty. I did wash clothes this weekend and washed diapers yesterday. Dinner tonight is easy-peasy! I have got to share the "recipe" with you! It is one of my go-to dinners when we have a busy evening. Tonight we will divide up after dinner between a t-ball game and a t-ball practice.

But I AM thinking about crafts...if that counts for anything. I am getting ready to bring a color into my beige living room. I know, living on the edge here. I have decided on blue! Surprise, surprise. I just can't get into making anything because I am spending a lot of energy on keeping my kids entertained. I even offered to get out the paints today and they said "no". I don't get it! I can't win with them these days. Not like we had any *solid* routine before, but coming off of a two week vacation isn't helping either. Me or them. I still don't have a good routine with them. Well, there is always tomorrow!

Share this

LinkWithin

Related Posts Plugin for WordPress, Blogger...