Showing posts with label Father's Day. Show all posts

Friday, June 10, 2011

Father's Day Grill Towel- Last One I've Got!

Another Grill Towel for Dear 'Ol...
DAD!!!
...Have you see the other 4 grill towels I posted earlier this week?...
Now this one, I was CRAZY about! I love it! It was actually the first one I made. But it was not as much my husband's taste. And I really thought I had nailed it. He said this one was a bit too colorful. Really? What I think, is that to him, the blue and orange are team colors of a sports team or something. He thinks in sports.

An extreme close up:


Here is how I made it:
  • followed the basic tutorial from Monday
  • orange single fold bias tape
  • appliqued "d-a-d" from an old orange t-shirt
  • I used an iron-on interfacing to the t-shirt fabric to make it stiffer to work with
  • attached it to the plaid fabric band before sewing the plaid fabric on
  • attached letters with HeatNBond and then followed with machine stitching
  • no grommet because it already had a loop on the corner for hanging (see below)

You know...


You could make a pair of these this weekend!  But which one?

Black with argyle
Brown with leather patch
Blue with blue oxford
Red with monogram
or today's, Blue with plaid and orange


I would love to know....which one is your favorite?

Linking up here:

Chic on a Shoestring Decorating Lovely Crafty Home

MondayBWS tips buttoncraftMakingThe Girl Creative Keeping It Simple

Thursday, June 9, 2011

Father's Day Grill Towel- Red with Monogram


Here is a real simple style. Just a man's monogram.
...Check out all 5 grill towels this week!...

This is another variation of the Father's Day Grill Towel Tutorial.


I basically made my own iron-on patch and appliqued a B on it.  And I didn't add a grommet to the towel because it already had a hanging loop on one of the corners.  Very convenient!

How I made this one:
  • towel is from the dollar store and it already had a twill tape "hook" on the corner so I did not add a grommet on this one  {see pic below}
  • black fabric cut into this shape and I put HeatNBond on the back (kinda made my own patch)
  • small double fold white bias tape sewn around raw edge
  • the "B" was cut from an old t-shirt and adhered to the black with HeatNBond
  • hand stitched red embroidery floss around edge of the "B" (oh so carefully) 
  • ironed on whole "patch" and then topstitched around the white bias tape
  • bobbin thread was red to match towel
Towels here came from dollar store.  They already had this loop on the corner- perfect for hanging on the grill!

You know, you could even use this same concept and make Dad a golf towel or sports/gym towel.  Just a thought...

post signature

Wednesday, June 8, 2011

Another Day...Another Grill Towel: Blue on Blue

Now this one actually was my husband's favorite one. It had all of his favorite colors- blue and blue, oh and grey.

On Monday, I posted a tutorial on how to make a grill towel and everyday this week I am posting variations of the first. I know this is a gift husband would use because he always needs to wipe his hands off when he is out there grilling. It could be raw meat on his hands, BBQ sauce, something fell, who knows.

I wanted to share with you all of my iterations of the Grillin' Towel because...1) I never come up with a good man-craft idea...and 2)I finally found a man-craft idea that my husband actually likes! I don't know. Maybe you have the same man-craft block that I do. Anyway...

Here is how I made this towel:

  • this design is very similar to the one I posted on Monday
  • the fabric strip is a blue oxford shirt fabric, 100% cotton
  • grey single fold bias tape
  • the patch is another iron-on mending patch I found in the notions section
  • freezer paper stencil "bbq" after I ironed the patch to the towel.
  • grommet is at the center of the towel left edge
  • I got all crazy and used blue thread for my topstitching, which I was surprised didn't make my husband think it was "too messy"


Also, I thought it might help if I showed you what the patches I have been using look like.

I really just stumbled upon them at at my fabric store. Do you see the ones I used Monday, yesterday, and today? Lots of possibilities for those in the future, too.

I was wondering if these ideas are inspiring you or confusing you? Thanks for looking!!
Linked here:
Somewhat Simple

Tuesday, June 7, 2011

Grill Towel with a Leather Patch

So in case you missed it, yesterday I just posted this awesome tutorial for a Father's Day gift...a grill towel!

Maybe you already knew that and you came back today to see what else I came up with.

Well here is variation #1.
...Father's Day is June 19th!...

What I did:
  • used a leather elbow patch (found in notions section of fabric store)
  • freezer paper stenciled on the patch with fabric paint
  • hand stitched the patch to the towel with upholstery thread.
  • hand stitched green embroidery floss around edges- every two holes
  • added a grommet to the top corner instead of the middle of the towel

Notes: The elbow patch was a complete experiment, but I love the way it turned out. It was easy to sew on because it has pre-punched holes all around it. On my patches, it seemed that one side had more obvious holes than the other. That would be the front where you will stencil; this makes it way easier to sew on when you can see the holes!  And I used 3 strands of green floss.  Besides drying time for the paint...this is super quick!

Here's a sneak peek at the rest!  Come back tomorrow- I will be featuring another one of these Father's Day Grillin' towels!


...
post signature

Monday, June 6, 2011

Tutorial: Father's Day Grillin' Towel


Am I the only one who thinks that men are difficult to craft for?  My husband likes a very simple style and a very limited color palette so this was quite the challenge for me!  Not too bright, not too bold, not girly, not too embellished.  Tailored and masculine.

This is an improved-upon idea from some grill towels I made for my husband last year....Last summer, my husband was deployed and missed our anniversary, Father's Day, and his birthday.  So I just lumped all those occasions into one gift and surprised him with a new grill when he returned!!  I made him grill towels to go with it, but they were pretty weak.  I  just added a grommet to a couple of kitchen towels and called it good.

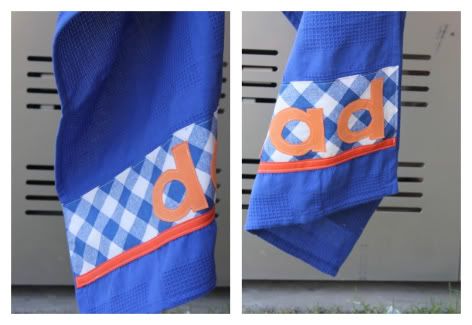
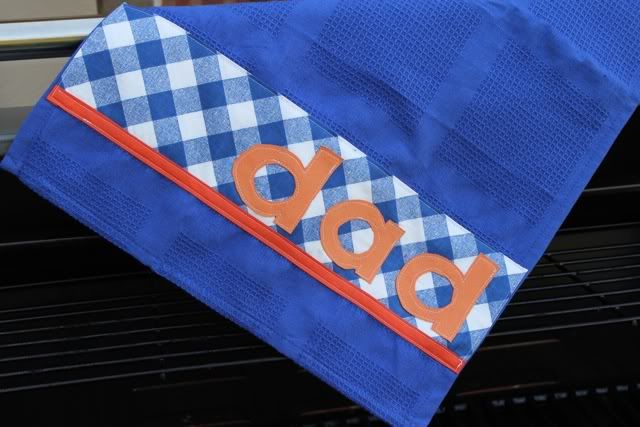
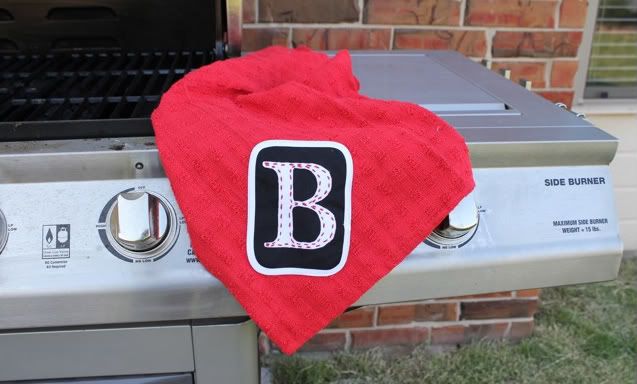
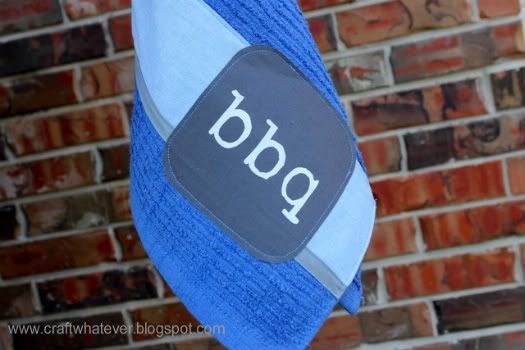
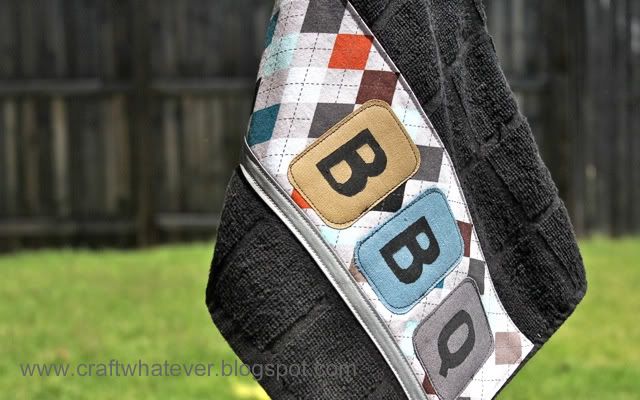
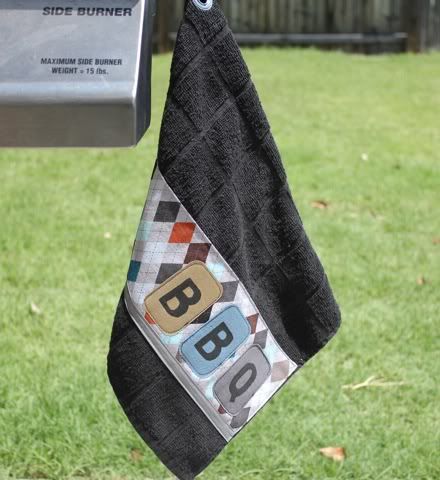
But this year...I spruced up the Grillin' Towel to be a very styilsh, but manly gift to give.

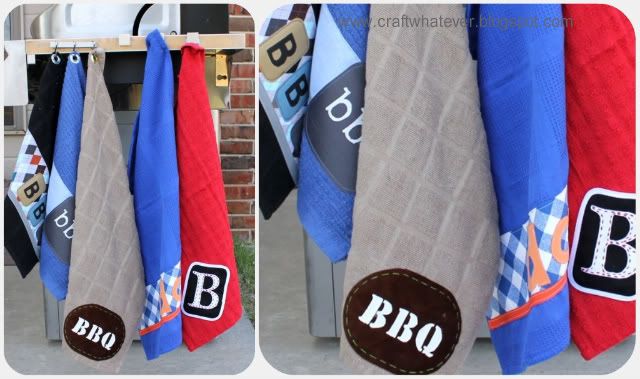
Here's a sneak peek at the rest!  Come back everyday this week and I will tell you how I made each one!


Now, on to the tutorial!


{Tutorial} :  Father's Day Grillin' Towel
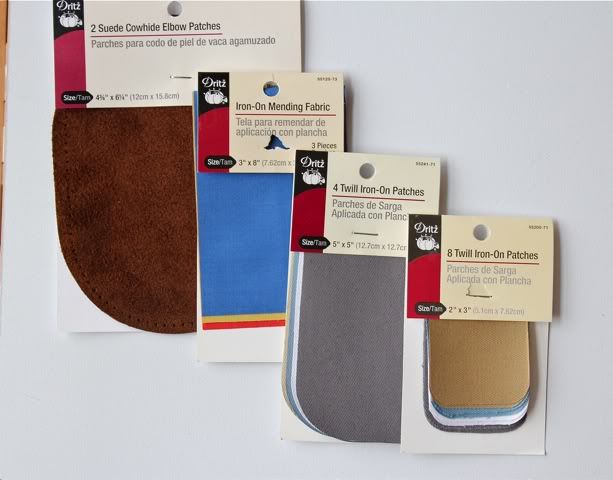
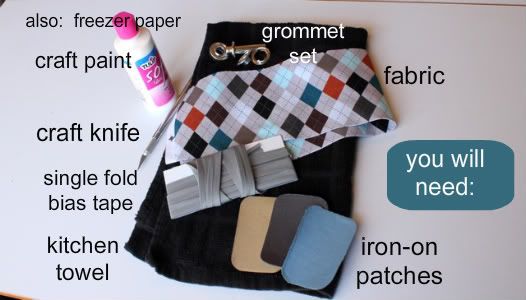
Gather your supplies:
****You will also need bobbin thread that is the same color as your towel.  Otherwise you can see all your stitching on the back of the towel***

The iron-on patches are twill and I found them in the notions section of my local fabric store.

NOTE:  Before you start, I would strongly suggest prewashing the towel and fabric.  Both can have a tendency to shrink when washed.  I like to get all the shrinking out of the way b-e-f-o-r-e I start the project!

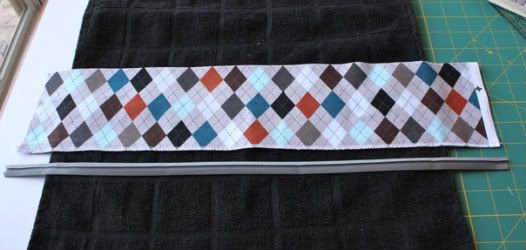
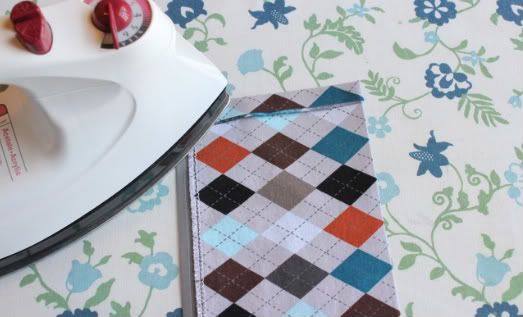
1.  Cut your fabric and bias tape to fit your towel.  The fabric is folded in half widthwise...your band of fabric can be any size.  I made mine ~4 inches wide.  If you follow that, you need to cut it 8" x (towel width + a few inches).  Then fold the fabric in half.  Press.  Sew together along long side.  This will keep it stable.  I actually serged mine (below).


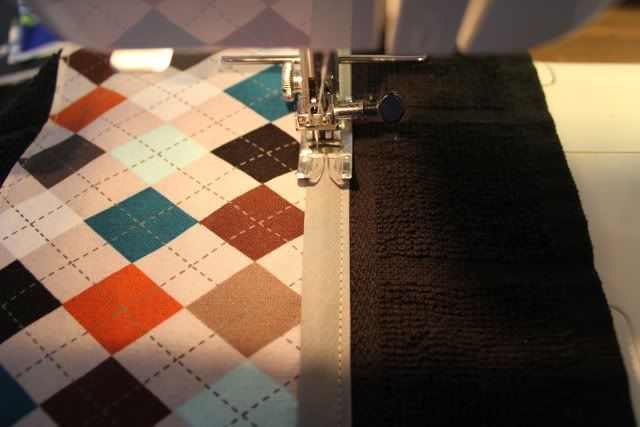
2.  Sew the bias tape to the fabric band as shown below.

3.  Next, fold the bias tape down and press flat.  Then press down 1/2"-1" on what will be the right end of the fabric band.


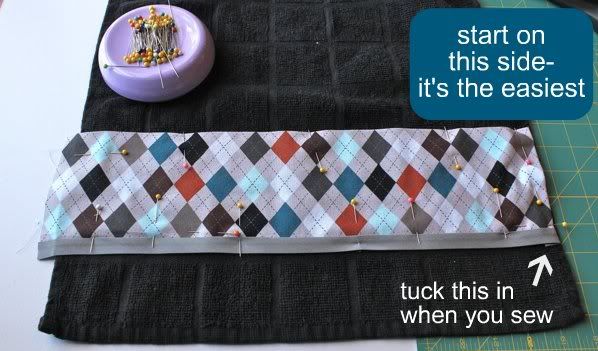
4.  Pin the folded end to the towel.  Start on the right side.  I have found this is the easiest side to start with because of how I am moving the project through my sewing machine.


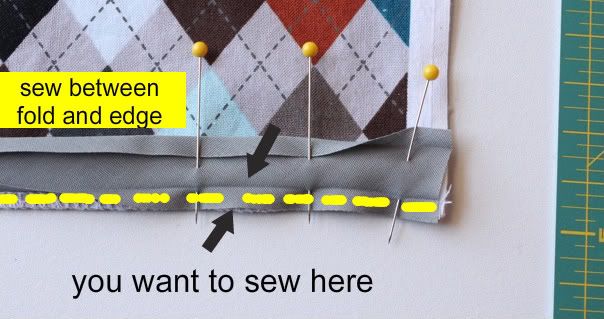
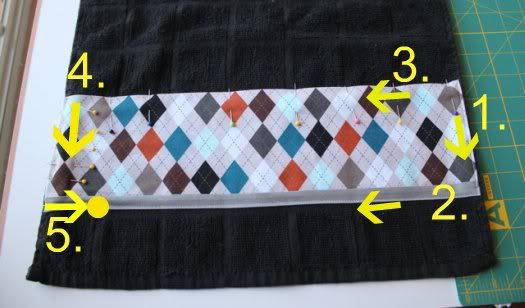
5.  Here is how you will sew the band down.  {Now, I suppose you don't have to do it this way, BUT from my experience (with other towel projects!) this will ensure that your band is sewn straight and even.}

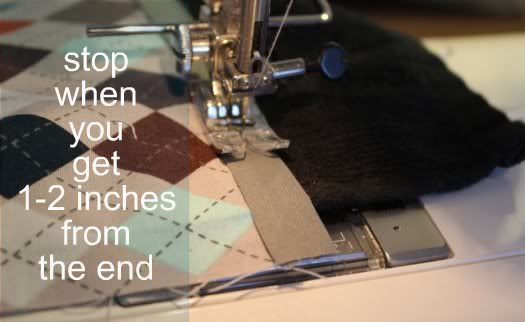
1.  Sew down.  Pivot at corner.  2.  Sew across and STOP at big yellow dot.


Next, lay out your towel and iron the left raw edge under so that the fabric band will be even with the left edge of the towel.  If it is too long, which mine was, cut it down.  You just need about 1/2" to fold under.  Pin in place.  Now sew again...


3.  Sew across.  Pivot at corner.  4.  Sew down, pivot.  5. Sew to where you stopped.  Backtack.


This is where you will be at the yellow dot.


6.  Now sew down other edge of the bias tape.  
Honestly, you could stop here if you wanted and skip the embellishments!  You still have a nice-lookin' towel to give!

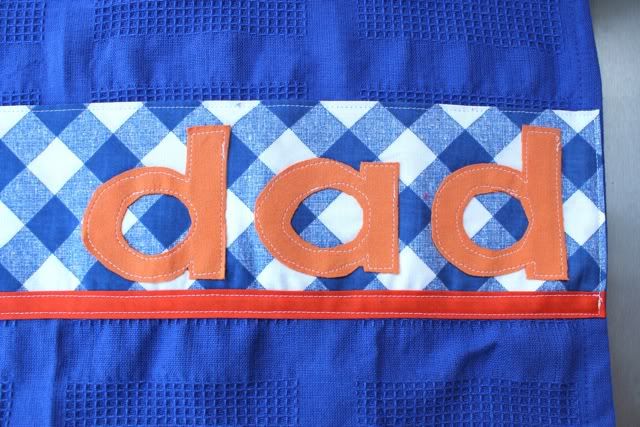
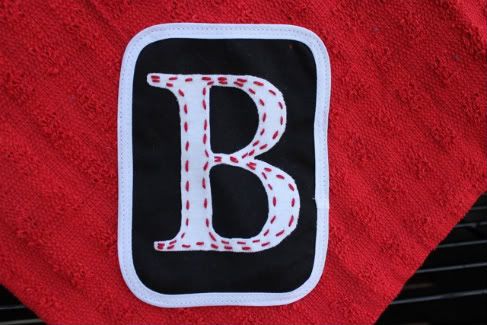
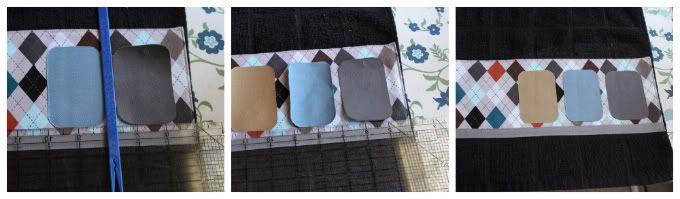
7.  Attach the iron-on patches.  Decide where you want to place your iron-on patches.  Follow the directions on the package to iron them on.  But realize, once you heat them up, they are stuck!  So choose wisely and if you want them even, line them up the best you can.  **Also, if you are doing a freezer paper stencil, then you have to iron the patches on first.  I suppose if you have a vynil stencil (silhouette or cricut) then you could stencil at the very beginning to shorten your drying/waiting time.  


Here is me trying to get them straight and even.  I had just ONE shot to get it right!


8.  And since freezer paper stenciling is pretty common, I will just give you some links here to a tutorials:  at Panjo Kids , at Made, at How About Orange, and at Simply Modern Mom.  All are very easy to follow tutorials.  Take your pick.

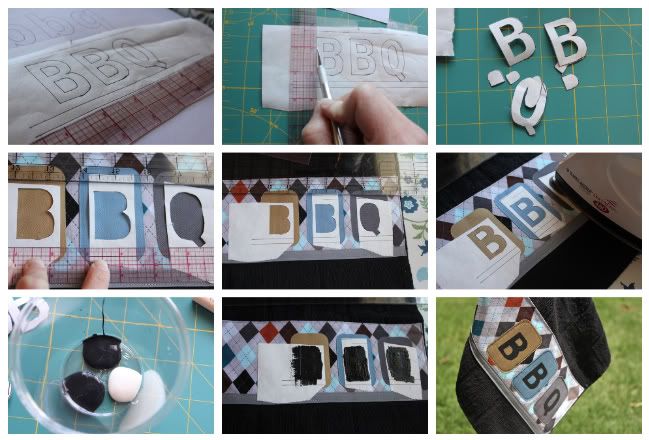
Here is my play by play with the freezer paper stenciling.
For my paint, I just used a regular acrylic craft (black) mixed with a fabric medium (white).  Just 'cause that's what I already had on hand.

9.  Now you have to let this DRY.  I waited overnight.  {I know, right!?}  When the paint is completely dry, edgestitch around each patch- just to be sure!

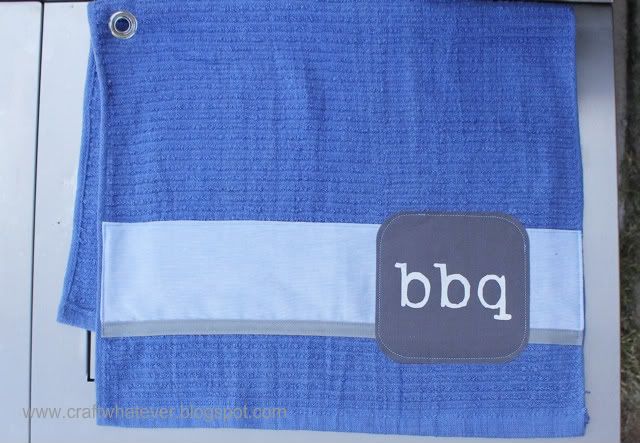
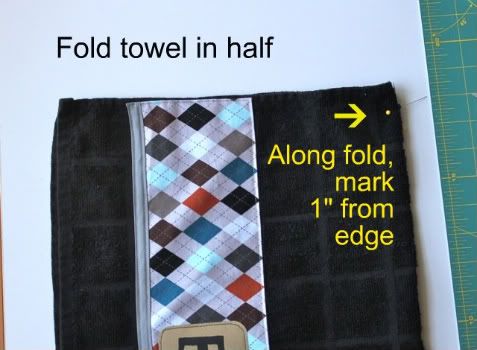
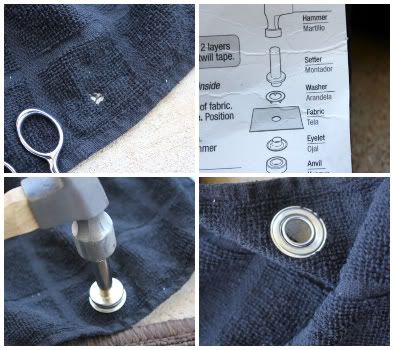
10.  To add the grommet, fold the towel in half and mark a spot 1" from the edge.  I used a 1" grommet, if you are using a larger one, you might need more space than 1" from the edge.  


Install the grommet according to the package directions.  You can buy a grommet kit (which includes everything you need) at a fabric store or a home improvement store.  If you have never used a grommet I can offer two tips:  1--do this on concrete (garage, patio, etc.) and 2--"pound" don't tap!


And DONE!


Pretty nice, huh!?!?!

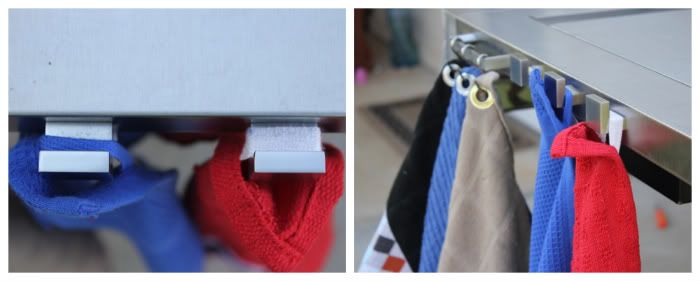
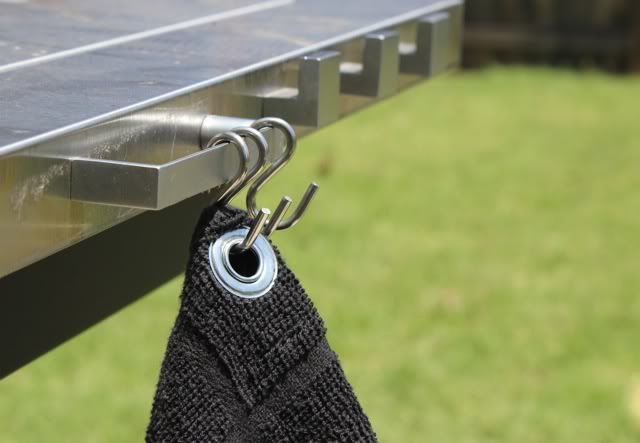
Funny thing is, our grill didn't have any hooks or bars on it.  I actually added these.  They are just drawer pulls from the home improvement store.  I bought shorter screws because the screws that came with the knobs were too long (since I am just attaching them through a thin sheet of metal).  I used my drill to make holes.  And attached the drawer pulls.  The L shaped ones are installed upside down.  Our grill tools have leather strings on them and just loop right on the hooks.  

Lastly, I bought these S hooks but a caribbeaner clip would also work.


~~~Now, come back tomorrow, and every day this week and I will show you 4 MORE towels that I made...all different...all manly...all easy!~~~

**UPDATE:  Check out four more GRILLING TOWELS that I made.  They are variations of this one so, same concept, just another look!  
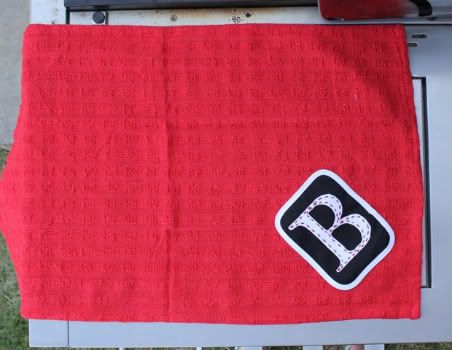
Blue on Blue Grill Towel.   Red Monogram Towel.  Leather Patch Towel.  Blue and Orange "dad" Towel.


craftTodays Creative Blog

Share this

LinkWithin

Related Posts Plugin for WordPress, Blogger...