Showing posts with label Christmas. Show all posts

Monday, December 26, 2011

Thursday, December 22, 2011

THE Funniest Holiday Card


Pin It


Yes.  
This is my sister.  And her husband.  They are hilarious, aren't they?

~~~I just thought I could share a chuckle in all the holiday stress and hustle-bustle.~~~


Sharing:
PhotobucketThriftyThurs Thrifty Thursday Week 34

Friday, December 9, 2011

{Friday Five} :: Our Christmas Traditions

I have read a few blogs this week that talked about their Christmas traditions.  This is something that I have really tried to create and stick with the past few years.  My oldest is now seven and he, out of the three kids, will *get* the Christmas traditions the most.  They will stick with him and he will look forward to them next year.  

1.  Appetizers for dinner on Christmas Eve.  
This stemmed from my family attending Christmas Eve(ning) and even midnight mass when I was growing up.  We were always rushing around getting ready for church (with four girls in the house, there was always lots of "getting ready")- which didn't leave much time for dinner.  So we snacked and grazed before mass.  THEN, we would pull everything out again when we got home!

2.  French Toast Casserole for Christmas Day breakfast.
It's one of those assemble-the-night-before-and-refrigerate deals.  Plus, in the morning it has to sit on the counter for 30 min and then bake for almost an hour and then cool.  Plenty of time to open presents before breakfast!

3.  Manicotti for Christmas Day dinner.
I make it ahead of time and put it in the fridge.  Then I pop it in the oven.  Again, easy yet belly-fillling.

4.  My husband reads The Night Before Christmas to the kids on Christmas Eve.
No sooner.  

5.  We spend Christmas here.  
The whole day.  At our home- wherever that may be.  It is fun and cozy and we stay in our jammies most of the day.  Until it is manicotti time.  

Now look at that!  I am getting less grinchy and more excited for December 25th!  My husband will be happy...he is Mr. Christmas around here.

Tuesday, December 6, 2011

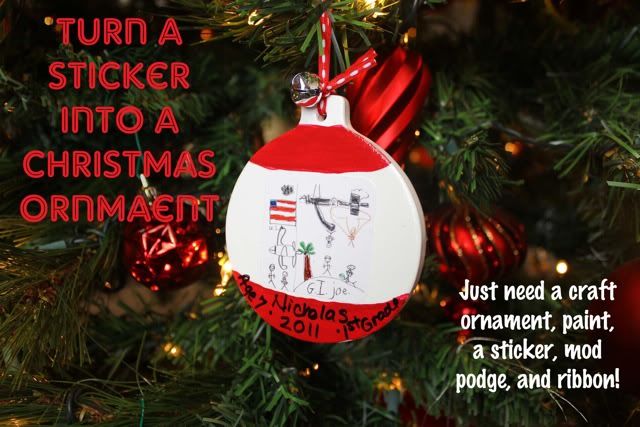
Simple Ornament to Keep Forever (and I used a Squicker Sticker)

I don' t know about you, but I have 5 pages of "Squickers" stickers laying around.  Some stickers are from three years ago!  I thought they were cute but I just didn't know what to do with them.  Until now...

Does your child's school do the Squickers fundraiser?  Ours does.  But here is my confession:  I just keep the free sheets of stickers and don't order their products.  I know.  I shouldn't have said that out loud.  But it's true.  

And honestly (another confession), I have never been too impressed with my kids' artwork to order anything with their picture on it either.  

BUT this year...my kids were super-duper creative and artsy and made some funny creative artwork!

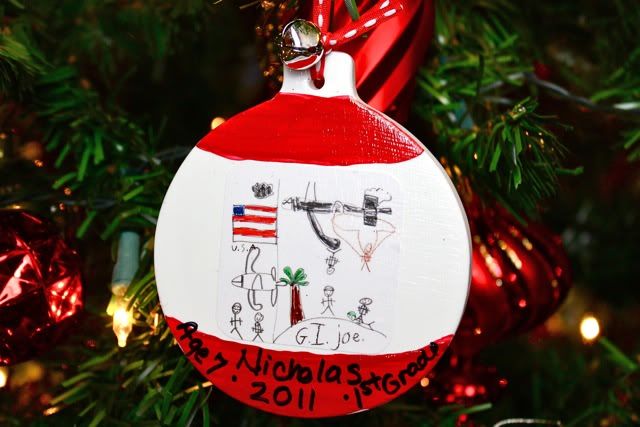
I had the light bulb idea this year:  Stick the squicker sticker on an ornament to cherish (and laugh at when they are older, of course) forever.  

I mean, who doesn't want a GI Joe ornament on their Christmas Tree?!?!

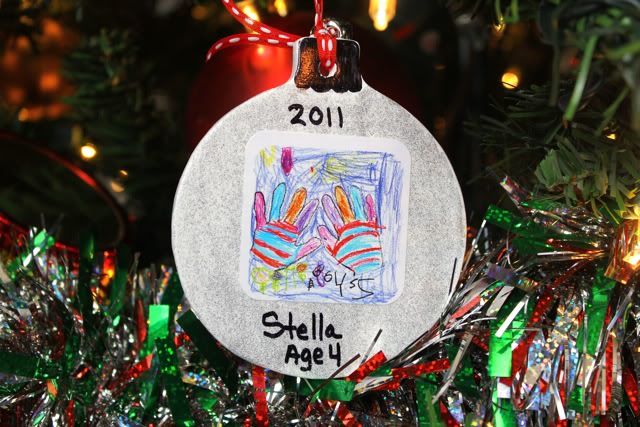
I found these unfinished ornaments at Hobby Lobby for $1 (which I scored at 50% off, so 50cents), painted them and then mod podged the squicker on the ornament. Added a little ribbon and viola!  Memories that last.

It does appear that Stella tried to write some sort of word, but she couldn't remember what it was.  Very colorful nonetheless.  

Oooh, these would be cute gifts!  Yes?

Linking here:

Friday, December 2, 2011

{The Friday 5}:: What I Wish I was making right now


Oh how I wish I had a few hours free to make something.  Anything.  I would prefer to make something for Christmas (obviously)!  Instead, I am drooling over these ideas I found.  Most of them I have already made in my head. 

1.  The most gorgeous Ribbon Wreath, from bhg.com


2.  This darling “Gift Wrap Garland Christmas Tree”, from Sew Woodsy

3.  A burlap Banner, from Story Crafting with Joy.
(I like this so much, I would probably make mine a giant-size!)

4.  Felt Flowers (galore!), from Craftiness is Not Optional
In my mind, I have already made about 4 dozen of these.


And again, in my head, I have already made these and eaten 3.  

Happy Crafting!  

Wednesday, November 30, 2011

{Tutorial} Advent Calendar, a Felt Wall Hanging


If you stopped by yesterday, I showed you my Advent Calendar that I made last year.  And then I promised you a "how-to" for it today.  Well, I rounded up some pictures I took while I was making it and collaged them to give you a quick tutorial.


I promise you, I just whipped this up.  On the 30th of November.  I finished all but assembling the ornaments, to include the hand sewing of the numbers.  But by the 5th it was complete.


  {Tutorial by Pictorial} Advent Calendar- Felt Wall Hanging

To make this I used:  fabric for the background, felt, interfacing, heat and bond, scrapbooking brads, rick rack, and embroidery thread.
1.  Grab some supplies.  2.  Decide on a size for the tree and base everything else off that.  3.  Cut two felt trees; light and dark green.  4.  Cut each in 3 pieces- take into account 1" of overlap when you plan your cuts.  Or not and just wing it!  5. Attach the thirds, bottom edges overlap.  You will only use three pieces of trees here.  I cut strips of Heat and Bond to attach them.  6.  Decide where you want your brads to go.  7.  Poke brads through the felt.  8.  I thought it could use some garland (rick rack).  9.  Again, I used tiny strips of heat and bond to hold in place.  Then sew down the rick rack.


10.  Lay out tree on background fabric and mark your lines for the ornaments to hang on the bottom.  11.  Sew some trim (rick rack) along the horizontal lines.  12.  It's probably safe to attach the tree now!  I cut pieces of Heat and Bond to hold it in place.  12.  Then sew the felt tree to the background.  13.  Add brads to the horizontal rows.  14.  Make a backing piece and line with a medium to stiff interfacing.  13.  Sew backing to the front panel.  I did 3-rows of stitching to be "decorative".  15.  Make a casing at the top for a dowel to slide in.  16.  Make some felt ornaments.  25 to be exact!

It isn't too too late to start this.  You can get the tree part done pretty fast.  Then just make the ornaments.


Linking here:
Somewhat SimpleA Crafty Soiree Transformation ThursdayThriftyThurs Thrifty Thursday Week 3436th AvenueCatch a Glimpse Button

Tuesday, November 29, 2011

Advent Calendar (my felt creation from 2010)

Hey!  Good to be back after such a whirlwind Thanksgiving Break!  We drove to be with our family- an 18 hour drive- and we drove it all in one day!  Holy cow!  Left at 3:30am (Central Time) and pushed on until 10:30pm (Eastern Time).  With three kids...I still don't know how we did it!  We drove it in two days on our way back.  (We aren't that crazy!)  But now it is back to the grind at home.  We have been feverishly putting up Christmas decorations before my husband has to go out of town again.  


I pulled this little beauty out of a storage bin today!

It's my:
 Homemade Advent   Calendar.

 I made this last year just off the cuff!


And I started it just hours before we needed to start using it!


I still remember buying all the supplies with only a vague idea of what I wanted it to look like.  For weeks, though, I had been admiring  this one which was inspired by this one.  (These two are beautiful and neat and perfection!)  I decided not to set myself up for failure disappointment, and took a more relaxed approach.  
I was going for a crafty-felty-whimsy-colorful motif!  


I remember I was dreading all of the hand-sewing that was involved (because I am quite allergic to that!).  But then I found it was actually much easier than I was imagining!

Come back tomorrow and I will show you how I made this!  I am working on a pictorial for it right now.  You will see how simple it is to make!
Linked here:
Photobucket

Share this

LinkWithin

Related Posts Plugin for WordPress, Blogger...