Showing posts with label kitchen shortcut. Show all posts

Thursday, March 15, 2012

{Recipe} No Measuring Healthy Taco Filling and Seasoning


Funny, my kids aren't real crazy about meat but they love tacos!  Love tacos!  So this is my chance to feed them healthy ingredients since they will eat well when it's "taco night".

The two things I do:
1.  Add a can of black beans.
2.  Homemade taco seasoning

3 reasons for adding black beans:  it  almost doubles my quantity of filling, it adds good protein and fiber, and it reduces the cost.  (My kids prefer ground turkey but sometimes I use a good ground beef and they eat it all the same.)

3 reasons for using homemade taco seasoning:  I already have the ingredients on hand, waaaay less salt, and I know exactly what is in it.

I need to preface this recipe by saying the amounts of seasonings I use give the meat/beans a mild flavor and is not spicy.  My kids don't like spicy.  This is for a pound-ish of meat plus one can of beans...obviously add more seasoning if you use more meat or want a stronger flavor!

No-measuring Homemade Taco Filling:
Pin It

Ingredients:  OH, and I don't measure! (Because you don't have to unless it must be exactly the same every.single.time you make it.) 

  • A BIG palmful of chili powder...
  • Medium size palmfuls of the cumin, onion powder, oregano, garlic powder, and paprika.
  • Just a small amount of salt (unless you prefer more).  I give it a good sprinkle around the pan and use sea salt with large granules. 

I am using ground oregano because I bought it for something and am (still) trying to get rid of it.  Also, sometimes I increase the cumin to a big palmful if I feel like it.


Directions:

  1. Add everything to meat either during or after it is browned.  I tend to add seasoning to the partly cooked meat and then the beans to the fully cooked meat- in case you were wondering!
  2. If the meat is getting dry (maybe because it is lighter fat), add some water.  About 1/4 cup.  This will help everything mix.
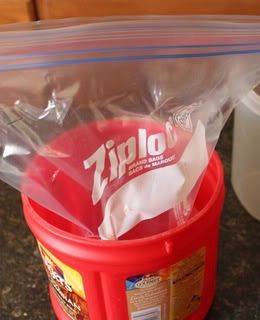
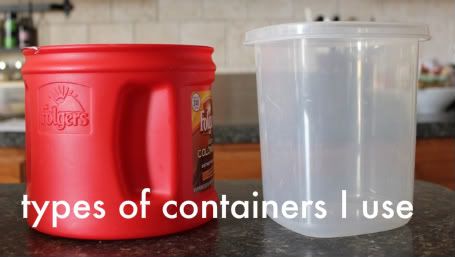

{KITCHEN TIP}
Now with the doubled the amount of filling needed to feed my family, I put the rest in freezer bags once cooled.  And VERY often, I cook up 2 pounds of meat and 2-3 cans of beans.  It is just as easy to cook 2 or 3 pounds of meat as it is to cook one.  I just have to pull out the bigger skillet, that's all!

I cook once and have dinners in the freezer for later!!

Pin It

I am entering a contest to win a $75 Amazon.com gift card here:  My entry into Just Something I Whipped Up sponsored by Appliances Online and the Bosch Washing Machines, .

Linking here:

Monday, February 27, 2012

A busy week for me and Chicken Tips

I really really really don't like to use my blog as a platform to complain (that's why I am hardly ever on facebook).  And I really don't want to complain.  More like, explain why I am not posting everyday right now.  Which, I know, is a ridiculous expectation that I put on myself.  I get that.  And I don't like how it feels to be under (my own) pressure to crank out an awesome tutorial or awesome post  SO I am just not going to put that pressure on myself.  At least at the moment.  I have too much going on at home- with my kids and family- that require my attention.  In fact as I type this I am being badgered by my husband to review some movies that our daughter has been watching in school and says "scare" her.  This is important.  My Stella's birthday is this week, also important.  My sleep is important.  Showing you the adorable shoes that Stella and I glittered up this weekend- well, important but it can wait.  Yes?  Today, I had great plans to go shopping for birthday presents but my oldest son needed to come home from school sick just as I was halfway to the store.  Big wrench in my plans.  So I had to go tonight, flying out the door after dinner.  Not ideal.

What I did get done today was some cleaning and I cut up about 10 lbs of chicken!  I hate cutting up chicken.  It is disgusting to me.  But it is a huge time saver and money saver so I have to do it.

It took only took about 30 minutes to cut up all this chicken.  (plus about 5 min to set up and 5-10 to label bags and clean/disinfect everything).  I put about 3 pieces of chicken in a bag.  Today I got 7 bags/meals from the 10 pounds- just depends on what I plan to make.  Here's my tutorial on chicken.

 In about 30 minutes...it all looks like this!


I flatten out the bags so they defrost quicker and stack nicely in the freezer.  Ten pounds...cleaned and trimmed...cut into different size pieces...easy to pull out of the freezer...ready to cook in the coming weeks.

Friday, May 27, 2011

Kitchen Shortcut: Super Fast, No-Mess, Real Deal Chicken Nuggets


A few weeks ago, I showed you how to prep and freeze your chicken. Right? Well, here is one reason why. Now you can make super healthy chicken nuggets. I bet you'll make it this way from now on, too.

My kids like chicken nuggets. They don't love them because they are a meat, and they just can't get into meat. But when I learned that they were more than willing to eat a McNugget...I knew this was my chance!


Here is my kitchen shortcut for:
Super-fast-No-clean-up Real-Deal Chicken Nuggets.
(You are going to thank me for this one.)

You will need:
- Your frozen chicken strips, thawed still in the bag
- Breadcrumbs (any flavor, try plain and add parmesan cheese,  or even crushed cereal)
- Parchment paper on a baking sheet

1. Preheat oven to 375 degrees.

2. Pour a guestimated amount of breadcrumbs into the bag and close it back up. Just dump them in. Don't worry about the liquid in the bag. You can keep this simple and add more crumbs or make this difficult and drain the liquid. Shake bag until the strips are coated with crumbs. Repeat until you are satisfied with the coating.


3. Lay chicken on your parchment paper lined baking sheet. I use tongs or a fork to get the strips out. You don't want to crowd the strips or baking will be uneven and longer. If you have too many just use another pan. Throw bag in trash.


4. Bake at 375 for approximately 15-20 min. I say "approximately" because ovens are all different and chicken done-ness is a preference. My kids won't eat tough, overcooked chicken. But once you find your number, that's the time to set everytime. Of course check them and if they are done (not shiny or pink) take them out.

5. Slide the parchment to a serving dish. Viola!

I hope you enjoy the simplicity of this!

Side note:  I know that this is not the proper way to bread chicken (dredge in flour, dip in egg, roll in crumbs).  I know that.  I have three kids.  I need fast.  Easy.  I have switched to this way because it is not messy and it works. Yes, this is similar to a shake and bake, but the breadcrumbs have less oil and salt.

Tuesday, May 10, 2011

Iced Coffee "Recipe"


With all the warm weather we have been having, I wanted to share with you my iced coffee recipe.

Though, I don't really consider it a recipe...it is more of a solution.


First of all, you are going to need some coffee ice cubes. When there is leftover coffee (if ever) pour it into an iced cube tray instead of throwing it out. I keep mine in the freezer in a ziploc bag and just keep filling the tray. Even if you have just a little bit of coffee left over, freeze it. Accumulate these babies one cube at a time if you have to.


Here is my version of iced coffee:

1. Fill my glass with coffee ice cubes.


2. Pour in some half and half. (I don't measure, but it's about 1/4 cup for a glass this size.)


3. Sprinkle in some sugar. Since sugar dissolves best in hot coffee, I usually pour the hot coffee in a mug and add my sugar to the mug. Then I pour the hot coffee from the mug to my glass.

4. Guzzle. Drink. Enjoy. Make another.


If you don't have coffee ice cubes yet, just make pot of strong coffee (add an extra scoop or so of grounds) and use regular ice cubes. But this solves two problems: One- I don't like to throw away coffee, especially expensive coffee. And Two- sometimes I need my coffee fast through a straw. Or what about when I just want a cold coffee!

Monday, May 2, 2011

Kitchen Shortcut: Chicken on the Fast and Cheap

Chicken. That's what I'm talkin' about today!
I make a lot of chicken meals. I don't know about your kids, but mine don't let me prepare a meal in peace. I require meals that are healthy, quick, and support one-handed cooking if needed. I just can't clean and cut up chicken during the week. I just can't. Besides, how gross if when I have to separate fighting children or grab a toddler off of a chair with "chicken yuck" all over my hands!

I used to buy the huge bags of individually frozen chicken breasts, but I have found that they are still quite fatty and I don't know that until they are thawed. And yes, I know I can buy pre-trimmed chicken. I am just too cheap to buy it. So, I have found a way to save money and time when it comes to my chicken.
Want to hear?

You will need:
- Huge pack of fresh chicken, rinsed or rinse as you go (I buy boneless, skinless breasts from Sam's Club or a family-pack at the grocery store)
- Good Sharp knife (my knife)
- Cutting board
- Large container (see below)
- Gallon-size freezer Ziplocs
- Pen or Marker

1. Buy the big big big pack of fresh chicken at the grocery store (or Sam's Club). Don't be afraid. It is cheaper!

2. Line your container with several Ziploc bags. One inside the other.

I have two plastic containers that I use: an old food storage container and an old coffee container.
Goal here is to use something large enough to hold the chicken and wide-mouthed so you can easily get the chicken in the bags without a mess. Turn the openings down over the container.
3. Trim your chicken. Trim the fat. Cut the chicken into sizes that you normally use.
What I do: I start by trimming away just the big parts of fat and then I start cutting my pieces. I remove the rest of the fat as I go. I think this saves a lot of time!

My cut sizes include:
  • Strips- for nuggets, fajitas
  • Medium pieces- for a casserole style dish, stir fry
  • Bits- for stir fry
  • Flats- for baking or grilling (these are cut into single portions and pounded thin so that my cooking time will be short)

**side note: I try to do my trimming when I get home from grocery shopping. But I don't always feel like it. In that case. The pack of poultry goes to the fridge until I have time later in the day, or later in the week, but always before that freeze by date.

As you cut it, put it right into your bag(s). When you accumulate enough for one meal, pull out that chicken bag and fill the next.

4. Label the bags. I write the cut size and the date.

5. Now freeze.

FINAL TIPS:
-- Now, when you plan to cook chicken for dinner, you can just pull out one bag from the freezer and thaw, and it's ready to go. No trimming. No cleaning up a cutting board, knife, countertop, etc.
-- But what if you have dinner guests? Just pull out another bag from your freezer!
-- A quick look in your freezer will let you know approximately how much chicken you have on hand. 3 bags is 3 dinners.
-- Don't limit yourself on the number of breasts per bag. One chicken breast per person is not always a "portion". Just cut and fill and when you feel like you have enough to make one meal then move on to the next bag. You will be surprised how many meals you get!

Doing this prep in advance will you save money and time. I know it seems like a lot to do ahead of time, but I think it is easier to cut all the chicken at once and clean up. I think you will thank yourself later.

So if you noticed the December dates on my bags...I took these pictures in January. That chicken has all been eaten up.

Share this

LinkWithin

Related Posts Plugin for WordPress, Blogger...