It is a pretty odd handy-woman skill that I know but wanted to share with you because I have done this one a bunch of times and feel pretty confident about it.
First, please trust me when I say, toilets are not complicated. Gross, yes, so I always give mine a good cleaning before I have to get this personal with it.
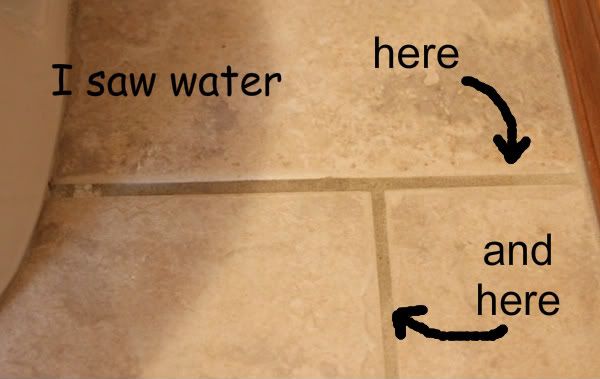
Problem: A few weeks ago, I noticed the grout was darker around my toilet. I cleaned it. My first thought was that the boys were going and missing in my bathroom. But that wasn't the case. I knew it was the other problem- water under my toilet. And the answer was most likely, and most cheaply, a new wax ring. This repair is going to cost somewhere between $1-$6.
{Handy-woman} Solution: Replace Wax Ring on Toilet


At this point, I call for my helper- who was folding laundry. That's right. My husband did the laundry while I fixed the toilet. We laugh pretty good about that! Just like on Saturday, I fixed the gutters and he watched the kids.
OK back to business...

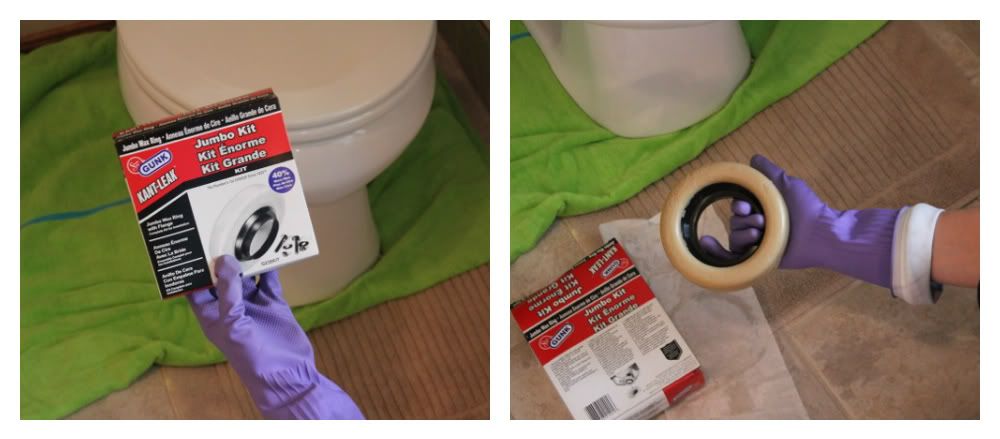
Now we will replace the wax ring. Funny, my husband bought it, but I did the whole repair. He chooses the jumbo size because in our first house we needed that one due to the floor being uneven under the toilet. Back then, we used two regulars stacked together. However, in this house we really don't need the jumbo. It just means more squishing on (see below).
11. TEST your work:
a. reconnect waterline to the tank and fill the tank about half way.
b. flush and look around the bottom
c. let the tank fill completely and flush again. and again. and maybe once more for good measure.
d. if you don't see water on your floor, you are in good shape! If you do, I am so sorry, but you are going to have to turn off the water and start over. You may or may not need a new ring.
12. Tighten your toilet bolts- do not over tighten! Do a couple turns on the right then a couple on the left, alternating until it is tightened.
13. Recaulk when floor is dry...I like to wait a few days before I recaulk. Just to be sure! Again, speaking from experience.
And yes, I am linking up a post about toilets to these fabulous parties:












First, please trust me when I say, toilets are not complicated. Gross, yes, so I always give mine a good cleaning before I have to get this personal with it.
Problem: A few weeks ago, I noticed the grout was darker around my toilet. I cleaned it. My first thought was that the boys were going and missing in my bathroom. But that wasn't the case. I knew it was the other problem- water under my toilet. And the answer was most likely, and most cheaply, a new wax ring. This repair is going to cost somewhere between $1-$6.
{Handy-woman} Solution: Replace Wax Ring on Toilet
1. If your toilet is caulked around the bottom (and it probably is) remove all the caulk. I just scrape it off with a metal putty knife. 2. Turn off water at the wall.
3. Flush toilet until won't flush anymore. 4. Remove water from tank and bowl. I use a cup to scoop out the water. When that isn't efficient anymore, I use a towel or sponge to soak up the water and wring it into a bucket. 5. Now detach water line from tank. I had a bit of a problem with the waterline this time. Even though I felt like it was turned all the way off, water was still dripping out. I used a cup and towels to catch the water vs. tightening it more. I am just overcautious after breaking one of those before (different house). 6. Remove the nuts from the toilet bolts. They are under those white caps, which just pop off. **If the bolts look rusted out you will need to replace them as well. You can buy the repair kit that includes the bolts or get them separately. Only problem with the bolts is that sometimes they are too long and will need cut.
Before you move on, you are going to need some wadded up newspaper, a spot to put your toilet (against a wall works well), and probably a helper. A toilet is pretty heavy and you don't want to put any pressure on the back tank! Lift from the bowl so the tank doesn't crack. Remember to handle the toilet carefully in the next steps so you don't crack any porcelain.
At this point, I call for my helper- who was folding laundry. That's right. My husband did the laundry while I fixed the toilet. We laugh pretty good about that! Just like on Saturday, I fixed the gutters and he watched the kids.
OK back to business...
7. Give your toilet a side-to-side jiggle to make sure it is loose and lift it STRAIGHT UP over the bolts.
Now stuff some paper in that hole! Keeps gross air out. **Remind yourself to REMOVE that paper before you put the toilet back!
Now we will replace the wax ring. Funny, my husband bought it, but I did the whole repair. He chooses the jumbo size because in our first house we needed that one due to the floor being uneven under the toilet. Back then, we used two regulars stacked together. However, in this house we really don't need the jumbo. It just means more squishing on (see below).
8. Remove the old wax ring. I use the putty knife. Sometimes the ring might be on your floor but usually it is stuck under the toilet- where it should be.
9. Take the new wax ring and squish it right on the bottom of the toilet. Center on the hole as much as possible. (There is also the "cheater way" where you put the ring over the hole and squish the toilet on.)
10. Put the toilet back where it goes. **Remove that paper!** CAREFULLY align directly over the bolts and press down super slowly and very evenly. Stand over the toilet and press straight down to squish the wax.
Test it first. TRUST ME. I have done this repair before only to have water seeping out from the bottom on the first flush! 11. TEST your work:
a. reconnect waterline to the tank and fill the tank about half way.
b. flush and look around the bottom
c. let the tank fill completely and flush again. and again. and maybe once more for good measure.
d. if you don't see water on your floor, you are in good shape! If you do, I am so sorry, but you are going to have to turn off the water and start over. You may or may not need a new ring.
12. Tighten your toilet bolts- do not over tighten! Do a couple turns on the right then a couple on the left, alternating until it is tightened.
13. Recaulk when floor is dry...I like to wait a few days before I recaulk. Just to be sure! Again, speaking from experience.
And yes, I am linking up a post about toilets to these fabulous parties: