Wednesday, March 30, 2011

Handsome Boy Shirt Redo

What would possess a mom to cut up a perfectly good Gymboree polo shirt?
Photobucket

Well, this.
Photobucket


The grey shirt is something my son had for a while, and quite honestly, it was getting boring. So I thrifted this mens dress shirt and merged them into something cuter. (It is all one shirt.)
Photobucket


Then I cut up a thrifted tie and took the look up a notch. HA!
Photobucket


Thank goodness for Twizzlers or I would have never gotten these pictures!
Photobucket


Monday, March 28, 2011

Patching holes in jeans- Tutorial

Photobucket

It seems like every week my son ruins a pair of pants.
IMG_4186

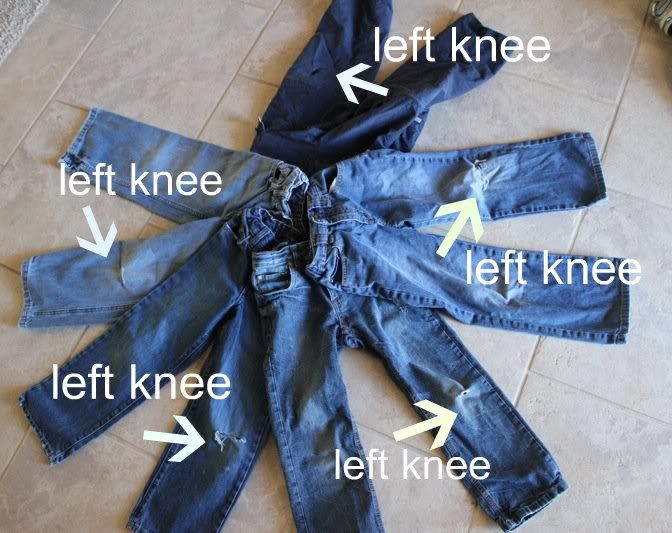
I send him to school in the morning with proper attire and he comes home looking like he got beat up and drug across the playground. I have been saving them- because you know, that is what good craftaholics do, and then I realized something....Do you see it, too?
Photobucket

I realized...that my 6-yr old has a razor blade for a left knee!

Do your kids do this to you, too? In March! I am not buying new jeans in March. Sorry. Last year he wore high-waters all spring. Well, here is my new solution. Kinda goes with last month's "Celebrate the Boy" theme on Made and Made by Rae. Though, I am not usually celebrating when he ruins his clothes.

My solution to holes in jeans in March? This tutorial!

Tutorial: Patching holes in Jeans
You will need:
- ruined jeans
- fabric to use as a patch
- seam ripper
- sewing machine, thread, scissors, pins

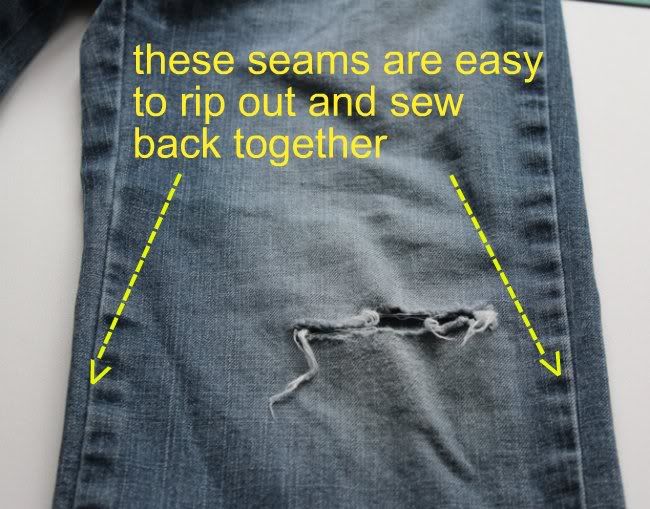
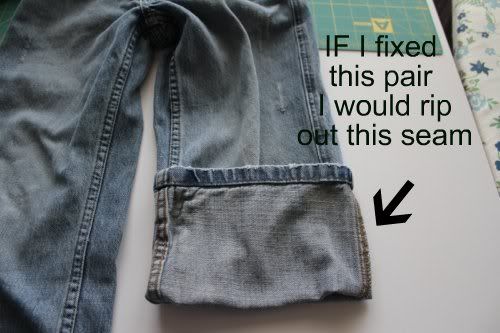
Pre-steps: First examine the jeans. You have to open up one of the leg seams to be able to sew around the hole. So let's figure out the easiest seam to rip out.

This pair has two very normal, easy seams. Either one will work. I will choose rip open the outside seam to keep it easy when I get to the machine.
Photobucket

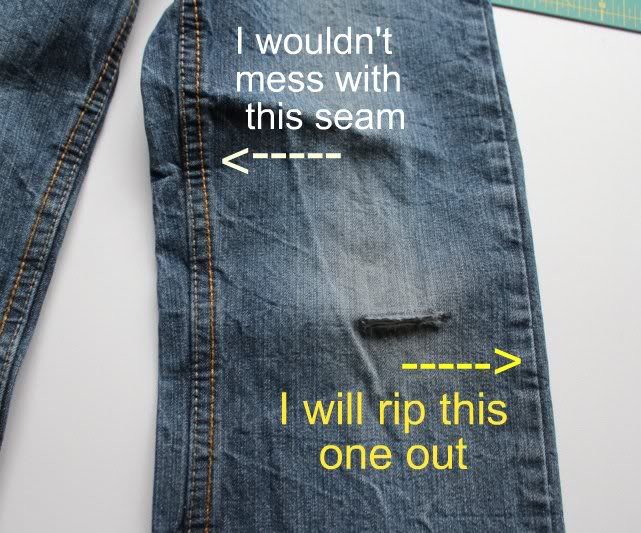
This one has an inseam that is a felled seam (=more work). Don't ask, just rip out the outside seam.
Photobucket

This pair has two felled seams. My options are:
It is March and these just need to last a few more months so I don't care about the neatness. OR It is March and I just won't bother!
Photobucket

Let's begin patching!

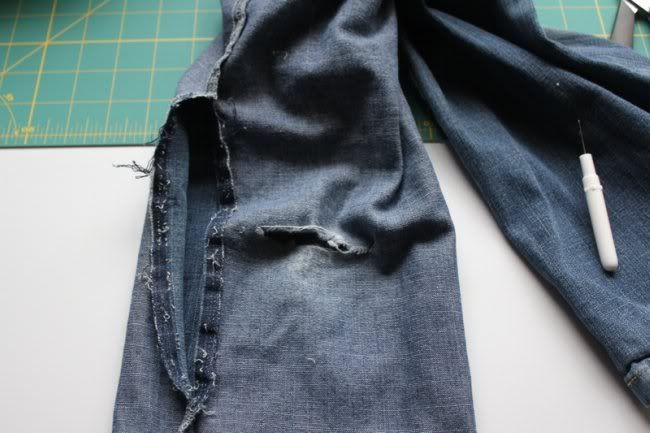
Step 1: Rip open side seam many inches near hole. You might even need to rip out more as you start sewing. You need enough room to sew around the hole.
Photobucket

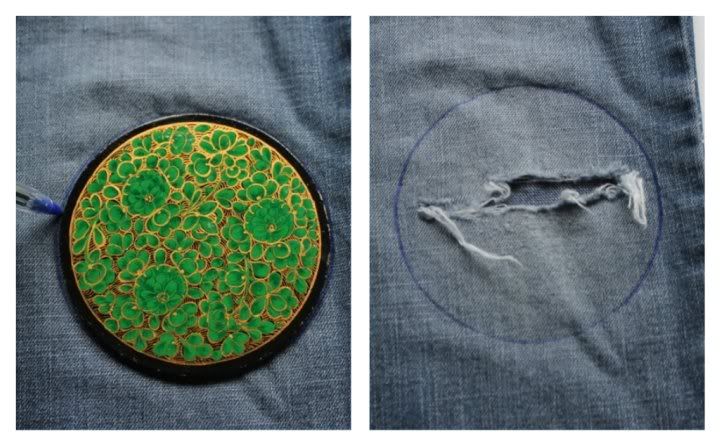
Step 2: Cut out a shape around the torn hole.
Photobucket

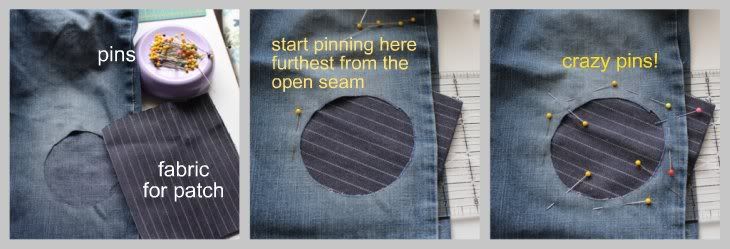
Step 3: Slide your piece of patch fabric inside the leg and pin in place.
Photobucket

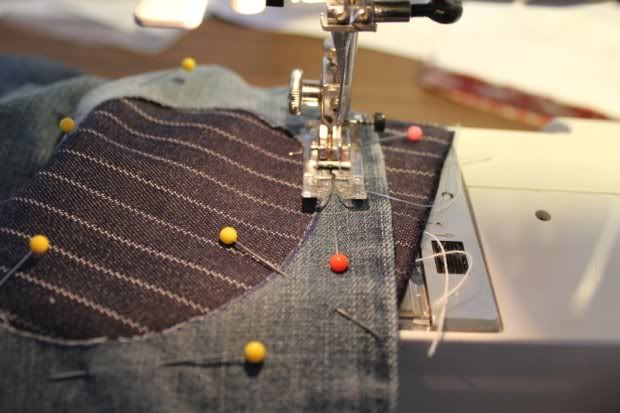
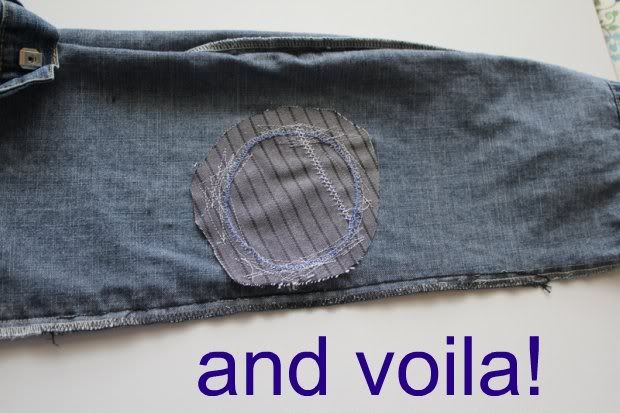
Step 4: Sew fabric in place. I also sewed some decorative stitches around the patch to make it look cool. I realize that the words decorative and cool are relative here.
Photobucket

Photobucket

IMG_4085

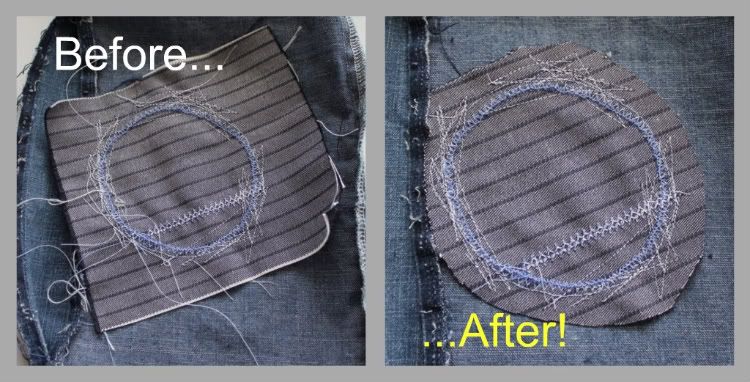
Step 5: Clean up the back. Trim your patch and threads.
Photobucket

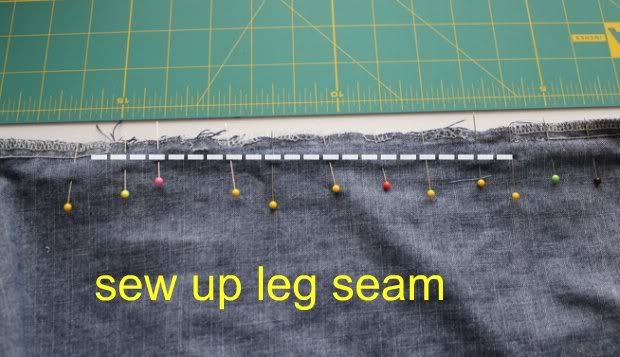
Step 6: Sew up side seam.
Photobucket

Photobucket

IMG_4191

See, cool! Told-ya.


Tip Junkie handmade projects

Wednesday, March 9, 2011

Celebrating the Boy

I know I have been absent. I told you about the Celebrate the Boy month over at Made and Made by Rae. Then I vanish. (Took care of sick kids all week.)

Then, what THE...I post Strawberry Shortcake cupcakes?!

I know. But what you haven't seen are all the cuuuute pants I have been sewing for my youngest BOY behind the scenes. I got inspired from the tutorial on Made to make your own pants pattern (here). Then my friend (you know who you are) asked me to sew some pillow cases from a sheet that she bought my mistake. These were BOY pillow cases. Then you know what she did when I gave her the leftover scraps still very useful pieces of sheet? She said she would throw them away. gasp! I know! I couldn't let her do that. So I took them back and made some comfy pants for my little BOY from the rest of that sheet.

Sewed up two more pairs of pull on jeans for my littlest BOY. Pics later.

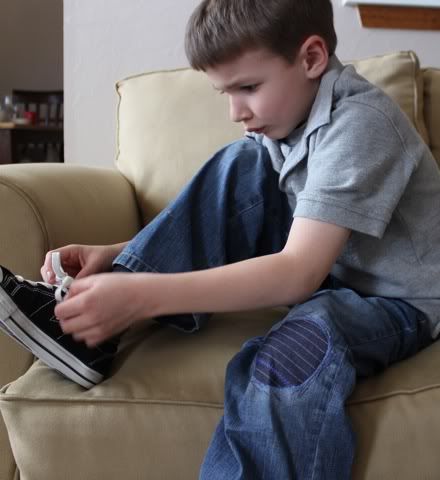
Patched up jeans that my oldest BOY tore the knees out of. And these are cool repairs, people. Not those crappy-looking iron-on rounded corner rectangles our parents used. Cool ones! Tutorial on that coming soon...

Made an shirt and tie for my oldest BOY that could possibly be worn on Easter. It is not super dressy. Just comfy, 6-yr old dressy. From thrift store goods, too.

Will make a pair of pants for my youngest BOY from the rest of that thrifted dress shirt.

And I have one more idea on the table. My friend (you know the one who was going to throw away the sheet) and I saw this tutorial on Celebrate the Boy from Kojo Designs. It is pants from scrap t-shirts. We are so going to make them. My friend has a trash bag of shirts for this project. I think she is going to clothe all the pant-less BOYS in the city!

Tuesday, March 8, 2011

Cupcakes with Homemade Buttercream (recipe)

IMG_4218
Everyone has their own preference when it comes to frosting. Some like the whippy kind, some like the sugary kind...and I love, love, love buttercream. Sweet, melty, buttery, lick-my-lips-for-like-five-minutes-after-I-eat-it buttercream frosting.


My daughter just had a birthday and wanted me to bring cupcakes to her class. What!? Did I just hear an opportunity to make (and eat) buttercream frosting? Yipee! Yahoo!

IMG_4220

So baked cupcakes. And I appeased her by making little cardstock cupcake wrappers with her favorite gal, Strawberry Shortcake, on them. Then she got sick. Real sick. Like vomitty sick. All three of my kids got vomitty sick. During her birthday. It was a long week, my friends. Now, luckily, I hadn't frosted the cupcakes I had just baked them. So I put them in the freezer until everyone was better.

So today is the big day for cupcakes at school. I just popped those babies right out of the freezer. Thawed for a bit. And then, finally, whipped up some oh so yummo buttercream. Ok are you just dying to know the recipe. It's not a secret. I just doctored up a recipe so that I would know it from memory.

IMG_4219
The world's best buttercream frosting recipe:
Ingredients:
2 sticks of butter (That's right 2!!!!), softened at room temp
1tsp vanilla
1lb box of powdered sugar (sifted, if you can)
2Tbsp half and half

1. In a mixer, cream butter. Then add vanilla. Mix together.
2. Add sifted sugar in four increments. Mixing well and scraping bowl after each addition.
3. Add 2 tablespoons of half and half. Mix. Scrape. Mix. Done.

Note: As if I am in any position to lecture on patience! Ha! But remember, some things take time and are worth waiting for. Please promise that you will properly soften your butter. It should be soft like lotion. Um, that's gross. I could just say, the butter should be the consistency of frosting, duh.

And...
IMG_4209
Cupcake wrappers were very easy. Next time I make some, I will post on my blog so that you can download them. I just didn't want to post one with a licensed character on it.




Share this

LinkWithin

Related Posts Plugin for WordPress, Blogger...