Monday, September 26, 2011

{Tutorial} Stemmed Fabric Lotus Flowers


On Friday, I showcased my bouquet of handmade fabric lotus flowers. I explained why I made them- for my dear friend. She just opened up her own yoga studio and when I saw a picture of the sign that is hanging outside of her new digs I was inspired (to say the least)!!

I was inspired to create these.  Because I didn't know how to send real lotus flowers!
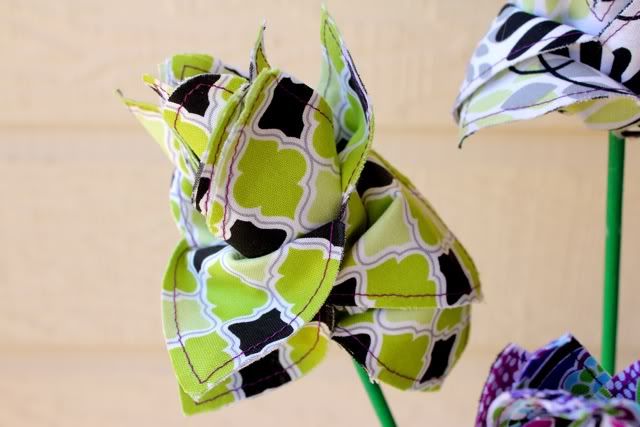
Of course, I combed the internet looking for a lotus flower tutorial...and maybe I don't know how to work the internet, but I couldn't find what I was looking for. I found lots of origami ideas, but I didn't want to use paper. I am a fabric girl. So, after making a few iterations of my idea, I opted for the version that was fast-enough that I would actually finish the project but pretty enough that it still takes some time to create a whole dozen.
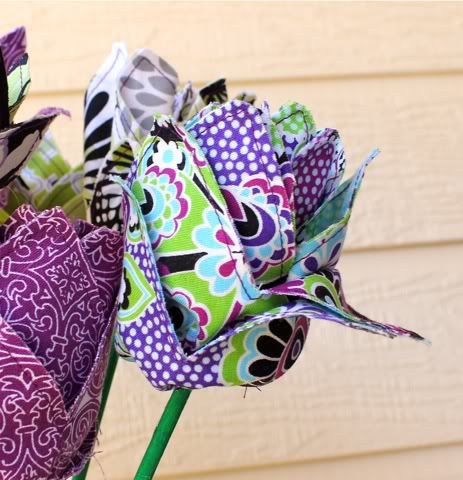


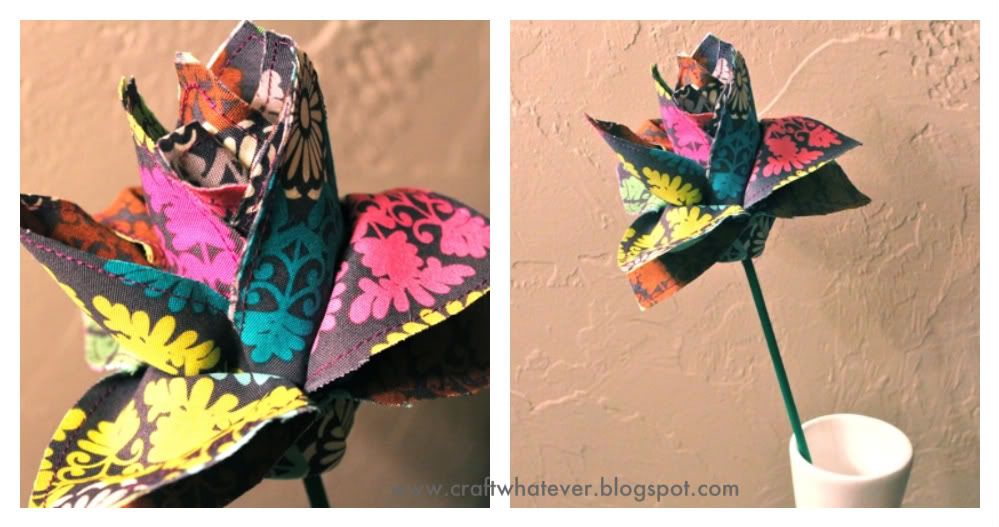
I wanted them to look like lotus flowers.


They also sort of look like tulips.


Either way, I think they are just beautiful!


This is a SUPER gift to make for someone- a handmade bouquet of flowers!


How to make a stemmed flower to give or keep:

Supplies Needed for One Flower:
Strip of fabric, 8" x width(44")
Template (link at bottom of post)
Stem or stick (I found these green sticks in floral dept of craft store)
Hot Glue
Contrasting thread, scissors, chalk or fabric pen
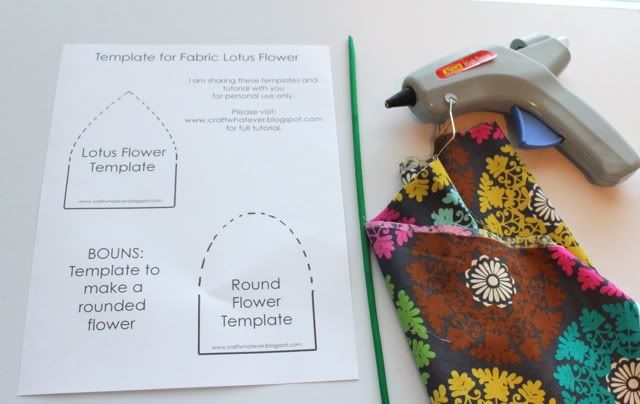
1. Press 8" strip in half, wrong sides together. Lay out the fabric so the fold is the "bottom" and the raw edges are the "top".  And PRINT out this template:

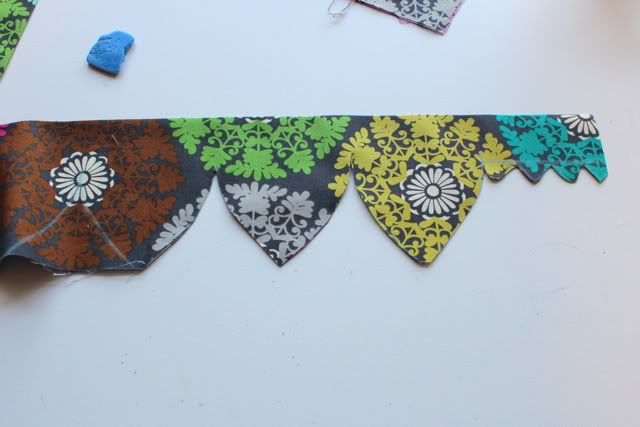
2. Trace template on fabric. Place template at one end and start tracing the petals. The base of the petal is along the fold and the point of the petal is at the raw edges.  Trace along the dotted line of the template.
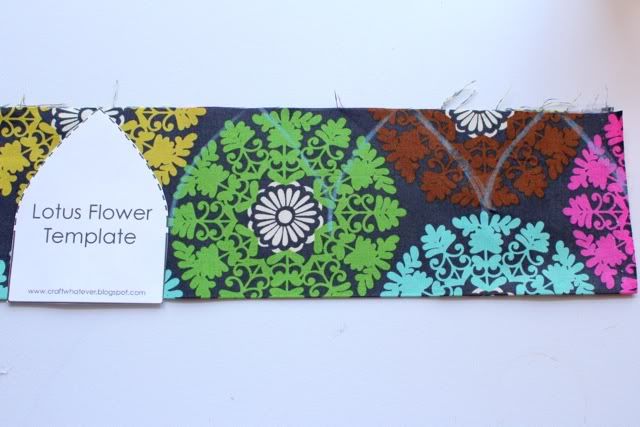
Keep tracing the petals until you reach the other end. There are no spaces between the petals.

When you only have room for one more petal and then some inches left, chalk a rectangle "tail" from the last petal to the edge of the fabric.  I drew a line then some wavies.
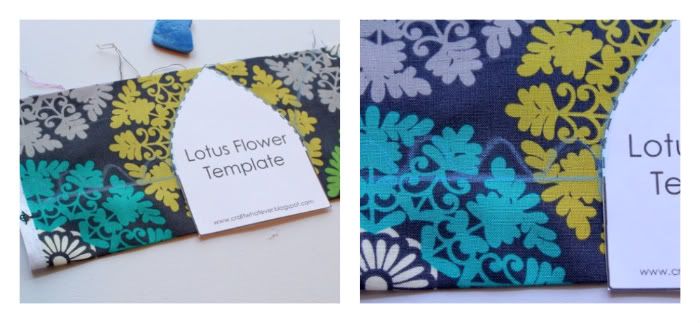
3. Cut out.  And please, cut off the white selvage. I think it is easier to cut from this side.


This reminded me that I need my scissors sharpened.  Last month I ran/cut over a pin!
TIP:  If you are making more than one flower, you can place a blank strip of fabric under the one you marked and cut them both out at the same time.

4. Sew together along the raw edge of the petals. I used a contrasting thread color.

5. Sew a gathering stitch along the bottom (folded side).
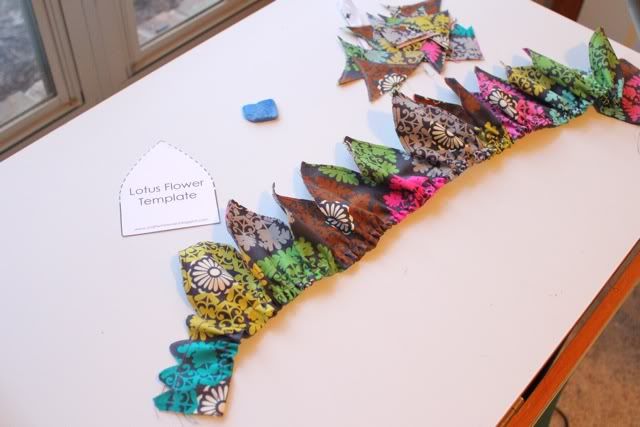
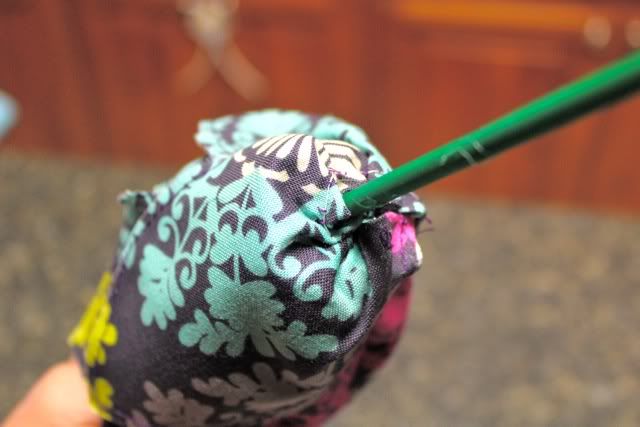
6. Start gluing the fabric to the stick. Start with the short tail part. Roll and glue about every half inch or so.  I use a lot of glue.
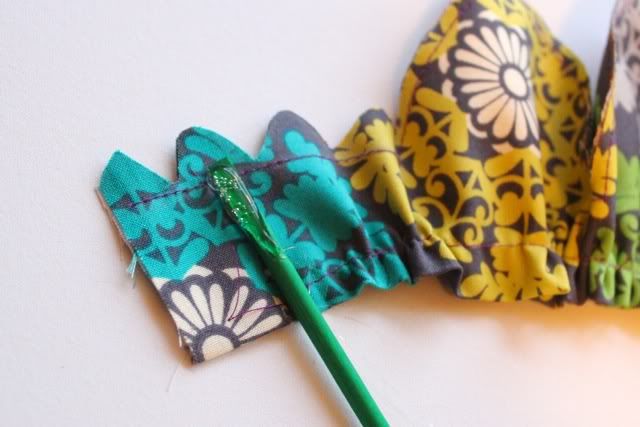
When it is almost finished, I pinched the base in a tiny bit as the glue cooled off.
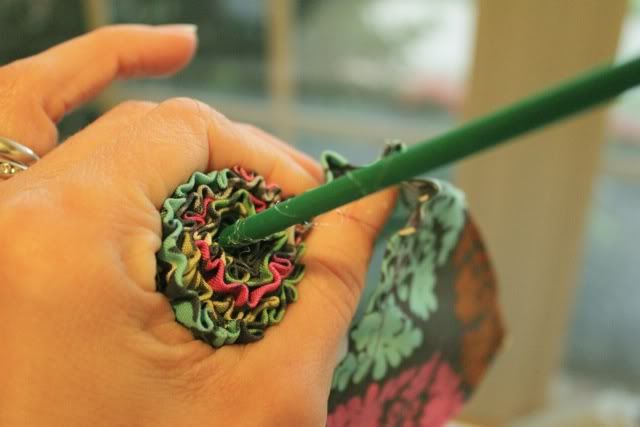
When there is a short tail remaining, use this tail to cover the messy flower bottom.


Just roll/glue until it is neat.  After this dried, I went back and did a second round of gluing to fix anything that was sticking out. It might feel wobbly now, but it will stiffen up after it is completely dry.
TIP: I do a practice roll first, before gluing, to make sure the fabric is gathered enough/not too much and my flower will look the way I want it.

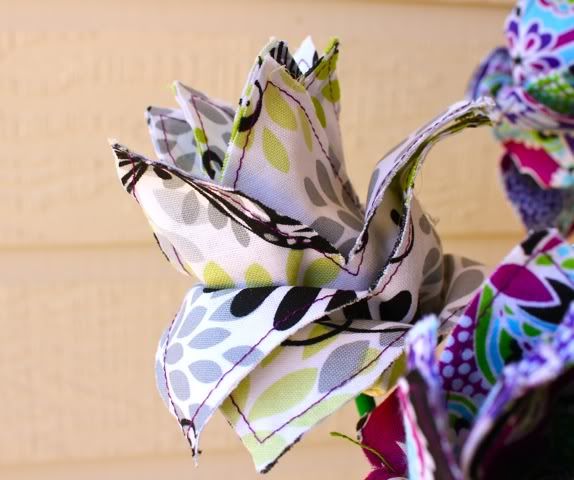
And this is what I get when I wait until Sunday night to make these...dark pictures.  Sorry.
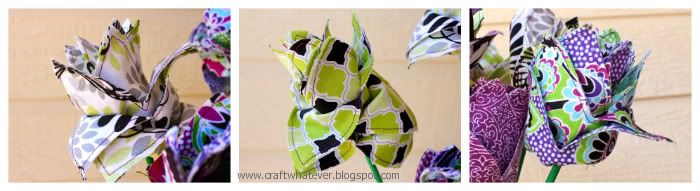
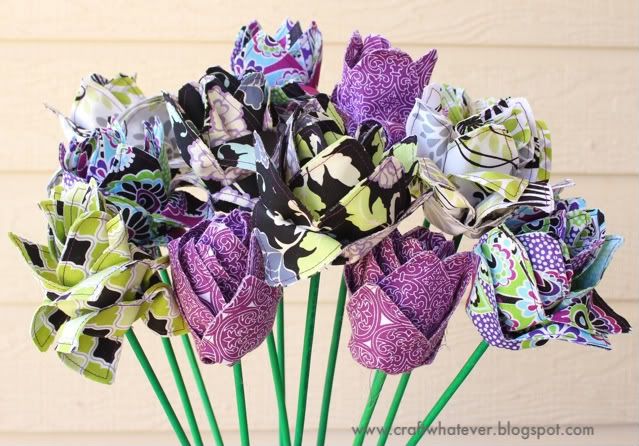
Just look at the nice sunny ones I made a couple weeks ago instead!

Linking Here:
NightOwlCraftingSomewhat SimplePhotobucketA Crafty Soiree Transformation ThursdayThriftyThurs Thrifty Thursday Week 3436th AvenueCatch a Glimpse Button Chic on a Shoestring Decorating Lovely Crafty HomeThe Shabby NestFantabulous Friday!

Friday, September 23, 2011

Lotus Flowers for my Beautiful Friend

Last week I mentioned a new craft I was working on, well, ta-da!

Stemmed Fabric Lotus Flowers.
Because I discovered it is not that easy to buy a real lotus flower.  
One of my dearest friends just opened up her very own yoga studio.  Six years ago I met her, and began taking yoga classes out of her home.  And I am so incredibly proud of her!  I wanted to send her flowers for the occasion.  I really wanted to send her lotus flowers.  You know, the real kind.

Then I googled it and found out that it would be a bit complicated to do that.  I went to bed that night with an idea of making a lotus flower.  The next day when I went to buy fabric, I loved so many that I made a dozen lotus flowers!

I just love how each one takes a different shape.  


I will post a tutorial next week if you want to make these...

Wednesday, September 21, 2011

Organizing Paper Clutter. I Made a Binder.

Here's the skinny on the Household Binder: GREAT, great, great tool to stay organized!!  Until now, I thought these binders were mostly used to help you keep a clean house.  But, helloooo, you can CUSTOMIZE it to your own needs!  See how I did that...
I have seen many, many, many of these "Household Management Binders" over the past few years of reading mom and craft blogs.  At Organized Home, they are called Household Notebooks and you should hop over there to get the whats, whys, and hows about making one!  They also have a ton of free printable pages.

Anyhoo...Seems that these binders are the thing to have in your house. Preferably the kitchen. And while I have thought about making them in the past, I just never thought they addressed my needs. A typical binder is divided into sections such as: babysitter info (don't have a sitter and don't go anywhere), budget (I use Quicken for that), emergency phone numbers (um, iPhone), menu planning and grocery lists (already have a system for those), to do lists (I already make a zillion of those!), and then several sections for cleaning (crickets, crickets).

I have this calendar in the back cover.


I needed a solution to the my piles of papers in the kitchen (and my bedroom dresser, but I don't want to get ahead of myself!).  See, I didn't need help with a budget, or emergency contact numbers, or a cleaning schedule.


This is me:   
I get papers from school and I never know where to put them. So I make a pile for school papers. Then I get something in the mail that I need to keep, and it goes in another pile. Coupons get stuck in a drawer, then I forget about them. Important papers go on the fridge. I have *lots* of important papers.  One pile might be things to get done today. Another pile is for things that can wait 'til next week. So, piles all over my kitchen. Then my husband comes home and mushes all my piles into one big- but neat- pile. He thinks he is helping, but he just messed up my system! Which means, digging through the really big pile to find everything and re-sorting it all later.

I have tried folders. But too messy.

OK, that's all I have tried. : )

So these home management binders really got me thinking...I could apply this same concept to my paper mess!  Check. It:

Here are my categories:


I Bought Supplies.
1.5" Binder
2 packs of pocket dividers
document protectors
3-ring pocket thing that I have not really used for anything yet.
After using this book for a couple of weeks, I also need a zipper pouch for my coupons.


I Selected Categories.
My binder might be the only one without a section for cleaning- HA!
I started by jotting down the categories I thought I might use. I set up my binder and followed these preliminary categories for a few weeks before committing to a set of categories that I know will work for me. I committed to them when I busted out the label maker and printed the labels.


This binder (just Up&Up brand) is very cool, because it has two pockets in the front and back covers.
~~ I use the front cover to stow little "now" things- receipts, to-do lists, etc.
~~ The back cover holds things that need no attention- just need filed.  (Mail, paid bills, or receipts) They are in the back and I will never look at them until I go to empty the pockets.

And the Binder Pocket (by Up&Up) might be useful for the coupons

Notice, no cleaning schedule???
Not that I don't need to clean. Ha! I need to clean. But seriously, I am not going to, let's say, wipe down my doors every Thursday, or dust on Mondays. Heck, I can't even commit to cleaning the kitchen floor on a regular basis. My method is, when it needs cleaned, I clean it. I tend to clean the kids bathroom in parts. One day I get the toilet, when I notice that someone peed on the seat. Next day the sink because it is covered in spit. And when I notice the bathtub has a ring of dirt around it, I clean it real quick before I give the kids a bath. See? It gets done. Just not on a set schedule.

So that's my new system. I have always been pretty good about going through the mail and immediately sorting the "recycle" from the "pay/keep". I also flip through catalogs and toss them into the recycle right then or same day. I just needed a system (and not piles everywhere) of the important papers.

I feel so organized now. I said "feel". No, I really am better organized now : )

Linking here:
NightOwlCraftingLet Birds FlySomewhat SimplePhotobucketA Crafty SoireeTransformation ThursdayThriftyThurs Thrifty Thursday Week 3436th AvenueCatch a Glimpse Button

Share this

LinkWithin

Related Posts Plugin for WordPress, Blogger...