On Friday, I showcased my bouquet of handmade fabric lotus flowers. I explained why I made them- for my dear friend. She just opened up her own yoga studio and when I saw a picture of the sign that is hanging outside of her new digs I was inspired (to say the least)!!
I was inspired to create these. Because I didn't know how to send real lotus flowers!
Of course, I combed the internet looking for a lotus flower tutorial...and maybe I don't know how to work the internet, but I couldn't find what I was looking for. I found lots of origami ideas, but I didn't want to use paper. I am a fabric girl. So, after making a few iterations of my idea, I opted for the version that was fast-enough that I would actually finish the project but pretty enough that it still takes some time to create a whole dozen.
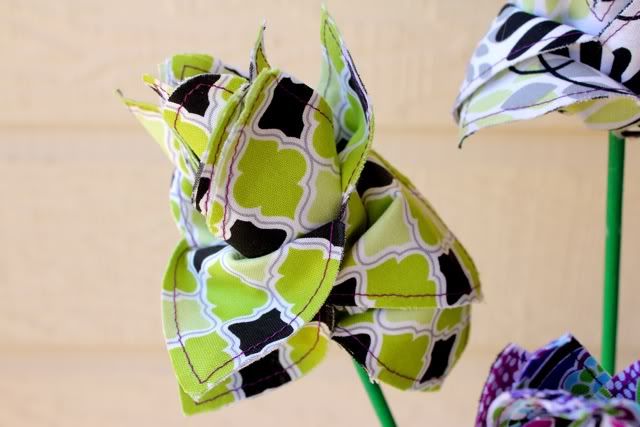
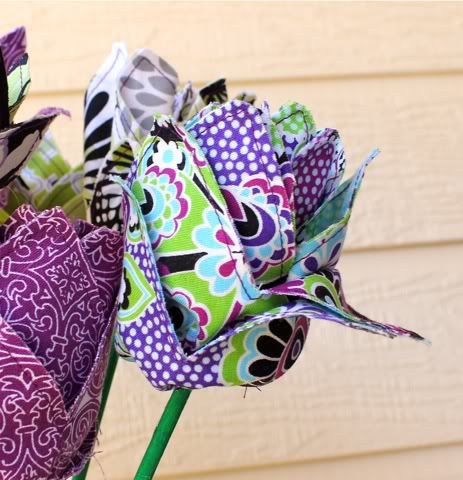
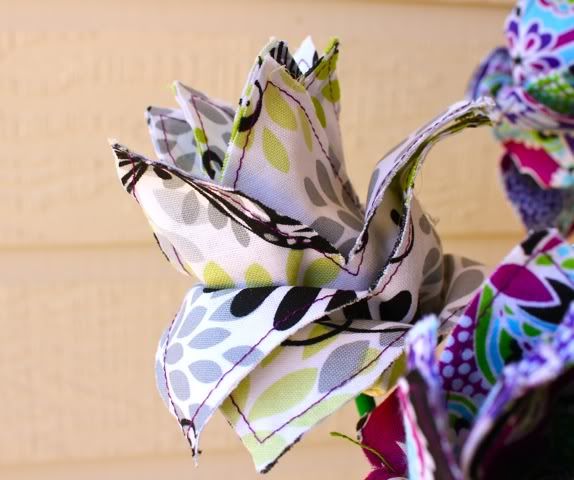
I wanted them to look like lotus flowers.
They also sort of look like tulips.
Either way, I think they are just beautiful!
This is a SUPER gift to make for someone- a handmade bouquet of flowers!
How to make a stemmed flower to give or keep:
Supplies Needed for One Flower:
Strip of fabric, 8" x width(44")
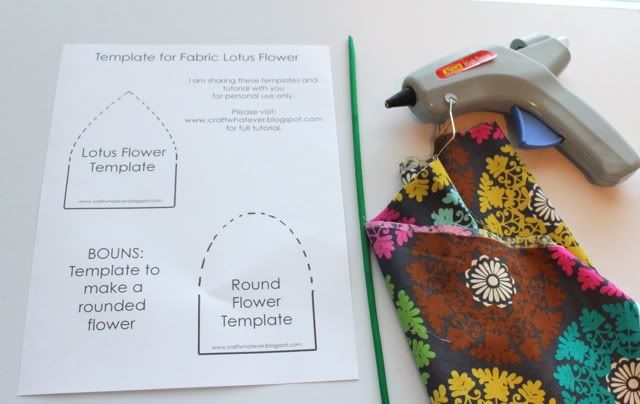
Template (link at bottom of post)
Stem or stick (I found these green sticks in floral dept of craft store)
Hot Glue
Contrasting thread, scissors, chalk or fabric pen
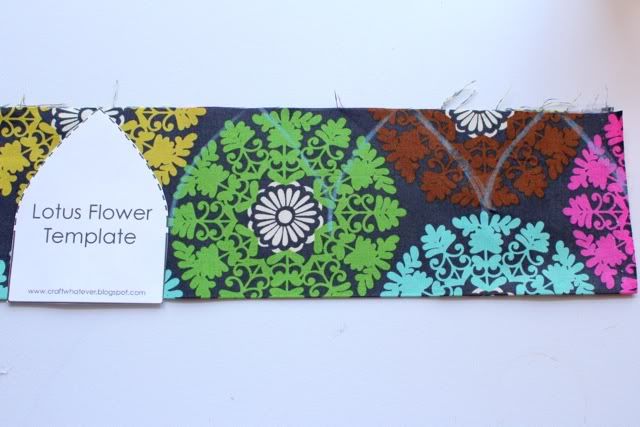
1. Press 8" strip in half, wrong sides together. Lay out the fabric so the fold is the "bottom" and the raw edges are the "top". And PRINT out this template:
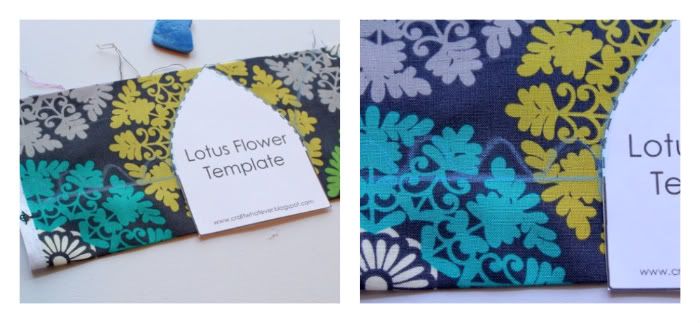
2. Trace template on fabric. Place template at one end and start tracing the petals. The base of the petal is along the fold and the point of the petal is at the raw edges. Trace along the dotted line of the template.
Keep tracing the petals until you reach the other end. There are no spaces between the petals.
When you only have room for one more petal and then some inches left, chalk a rectangle "tail" from the last petal to the edge of the fabric. I drew a line then some wavies.
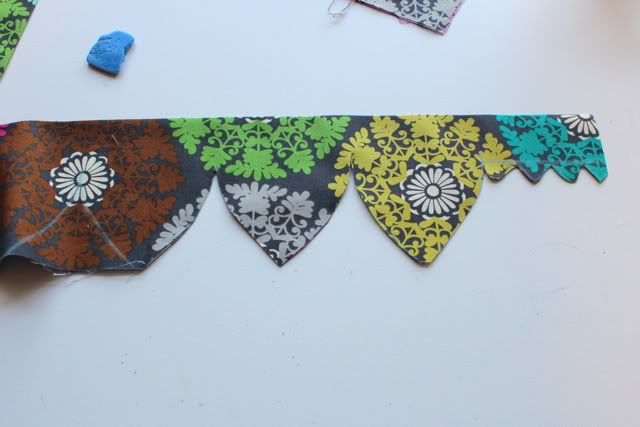
3. Cut out. And please, cut off the white selvage. I think it is easier to cut from this side.
This reminded me that I need my scissors sharpened. Last month I ran/cut over a pin!
TIP: If you are making more than one flower, you can place a blank strip of fabric under the one you marked and cut them both out at the same time.
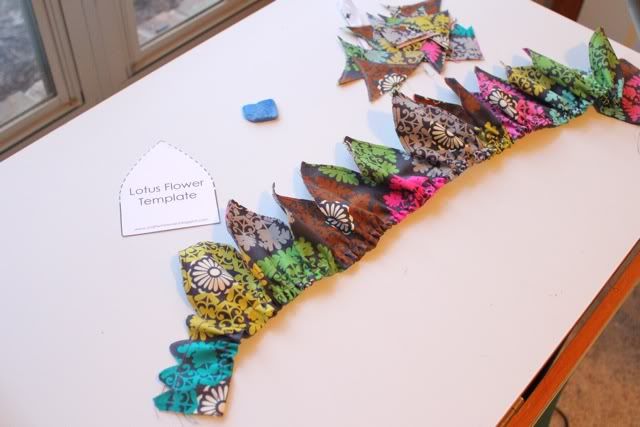
4. Sew together along the raw edge of the petals. I used a contrasting thread color.
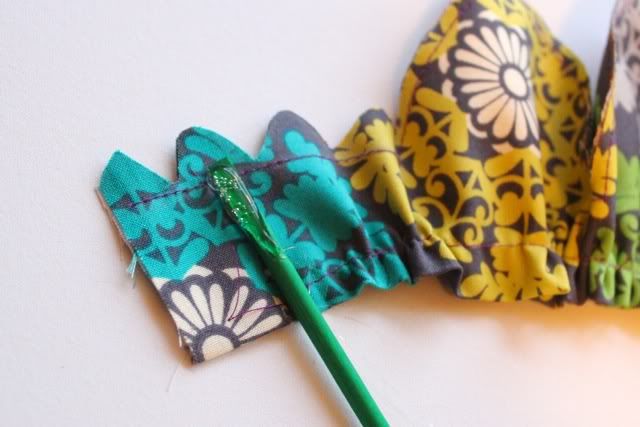
5. Sew a gathering stitch along the bottom (folded side).
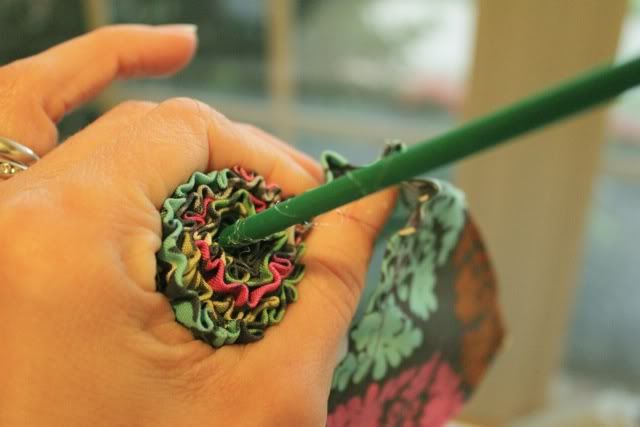
6. Start gluing the fabric to the stick. Start with the short tail part. Roll and glue about every half inch or so. I use a lot of glue.
When it is almost finished, I pinched the base in a tiny bit as the glue cooled off.
When there is a short tail remaining, use this tail to cover the messy flower bottom.
 | 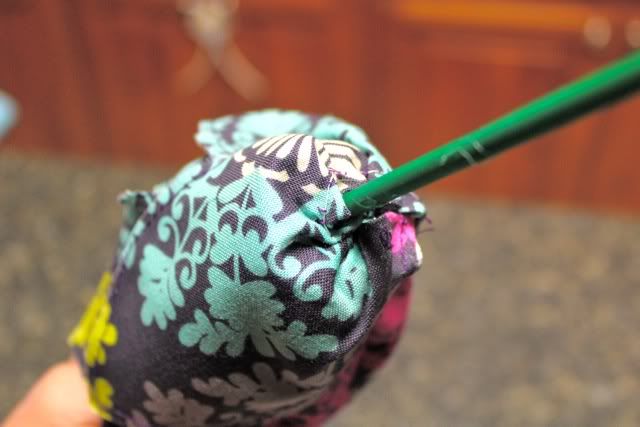 |
TIP: I do a practice roll first, before gluing, to make sure the fabric is gathered enough/not too much and my flower will look the way I want it.
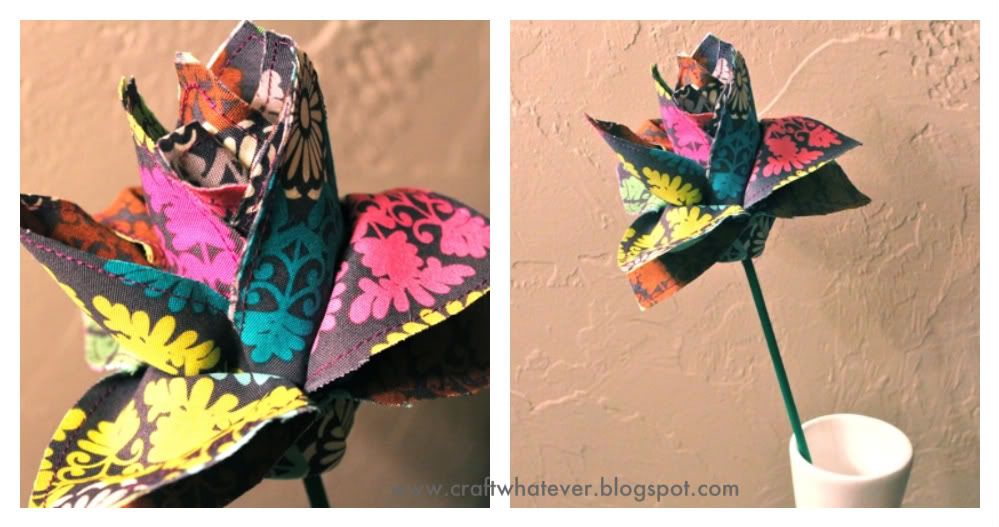
And this is what I get when I wait until Sunday night to make these...dark pictures. Sorry.
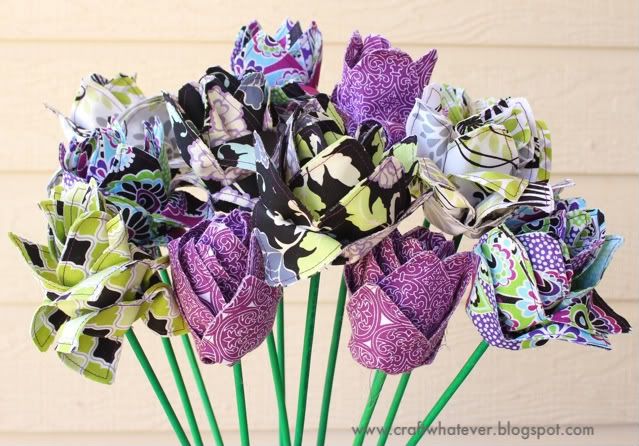
Just look at the nice sunny ones I made a couple weeks ago instead!
Linking Here:



They look beautiful, Kate! Thank you so much for sharing the pattern, I know that took a lot of hard work!
ReplyDeleteI wanted to let you know, also, that I posted about Stella today!
Hi - those are lovely!
ReplyDeleteAm your NEWEST FOLLOWER via the blog hop - nice to meet you!
Truly wonderful - lots of patience and a beautiful result!
Happy weekend-
Linda
beachside cottage
Love this idea!! Your fabric selection is great!!
ReplyDeleteI love the flowers and the combination of fabrics!
ReplyDeleteLove this idea, love your tutorial, love your fabric selections! I'm always sorry when my real flowers reach the end of the road, so these are perfect. Thanks for sharing!
ReplyDeleteTHESE ARE BEAUTIFUL! I LOVE THEM AND CAN'T WAIT TO MAKE THEM SOON. PINNING THIS IDEA NOW!
ReplyDeleteThis is really cute... refreshing not to see something made out of felt. I'm gonna go through my stash and make several for gifts. Thanks.
ReplyDeleteWould love it if you would link this up to our Rockin' link party going on now at RoCa and Company. Here is the link: http://rocaandcompany.blogspot.com/2011/09/you-rock-3.html . Come and show off what you got. Hope to see you there...
Remember...YOU ROCK!!
Carmen @
RoCa and Company
www.rocaandcompany.blogspot.com
This is beautiful! I'd love for you to join my brand new linky party! http://www.coffeeandtheirkisses.com/2011/10/stitch-n-niche-saturdays-linky-party-1.html
ReplyDeleteThose are just too cute! newest follower, Karima
ReplyDeleteSo cute! i will have it, thanks for sharing.
ReplyDeleteHoly gorgeous!!! Amazing!
ReplyDeleteFlowers give beauty and joy to any occasion like birthdays,weddings and anniversaries.Good to know that these items are already available online for orders.And they provide the best possible services for customers that will be interested in their products.
ReplyDeleteGifts to Philippines & Gifts for Philippines