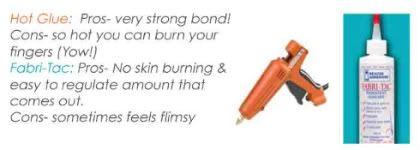
Tip #1: Know your glue!
Your best bets are hot glue or fabric glue, such as Fabri-Tac.
Know how long it takes to dry/stick, how fast it comes out, strength, etc.
Tip #2: Practice your twist and roll.
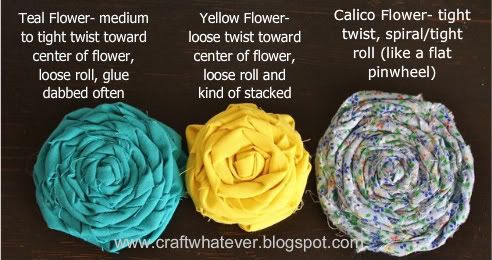
I like to "warm-up" before I start making these flowers. Each fabric type and size will behave differently. The way you twist will determine the look of the flower. By practicing, you can get an idea of what your flower is going to look like before you glue.
See what I mean...
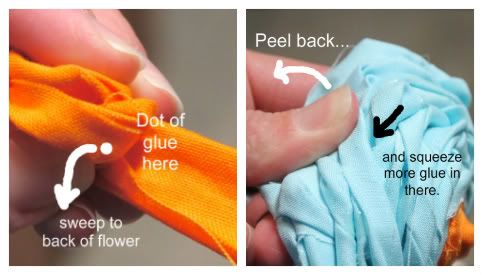
Tip #5: When you're done go back and glue some more.
I like to "warm-up" before I start making these flowers. Each fabric type and size will behave differently. The way you twist will determine the look of the flower. By practicing, you can get an idea of what your flower is going to look like before you glue.
See what I mean...

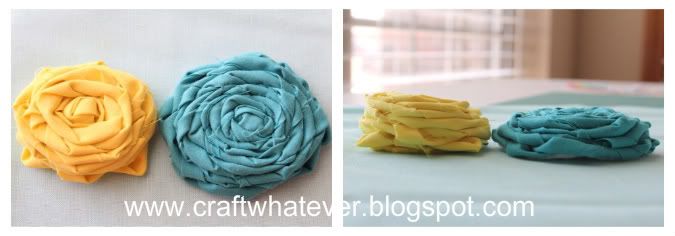
Same amount of fabric...different rolling methods.

Tip #3: Hide your glue = Glue from the back.
Use tiny dabs of glue and a sweeping motion toward the back of your flower. This keeps your glue strings in the back. And dot just enough to get your fabric to stay as your build your flower. You will reinforce it when you are done.

Tip #4: For the felt backing, glue in one spot first.
Position your felt circle on the back where you want it to be glued. Since these flowers are not perfectly circular, your felt should mimic the shape of your flower. Hold the felt in place with your thumb and glue one side down with a dot of hot glue. Now your felt circle doesn't shift out of place and the messy back is covered. Then when that is dry, glue-like-crazy the rest. Also, instead of gluing to felt as I go, I start with a knot and roll my fabric around the knot until I get the flower going. Then I cut the "tail" off my knot when it gets in my way.
Peel the layers (like you are flipping book pages) and find your weak spots that need a dab of glue. When you find a spot that needs glue, peel it open so you can get your glue nozzle way in there. Squeeze it in and get out of there with a clean sweep.
I prefer to use the Fabri-Tac as I roll then I follow up with the hot glue for the final gluing and back. Though I don't always do that. The only reason is that I am impatient and I hate burning my fingers : )
Leave me a comment...was this helpful? Did I miss something?
I am addicted to making these, you know. So the faster I can make them, the better !
Happy crafting!
--Kate


This is very helpful! I love the look of these flowers. Would you be interested in doing a guest post on my blog? email at kraftykashATyahooDOTcom
ReplyDeleteCraft Whatever! You should do it! It's a great blog!
ReplyDeleteGreat tips, thanks! I have yet to make one of these rolled fabric flowers but it is definitely on my to do list!
ReplyDeletewww.thegunnysack.com
This is a great tutorial! I love the photos. I'm visiting through TipJunkie. I'd love for you to share this on my Share the Wealth Wednesday Link Party at www.laughloveandcraft.com
ReplyDeleteI heart comments! Thanks to you all for taking time to chat back at me!
ReplyDelete@meanmaching- yes I said I would
@KraftyKash- yes I will, and I sent you an email
@gunnysack- if you do try out these flowers, you might get addicted! They take just a few minutes and you don't even have to cut the fabric straight!
@ LrSchwtz- I will, I will. Going there now!
OK, LrSchwtz- scratch that! Linky is closed. But I will be there next Wed!
ReplyDeleteAnd you have shared some great money saving tips on your blog. I especially love the FREE Coffee at Starbucks.
http://www.laughloveandcraft.com/2011/04/free-tea-or-coffee-at-starbucks-on.html
I wonder if there is a size restriction on the mug? Hmmm.