Pages

Wednesday, February 16, 2011

Boys Boys Boys!

THIS is what I am talking about:

made by rae

made

Go ahead, click on them.

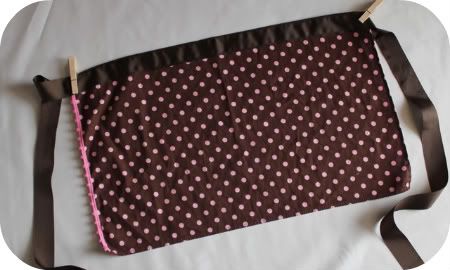
Do you have boys? And are irked at how the "girl stuff" always looks so.much.better than the boys'? I find (because I have two boys and a girl) that I get lost in the girls department of a store. While the boys' department is just a varying arrangement of stripes and dogs. Pants are brown or blue. Jeans. And honestly, my 6 yr old boy couldn't care about what he wears. (You know, red shirt matches red pants kind of thing.) So this month, is Celebrate the Boy at Made and Made by Rae. If you don't know these bloggers, they are ones to aspire to be! These gals could sew circles around me! For the next month they are showcasing all.kinds.of.boy.things- to make, to wear, to play with, to buy, to win. I didn't realize how excited I was for this year's Celebrate the Boy! Last year they teamed up and you can even see all the tutorials on their blogs from last year. It might be boy overload month. But I don't care. I am going to be reading those blogs twice a day. Yes.

Monday, February 14, 2011

Happy Valentine's Day!

Today I linked up (again) at skiptomylou.org.


Did you see the tutorials on Friday and Saturday for the kitchen towel aprons? Did you make one?

I will try and get in the holiday spirit a week or two before the next holiday! That way you actually have time to make a holiday craft. However, you know, the towels can be made from any towels...maybe black and white would be nice!

--Kate

Saturday, February 12, 2011

Kitchen Towel Apron Tutorial (part 2)

Photobucket
Hi again. I will just say, when I am posting a tutorial, I will most likely just get down to business and save the chit chat for another day (when I am out of tutorials and craft ideas- Ha!). So let's get to it.

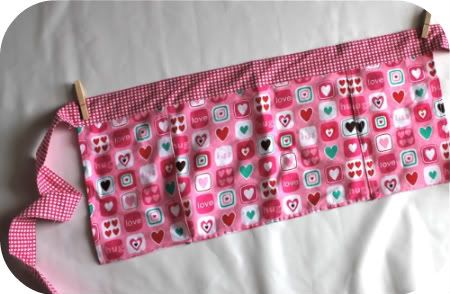
Today, I am going to show you how to make towels #3 and #4. Both of these involve cutting your towel and sewing to back together for the apron front. Yesterday's tutorials were easier because we just turned the towels sideways and left it at that! The main difference between #3 and #4 is the pattern of the towels. For #3, the side panels of the apron are "upside down" (but in a stylish way). This way is quicker than making #4 where the print is all going in the same direction (also stylish, yes).


Photobucket
Tutorial: Apron #3
"Cut Apart Towel (upside down sides) and Ribbon"
Level: Advanced beginner
Time: 1 hr or less


You need one towel and 7 ft of ribbon. Again, using 1 3/8" wide grosgrain ribbon.
Other supplies: scissors, sewing machine, matching thread, pins, fray-check

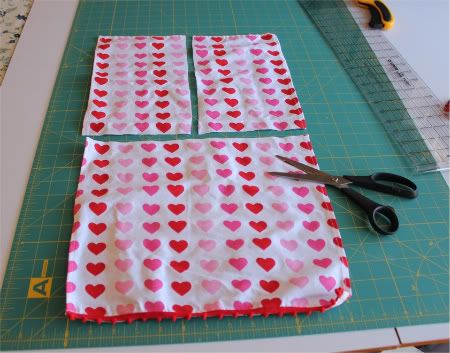
Step 1: Lay your towel out and cut in half, cutting across the width of the towel. Then cut the top piece in half along the length. Here, just look at this picture:

Photobucket


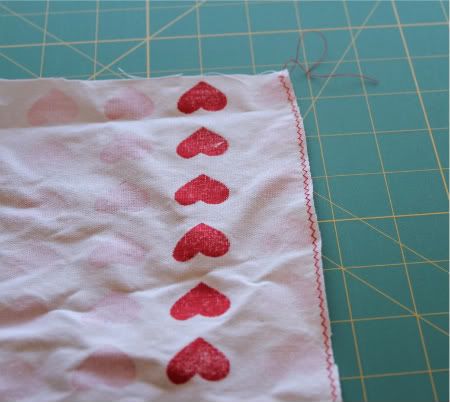
Step 2: Clean up those raw edges.
Sew a zig zag stitch along the raw edges of the two small pieces that you just cut.
Photobucket


Step 3: Sew panels together.
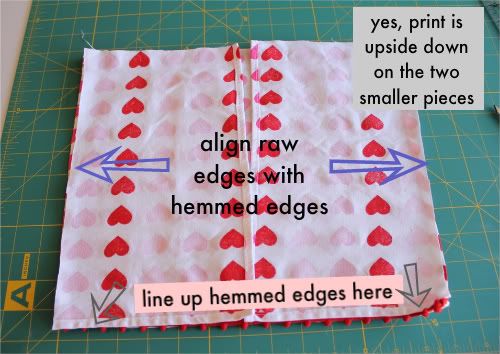
Lay the big piece of towel down, right side up. Lay the small pieces of towel on top of the big piece, right sides together and placing the finished (factory hemmed) sides of the smaller pieces in the center. **This is going to cause your print to be upside down on the smaller pieces. This is what you want to do**

Align the bottom edges- all of which are already hemmed. Now line up the raw edge of the small piece with the hemmed side of the big piece. Pin in place, if you like. Yes, confusing to explain, so look here:
Photobucket

Now sew the small towel panels to the big piece along those pinned edges. Open up the apron panel and iron the whole thing out flat.

Step 4: Hide that raw edge on the top.
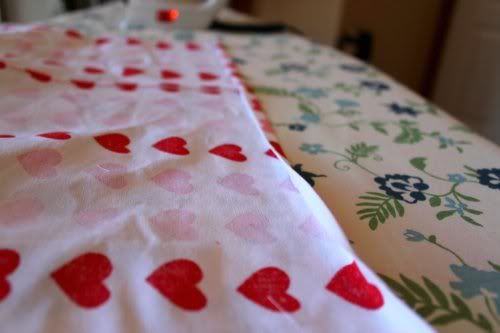
Since we cut this towel it has a messy raw edge along the top. We need to fix that before attaching the ribbon. Start by folding the top over 1/4 inch to the back of the towel. Then fold again, another 1/4 inch. Now the raw edge is hidden in your fold. This is also a good time to even out the apron panel if it is a bit crooked from being a cheap towel : )

Photobucket


Step 5: Attach the sash.
We are using ribbon here so we'll use the same technique in yesterday's post (Apron #1). Basically, find the center of the ribbon and the center of the apron front.
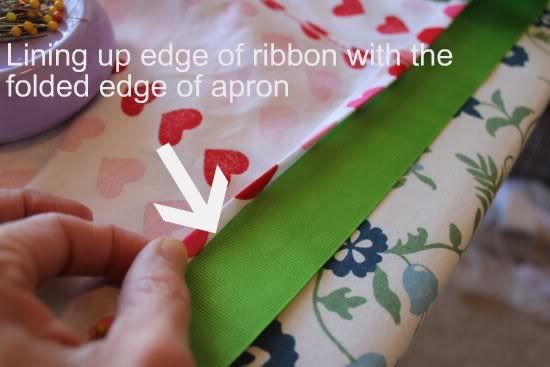
Match up center points-- ribbon is face down and the apron panel is on top of the ribbon, also face down. You want the bottom edge of the ribbon to to be aligned wtih the folded edge of the towel. In Apron #1, we lined up the towel on the top edge of the ribbon. Probably don't want to here because your apron panel is already shorter than the panel in #1...don't want to lose another 1 3/8"...or maybe your towel is bigger than mine.

Photobucket

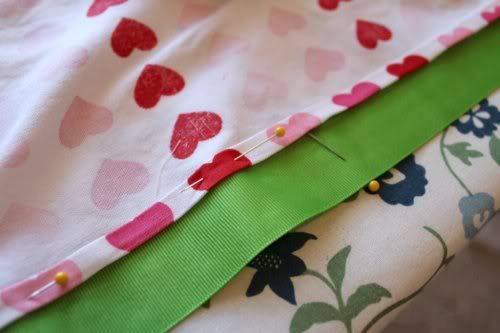
Pin ribbon in place.
Photobucket

At last, sew the ribbon to the towel. I believe that when I did this I sewed from the back to make sure I caught both layers.

Finish the ends of your ribbon using the fray check. Yesterday I showed you how to do this for Apron #1

-------------------------------------------------------------------
Photobucket

Tutorial: Apron #3
"Cut Apart Towel (right sides up) and Fabric Sash"
Level: Advanced beginner
Time: 1 hr or less


You need one towel and 1/2 yard of fabric (all prewashed and ironed).
Other supplies: scissors, sewing machine, matching thread, pins, seam ripper

Step 1: Make the sash. Follow my tutorial for Apron #2, Steps 1-5. I hate to ask you to do this, but if I don't my post will be foolishly long. But the pictures are great and everything is explained.


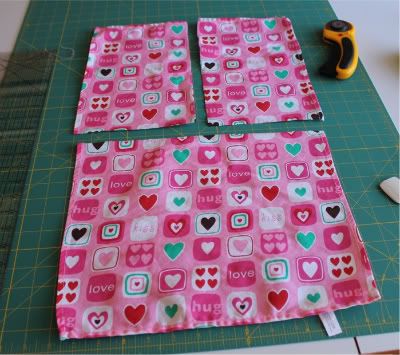
Step 2: Lay your towel out and cut in half, cutting across the width of the towel. Then cut the top piece in half along the length. Here, just look at this picture:
Photobucket

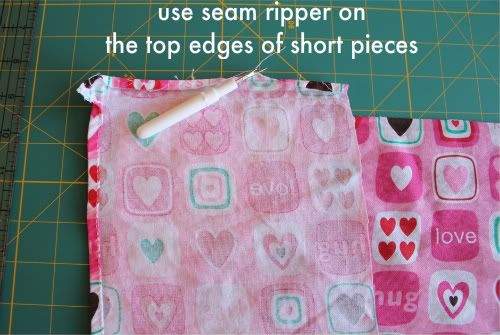
From the picture above, slide the small pieces down and next to the large piece- big piece in the center and a small piece on either side. The small pieces will have their raw cut side edge positioned next to the big piece and their factory sewn edges on the outsides of the layout. Now you see that the bottom edges are raw edges on the small pieces. We will unpick the factory sewn seams along the tops of the short pieces to fix this.

Step 3: Use your seam ripper ( I can hear you cursing me now :) ) to undo the stitching in the top ends of your smaller towel pieces. Now press flat.
Photobucket

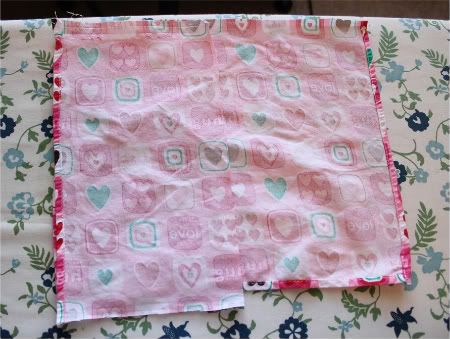
Step 4: Now place the small pieces face down on top of the larger piece- right sides are together. All prints going in the same direction. If you lay it out as you did in Step 1 after you cut, then think of closing the shutters (small pieces) on top of the big center piece. Align the top raw edge or the big piece with the raw edges you just seam ripped (like how I use "seam rip" as a verb?) Should look like this:
Photobucket

With the tops lined up, the bottom edges are not. Perfect. We will hem the short pieces.

Step 5: Hem short pieces.
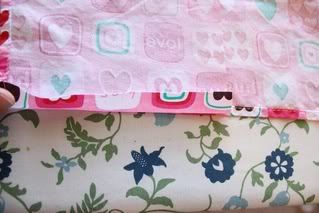
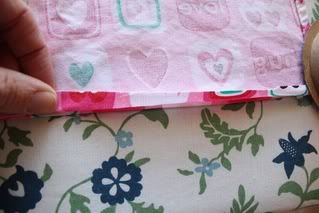
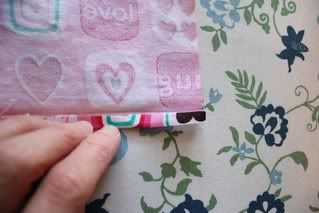
First fold the raw edge of one short piece up and towards the back of the fabric so that the fold is aligned with the factory sewn hem on that big towel piece. Iron down fold.


Then fold the raw edge under again; raw edge to the fold line. Iron this down well.
Photobucket
Now your raw edges should be encased in this folded hem. Pin hem and sew down the fold. Do the same for the other small towel piece.

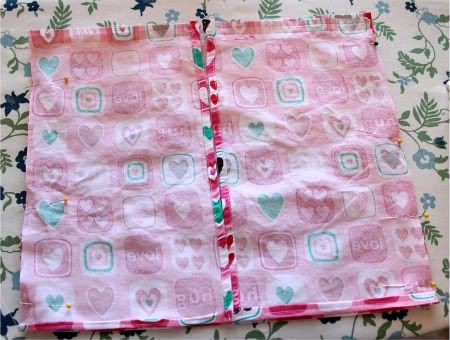
Step 6: Sew the three towel pieces together to make apron front.
Position the small pieces on the big towel piece making sure the bottom hems are even. Pin sides together.
Photobucket

Sew the two seams to get one big happy apron front!

Step 7: Pretty up those seams you just made.
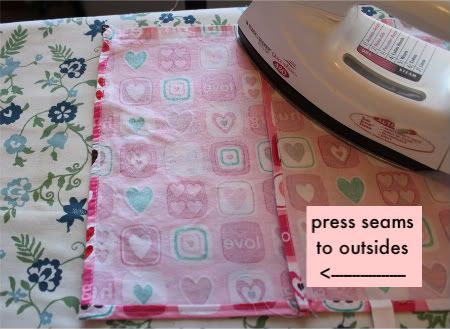
Sorry, I had to add these extra steps in to give the apron a nice finished look. Turn your apron front over, right side down, on your ironing board. Press both seams to the outsides.
Photobucket

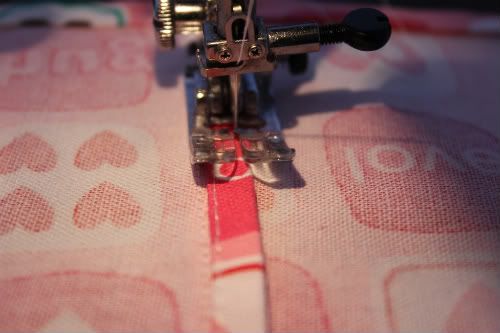
Sew these seams down. Do this by sewing, from the back, right into that factory sewn edge. This is not going to be fun because it is so thick, but this encases the raw edge and looks professional. Do the same for other seam.
Photobucket

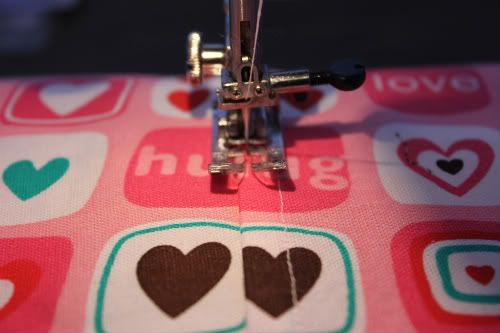
Now turn the apron panel over and make another stitch on the front side down those seams. This is partly to secure the seam and keep it from buckling and partly because I thought a double seam made it look nice!
Photobucket


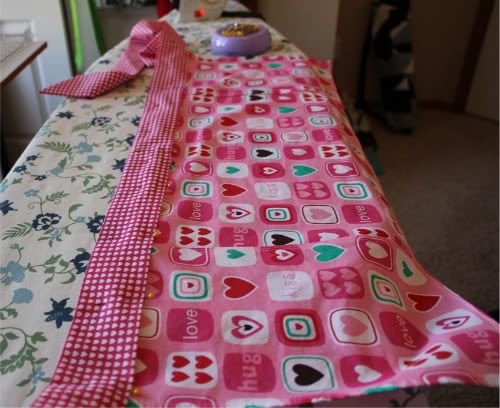
Step 8: Mark the center of your towel and the center of your fabric sash. Match up the center points and place the towel inside the folded fabric. Get the towel all the way up into that center fold. Pin in place.
Photobucket

Step 9: Sew.
You are going to want to start sewing on one of the diagonal ends and just continue along the top of the sash, then along the top edge of the apron (where your towel is inserted). Continue sewing out along the sash on the other side of the apron, down the diagonal end, and back across the entire sash, sewing the towel into place in the process. One continuous mile-long stitch. Backtack. Done.
And yes, I know this picture is of Apron #2 : )
Photobucket

Whew! That was a looooong post. But it is there. Published. For referral purposes only, too. Dry and boring, but informative. Enjoy the tutorials and now you can choose which apron you want to make!

Friday, February 11, 2011

Kitchen Towel Apron Tutorial (part 1)

Here is a tutorial to make a cute apron from a kitchen towel. These towels are from the dollar bins at Target so don't expect perfection. Having said that, what they lack in perfection, they make up for in adorable-ness!

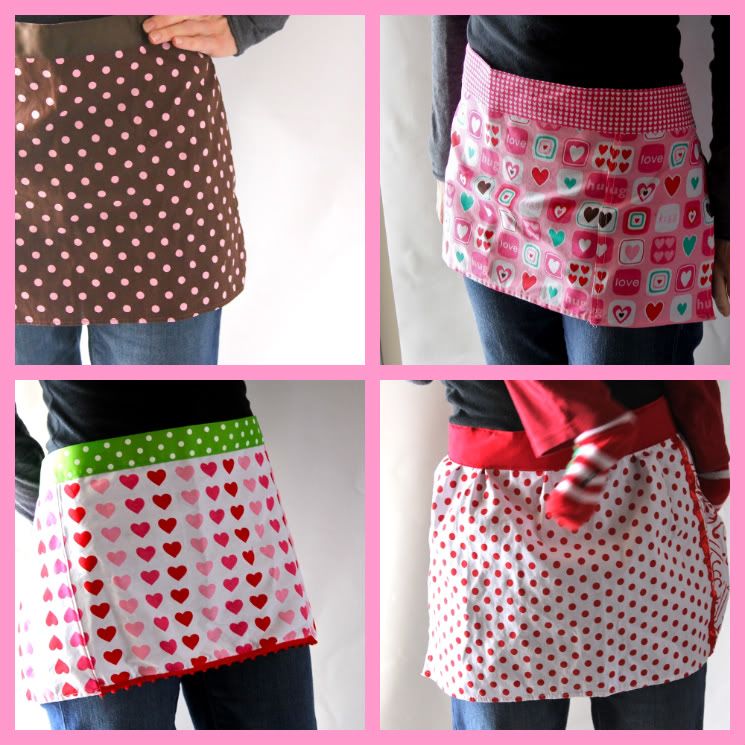
I will discuss how to make four variations of this apron. They vary in the areas of: time to complete, supplies needed, or appearance of end result. You choose yours depending on your constraints. Today, I am posting the tutorial for #1 and #2 below.


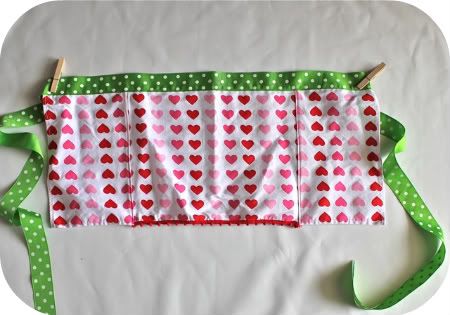
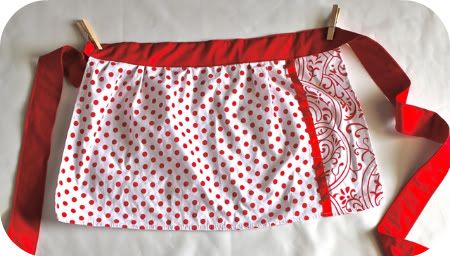
Here is my layout for inspiration:
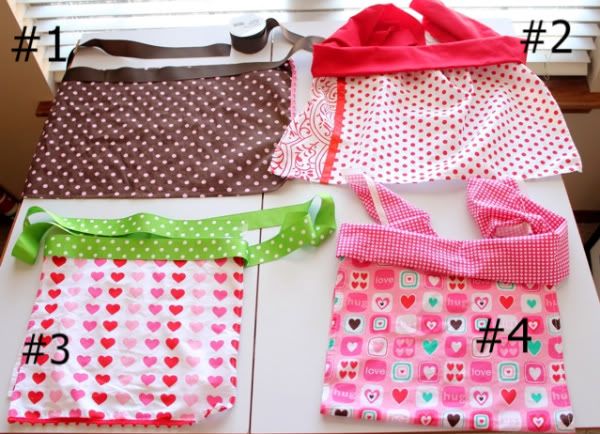
Photobucket


Photobucket
Tutorial: Apron #1
"Sideways Towel and Ribbon"
Level: Easy
Time: 30 min or less


You need one towel and 7 ft of ribbon. I prefer to use grosgrain ribbon; wanted a wide sash so used 1 3/8" wide ribbon.
Other supplies: scissors, sewing machine, matching thread, pins, fray-check

Step 1: Lay your towel out sideways, long side at the top. Find and mark the center point of your towel. Next, find and mark the center point of your ribbon.
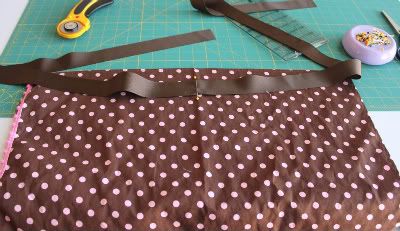
Photobucket


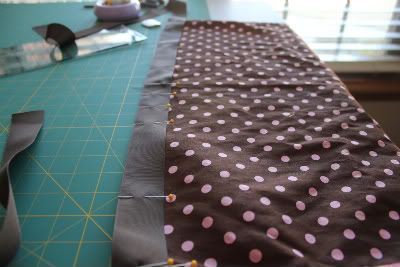
Step 2: Lay the ribbon across the top of the towel matching up the center points.
Photobucket

Pin together, aligning the top edge of the ribbon with the top long edge of the towel.
Photobucket

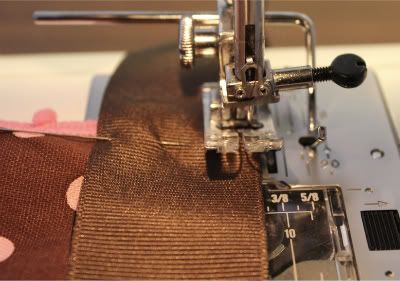
Step 3: Sew in place. Do this by sewing along both edges of the ribbon. Backtack at ends.
Photobucket

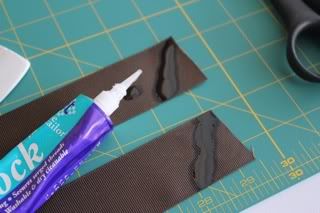
Step 4: Apply fray check product to the cut ends of the ribbon. Diagonal if you like.
IMG_3862

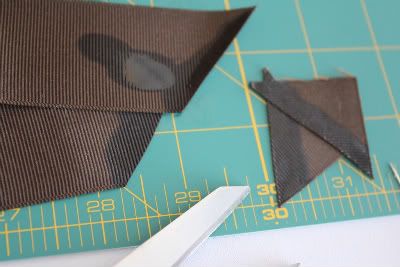
Now cut the ribbon ends through the liquid.
Photobucket

Hang to dry. Clean up your scissors. Done.


----------------------------------------------------------------------


Photobucket

Tutorial: Apron #2
"Gathered Sideways Towel and Fabric Sash"
Level: Easy
Time: 1 hour or less


This apron adds some gathering to make it cute and has a fabric sash which the towel will be sewn into.

You need one towel and 1/2 yard of fabric (pre-washed and ironed).
Other supplies: scissors, sewing machine, matching thread, pins

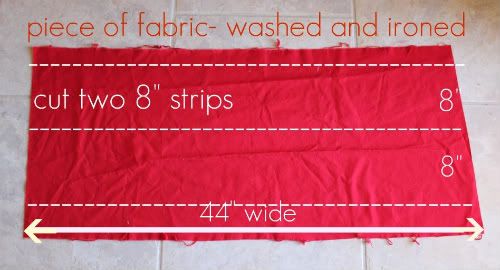
Step 1: Cut fabric for sash.
Lay out your fabric like picture below and cut two strips that are 8" wide.

Photobucket


Step 2: Take one of these strips and cut it in half. Now you have three pieces of fabric- one long and two short.
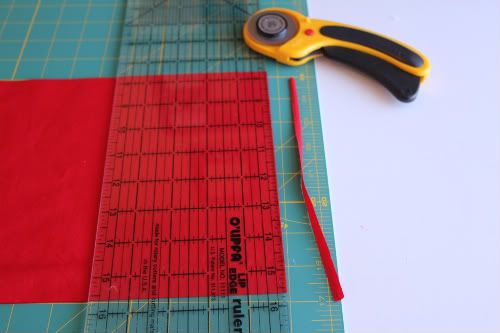
Photobucket


Step 3: Pin the fabric pieces together, right sides together, in this order: short, long, short. This ensures that the front of your apron does not have a seam. It's a preference thing, really. Sew together where your pins are. You now have this.
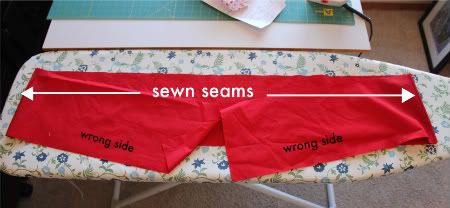
Photobucket

Step 4: Folding and ironing.
Press your seams out if you like. Now starting at one end, fold the fabric sash in half, wrong sides together. You are folding long side to long side. Press the fold well.

Next, open up your fold and press the long raw edges to that center fold you just made. Again wrong sides together. Looks like giant bias tape!
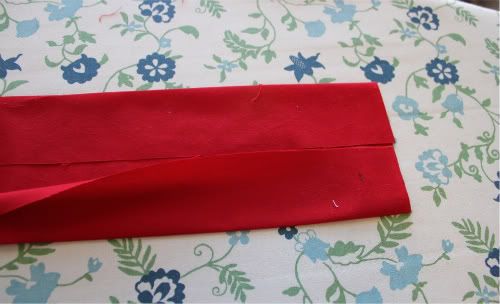
Photobucket


Now fold in half along the first fold. Press.
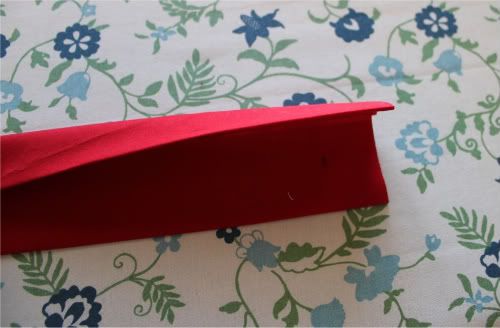
Photobucket


Do this for the entire length of the fabric. You can do each fold along the length (88 or so inches) one at a time- folding and pressing the whole length. Or, I did the whole process, one section at a time. Whatever you are most comfortable with. I thought I saved time by not shifting and moving the fabric as much.


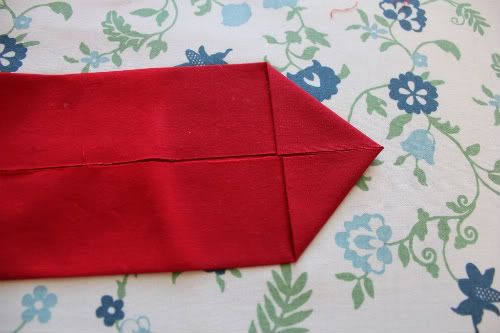
Now go back to the ends. Open up fabric, one unfold. Then fold and press the ends to look like this:
Photobucket


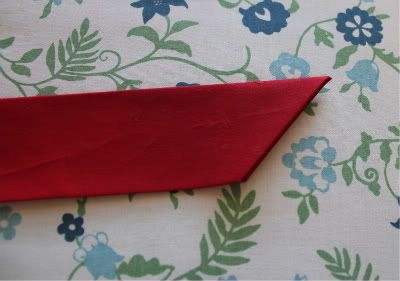
Fold back in half and press. Do for both ends. This will create a nice diagonal on the ends of your sash.
Photobucket

Now set this aside.


Step 5: Gather the towel.
Turn your towel sideways and choose the top of your apron. You are going to gather the top of the apron slightly to give it a cute-factor. If you already know how to do this, do so and move on to step 6. Otherwise, I will explain gathering.

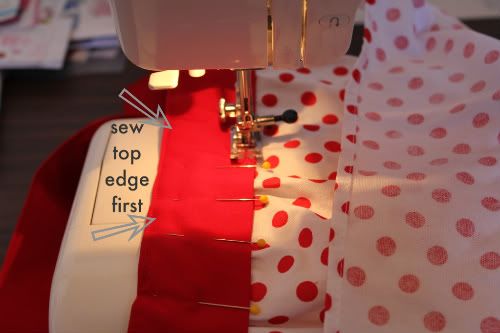
You are going to sew a long stitch across the top of your apron and pull the bobbin threads until it is gathered to your liking. Easy. Set your machine to its longest stitch length, mine is 6. Before you place your fabric on your machine, grab your threads and pull some extra thread out to the back of your sewing machine. This will give you something to hold onto in a minute. Stitch along the top edge and when you come to the end, pull your threads a few inches extra before cutting away. Now take a bobbin thread (bottom thread) on one end and hold it while sliding the fabric closer together. Gather from both sides and hold it up to you to get the right amount of scrunch. Doesn't take much on this project. Ok? Next.

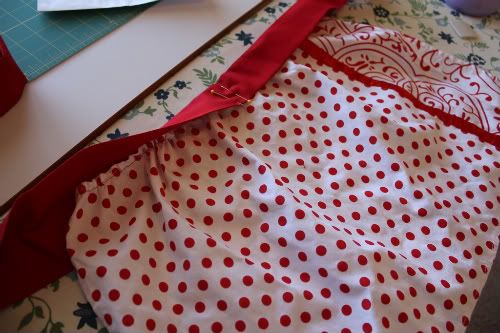
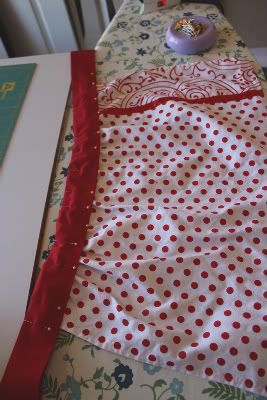
Step 6: Mark the center of your towel and the center of your fabric sash. Match up the center points and place the towel inside the folded fabric. Get the towel all the way up into that center fold. Pin in place.
Photobucket


Photobucket

Step 7: Sew.
You are going to want to start sewing on one of the diagonal ends and just continue along the top of the sash, then along the top edge of the apron (where your towel is inserted). Continue sewing out along the sash on the other side of the apron, down the diagonal end, and back across the entire sash, sewing the towel into place in the process. One continuous mile-long stitch. Backtack. Done.

Photobucket

Cuuuute, huh?! Now put it on and whip up some cookies! Ha! OK...I will come back tomorrow with #3 and #4.

Was that too difficult? If so, leave me a comment and I will walk you through your trouble.

Thursday, February 10, 2011

Choose your own apron-sewing-adventure...Valentine's Day version

Photobucket

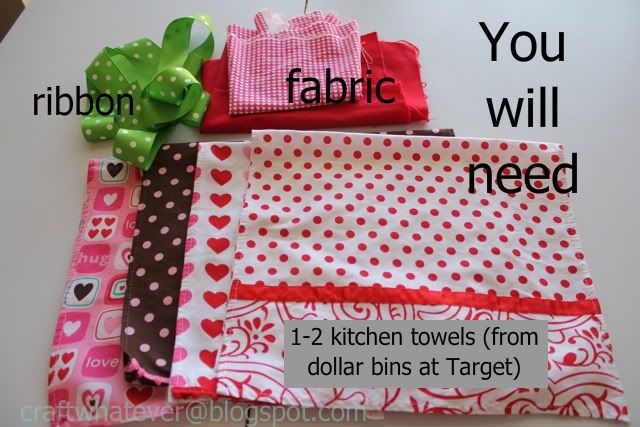
So this apron is a very easy-peasy Valentine's craft that you can give and gift! I will be posting the tutorial for these (in two parts) tomorrow and Saturday. I know, making you come back on a Saturday...sorry. Just that I don't want to overload one post with four tutorials. Today, I want to give you the chance to run to the store and gather up supplies!

I bought these kitchen towels from Target in their dollar bins. They were a set of two for $2.50. Give and gift! These are very easy and quick to make. You can make this in less than 30 min!

You will need for one apron:
- Kitchen towel
- Ribbon (7ft) or fabric for sash (1/2 yard)
- Scissors, pins, thread, fabric marker or chalk, fray check, iron

Photobucket

Prep-work:
- Pre-wash kitchen towel and fabric. Press.
- Load your sewing machine with thread.

Now go get you a set of these towels from Target, some ribbon or fabric and meet me back here tomorrow!

Tuesday, February 8, 2011

Signature Labels for Pre-Writers

Photobucket
Aren't these practical...and adorably legible!

If you don't already have a dashed or dotted line font, you can get one. They are free.

The font I used is part of the "Print Clearly" font. It can be downloaded for free at dafont.com. Another one that works is called "Trace" and can be found at fontspace.com.

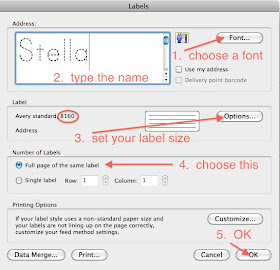
I used MS Word to create my labels. The path is Tools --> Labels. Now you are here:

1. Choose a font. 2. Type name. 3. Select label size. 4. Full sheet. 5. OK.

Since I didn't need a full sheet of "stellas" I deleted about half the page.

Now my pre-writer can "sign" her Valentine's and her friends' parents will know who the card is from!
Signature Stickers - 5

We use these for thank you and birthday cards as well. Enjoy!

Linked up at Today's Creative...#406 but you can barely see my picture. Tried to zoom but I don't know what I am doing yet : )

Monday, February 7, 2011

Owl be your Valentine!

IMG_3836
Almost Valentine's Day and I need to give this to you. Free valentines to print out and hand out. It's not perfect, but I made it. Designed it from scratch in PSE (and I am not a graphic designer by any means). But it is free.

Click on image. Then drag and drop to your desktop or "save as" to your computer. Be sure it saves as a .jpg file. Probably want to print on light card stock.


Should I change it to say "Owl be your Valentine!" ????
Seriously, tell me. I will change it.


And I linked over at Skip to My Lou...here. I am way down the list- maybe around #70.


and here